Page 1 of 4
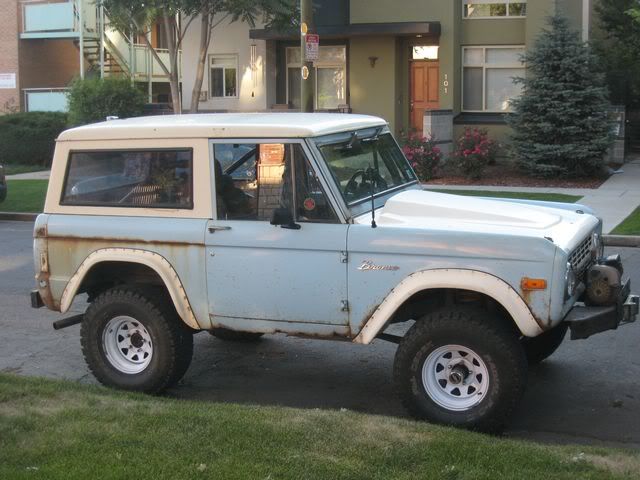
72 restore/mild build

Posted:
Wed Dec 29, 2010 9:22 pmby dsmith01
Re: 72 restore/mild build
Posted:
Wed Dec 29, 2010 9:39 pmby cobshane
Its looking nice keep up the good work. Its a lot fun building up these trucks.
Re: 72 restore/mild build
Posted:
Thu Dec 30, 2010 2:04 amby Entourage
That is impressive work. Keep the pics coming!
Re: 72 restore/mild build
Posted:
Thu Dec 30, 2010 4:05 amby David Smith
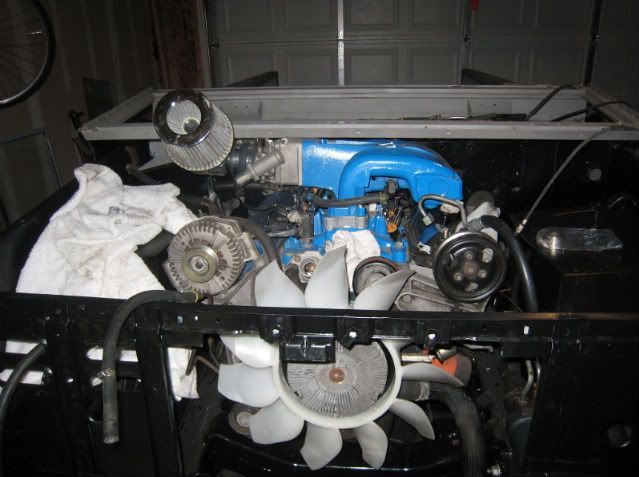
Nice build-up. 351 W fuelie sounds like alot of fun!
Re: 72 restore/mild build
Posted:
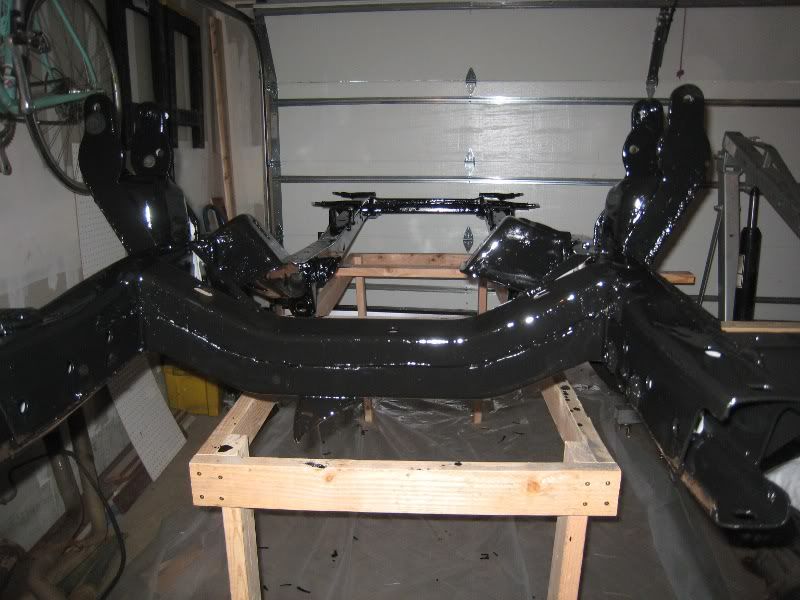
Thu Dec 30, 2010 6:06 amby airbur
Holy cow! Very nice! That frame looks beauuuutiful!

Re: 72 restore/mild build
Posted:
Thu Dec 30, 2010 9:02 pmby Kinder
Derrick, welcome to the site and glad you found us. If you ever wondered what became of the rear of your tub some of it went into my trailer, when you have time check out the thread.
Re: 72 restore/mild build
Posted:
Fri Dec 31, 2010 9:45 pmby Bitch'nBronco
Nice Bronco, jealous of your EFI
Re: 72 restore/mild build
Posted:
Sun Jan 02, 2011 4:48 pmby dsmith01
kinder wrote:Derrick, welcome to the site and glad you found us. If you ever wondered what became of the rear of your tub some of it went into my trailer, when you have time check out the thread.
Will do. I'm glad it found a good home!
Re: 72 restore/mild build
Posted:
Sat Jan 08, 2011 7:20 pmby Zenzone
Thats some major surgery, looks like your doing well with it. Look forward to following your progress.
Re: 72 restore/mild build
Posted:
Tue Jan 11, 2011 7:46 amby Jesus_man
Been following your build on CO4x4 and am still amazed at how well it's turning out. You certainly have a knack for it!
J.D.
Re: 72 restore/mild build
Posted:
Sun Jan 16, 2011 11:23 amby dsmith01
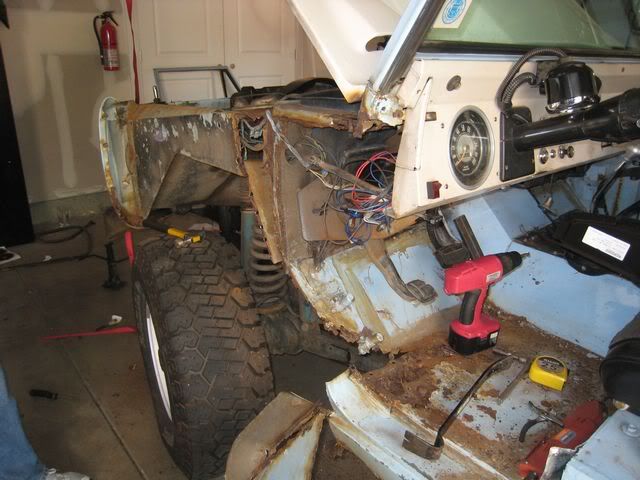
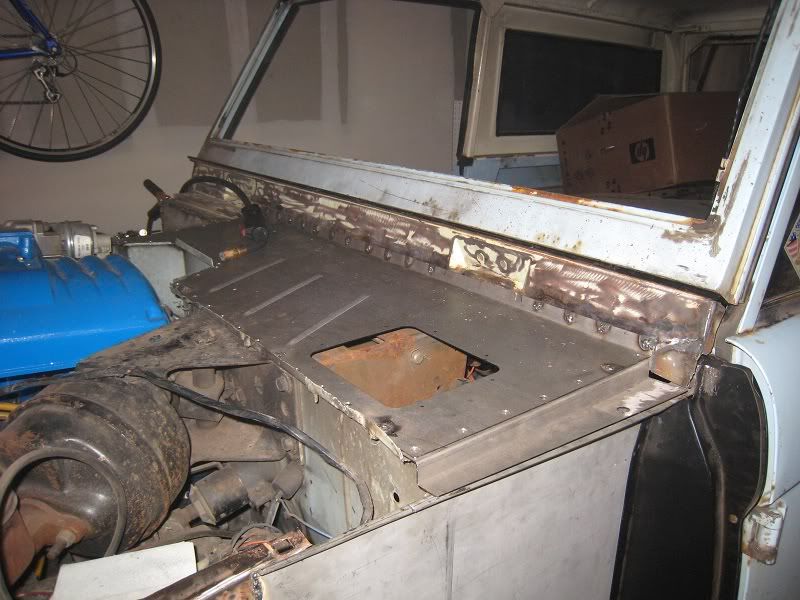
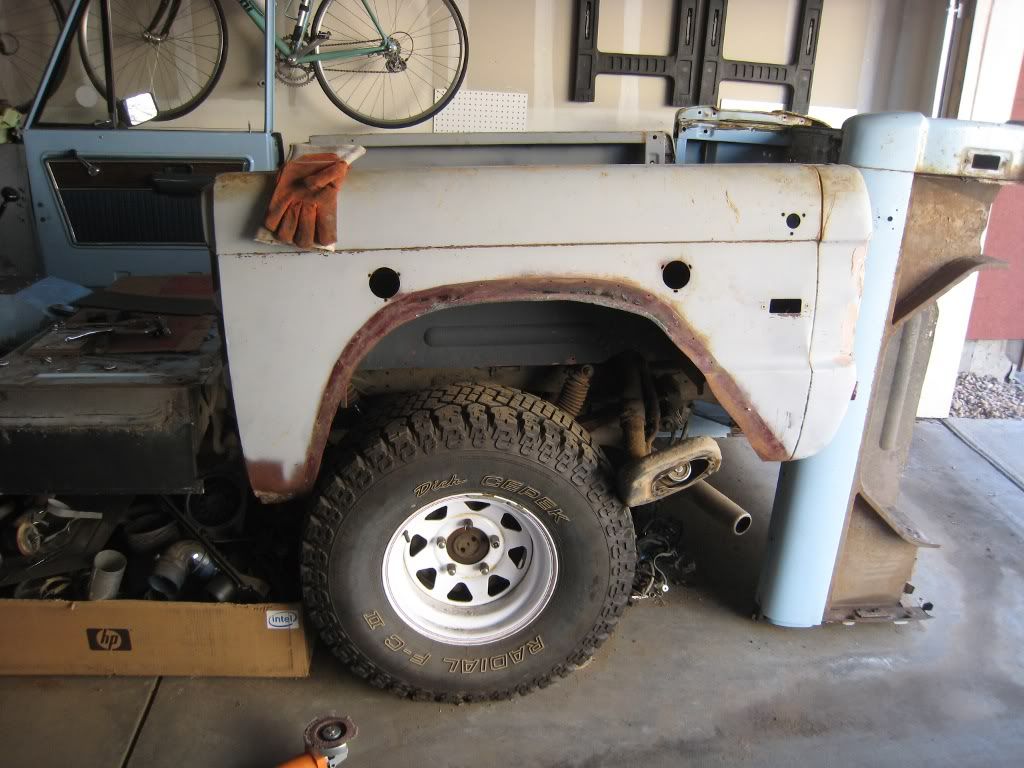
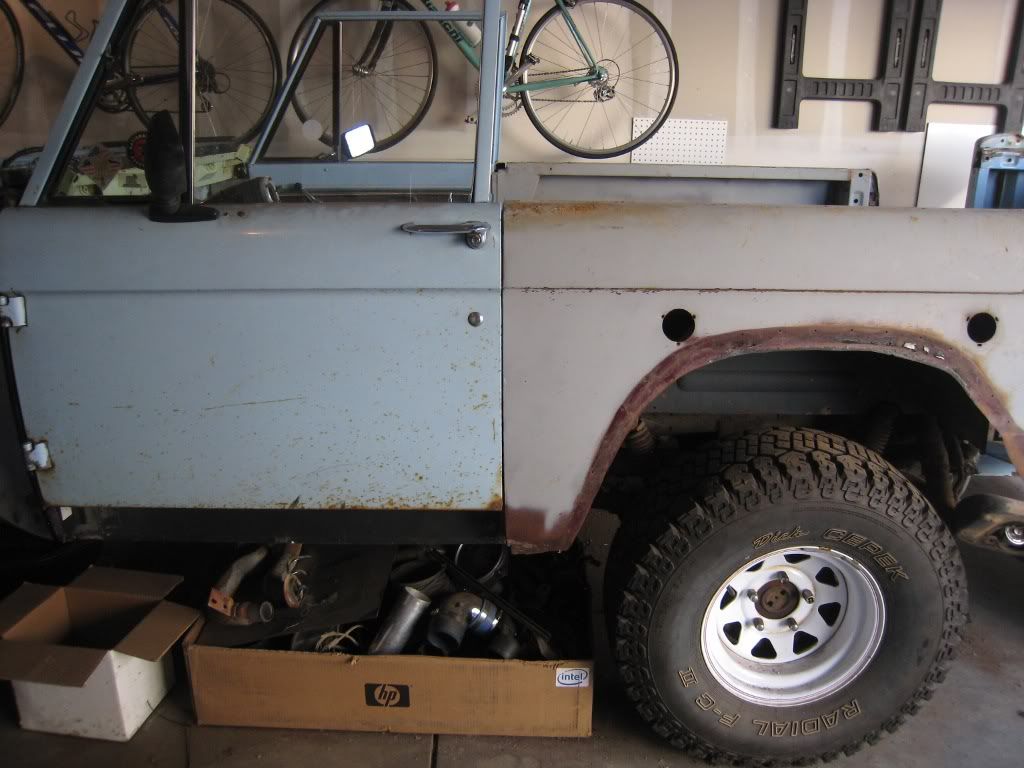
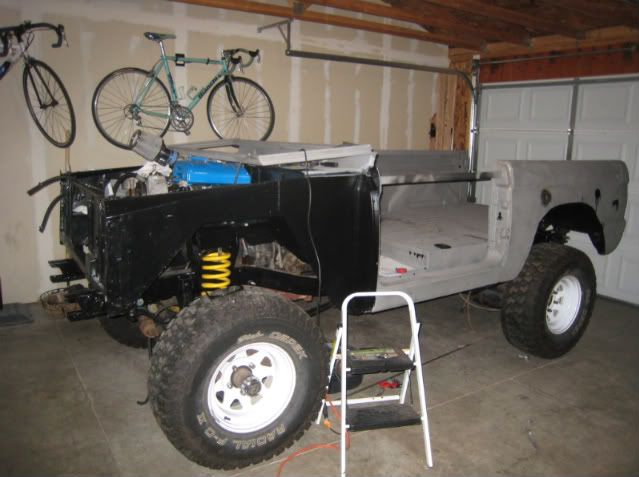
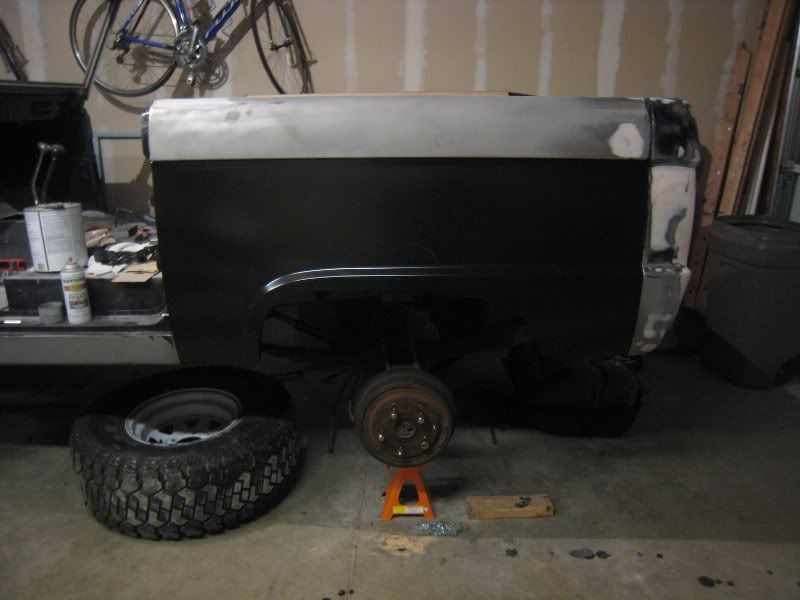
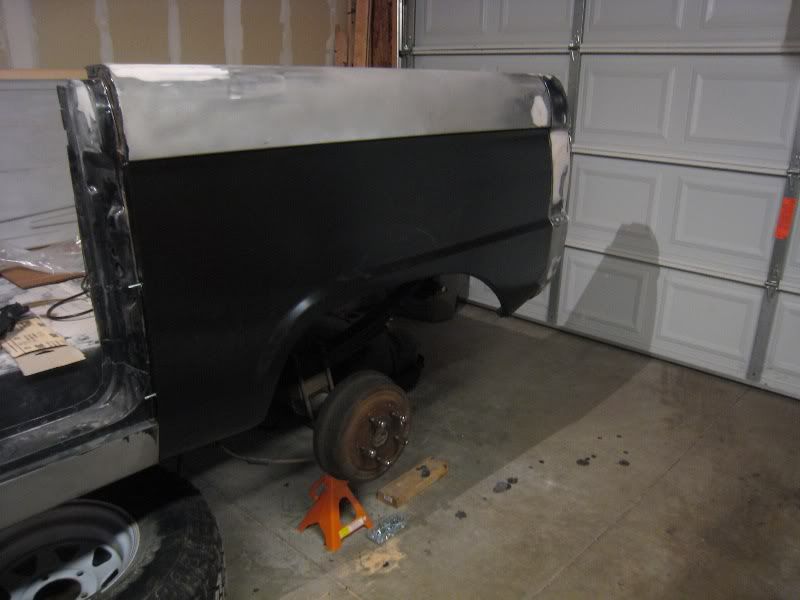
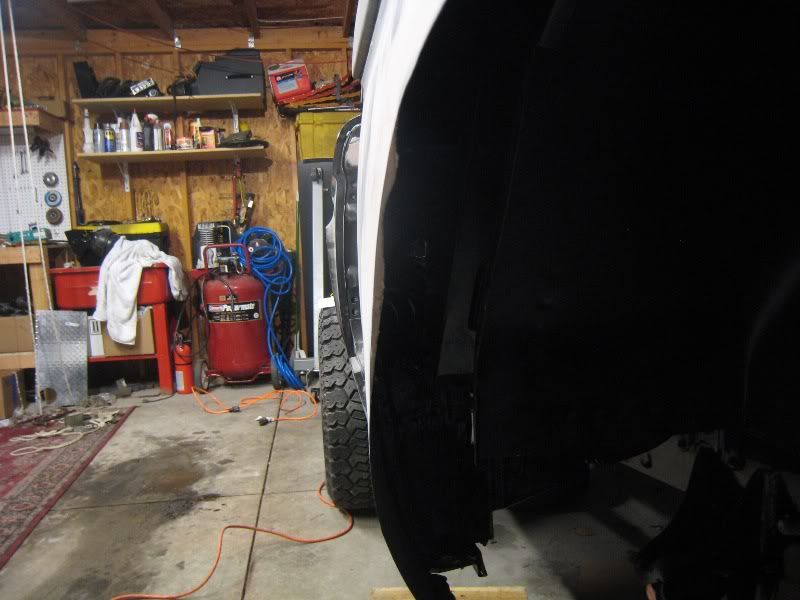
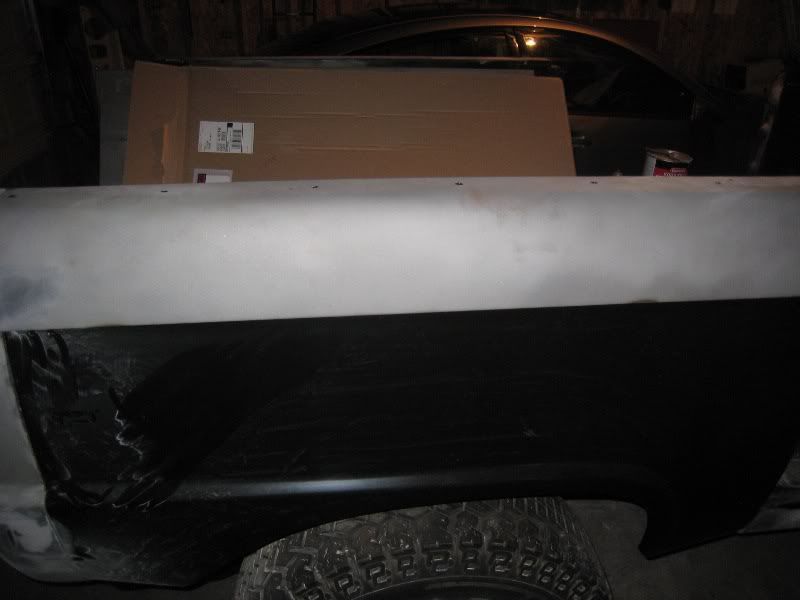
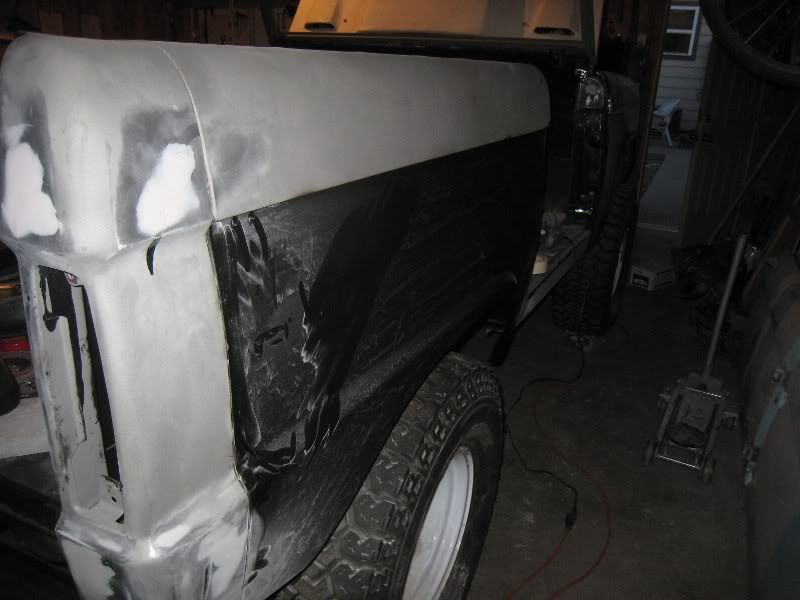
My attempt to bondo the quarters didn't turn out so well. They were just too wavy and the bondo was a 1/4" or more in some areas. After some thought I decided to give in and buy some JBG OEM lower quarters. Yesterday I ripped out the drivers side and UPS says the new ones will be here on Wednesday.
You can see how wavy the sheet metal was in this pic and how much bondo was on there.
I Started out by cutting the quarter out with a body saw.
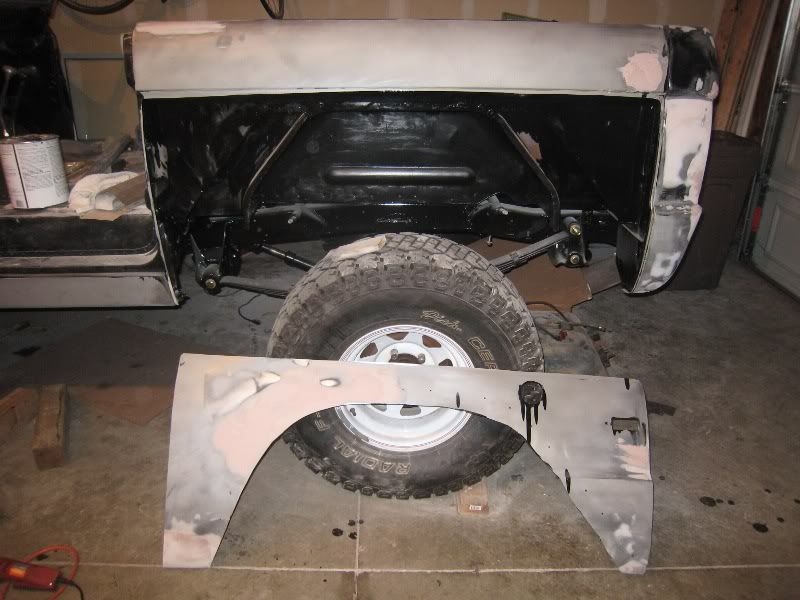
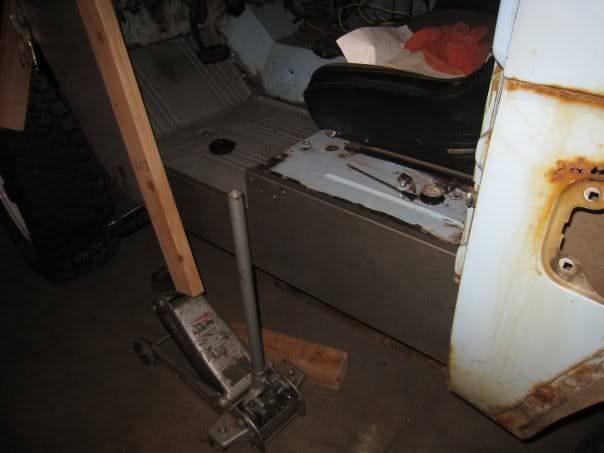
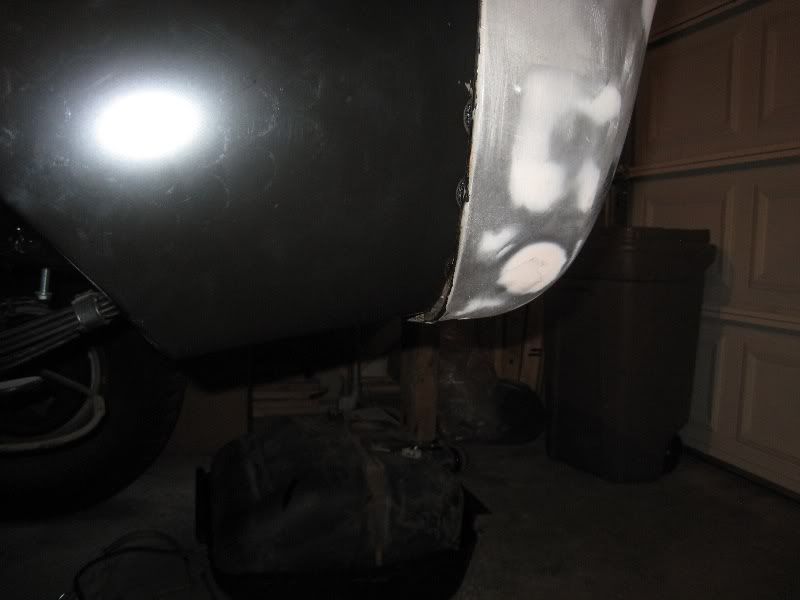
Then drilled out each spot weld along the two sides and top.
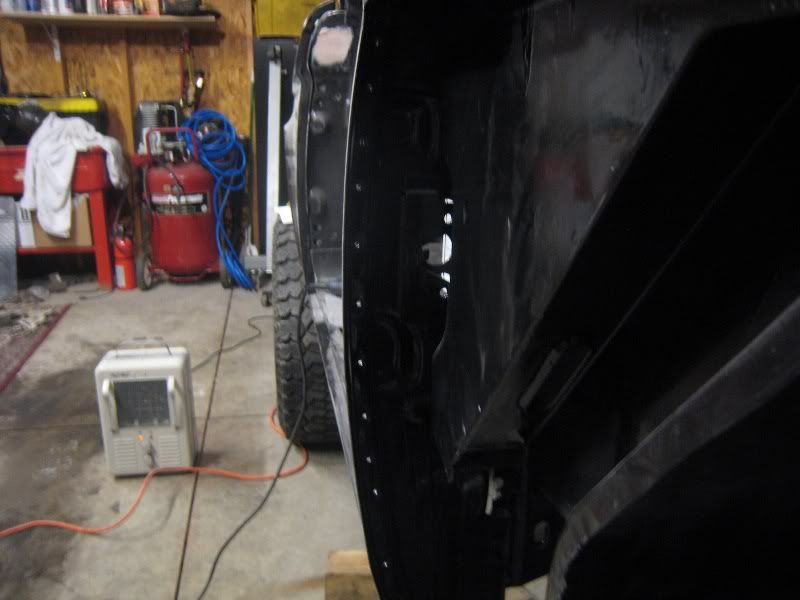
The most difficult task was the spot welds attaching the quarter to the taillight section. I was able to get to the top 4 welds with a drill bit on the inside of the tailight but the lower 3 welds took some work to get out. Lots of pulling with some pliers and use of the body saw. I may have to forego these welds when I attach the new quarter.
Re: 72 restore/mild build
Posted:
Mon Jan 17, 2011 10:34 amby Entourage
You do amazing work. Looks like we are at about the same point. I cut around my rear quarter panels this weekend. I need to get a Spot Weld bit today then plant to remove the remaining panel pieces this week. I am really looking forward to getting this part done so I can move on to the next step in Body Work.
I got the best advice at the Breakfast - use a Flap Wheel instead of Grinding Wheel - WAY better. You likely already knew that, but dang good advice - thanks Keith.
Keep the pictures coming.
Re: 72 restore/mild build
Posted:
Tue Jan 18, 2011 11:40 pmby dsmith01
Entourage wrote:use a Flap Wheel instead of Grinding Wheel - WAY better.
Best advise I've ever heard! So much better than a grinding wheel. Should get the quarters tomorrow so I hope to have them on by Saturday.
Re: 72 restore/mild build
Posted:
Wed Jan 19, 2011 9:00 amby Jesus_man
I want to say I came across another wheel that works just as good as a flap disc, but cheaper. It was like sand paper and used the centrifugal force to stay in shape. I'll have to see what I can find.
J.D.
Re: 72 restore/mild build
Posted:
Wed Jan 19, 2011 9:34 amby Entourage
Dsmith - are you going to remove all of the paint (down to the metal) before body work or are you covering it with Primer? I have mine sanded down, but not down to metal on the whole truck. It seems like a lot of extra work to take off the rest of the paint only to primer it anyway.
Re: 72 restore/mild build
Posted:
Wed Jan 19, 2011 10:17 amby PonyCorral
Any suggestions for that DS door post? I tried to get it back to the position of the original door post but I think it is cockeyed! let me know what you think. I will take a picture and show everyone what it looks like.
Thanks
Re: 72 restore/mild build
Posted:
Wed Jan 19, 2011 11:37 amby dsmith01
Entourage wrote:Dsmith - are you going to remove all of the paint (down to the metal) before body work or are you covering it with Primer? I have mine sanded down, but not down to metal on the whole truck. It seems like a lot of extra work to take off the rest of the paint only to primer it anyway.
The body was completely media blasted before I removed the quarters. The underside and interior of the body and the frame were all coated with POR15. I plan on sanding down the primer that comes on the repo quarters and then epoxy primering over it. At least that seems like the best plan so far.
PonyCorral wrote:Any suggestions for that DS door post? I tried to get it back to the position of the original door post but I think it is cockeyed! let me know what you think. I will take a picture and show everyone what it looks like.
Thanks
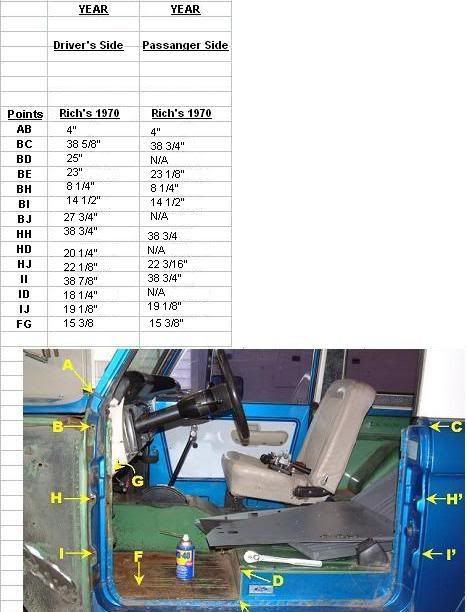
Are you having a problem with vertical or horizontal alignment? I tacked and retacked the door post about 50 times before getting mine right. After I tacked it in place it hung the door to see if everything lined up. Have you seen
this post on CB? I based most of my alignment off of it. I asked the owner of the pic if I can post it up here. If he agrees I'll add it to this post.
[EDIT]
Blue71 over at CB put this together
Re: 72 restore/mild build
Posted:
Wed Jan 19, 2011 2:38 pmby PonyCorral
Thanks for the info...I am heading out to give this a try.
Re: 72 restore/mild build
Posted:
Fri Jan 21, 2011 11:14 amby dsmith01
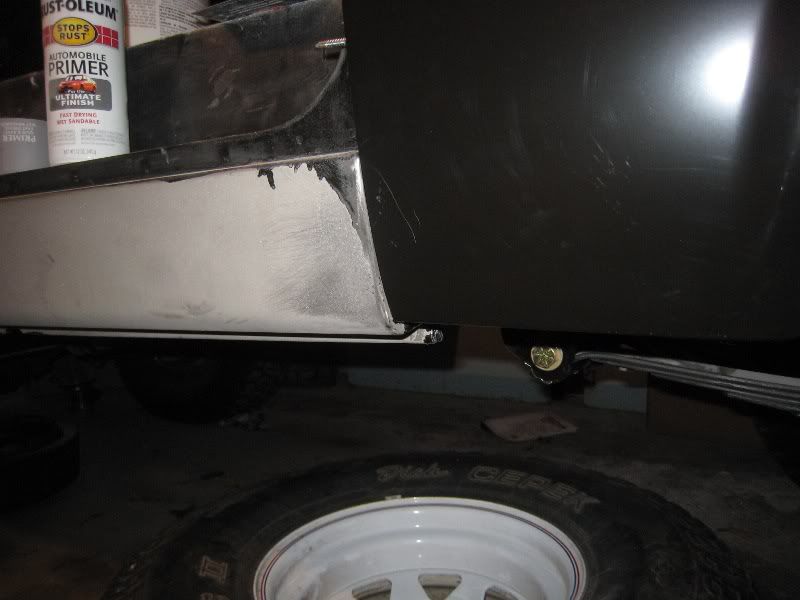
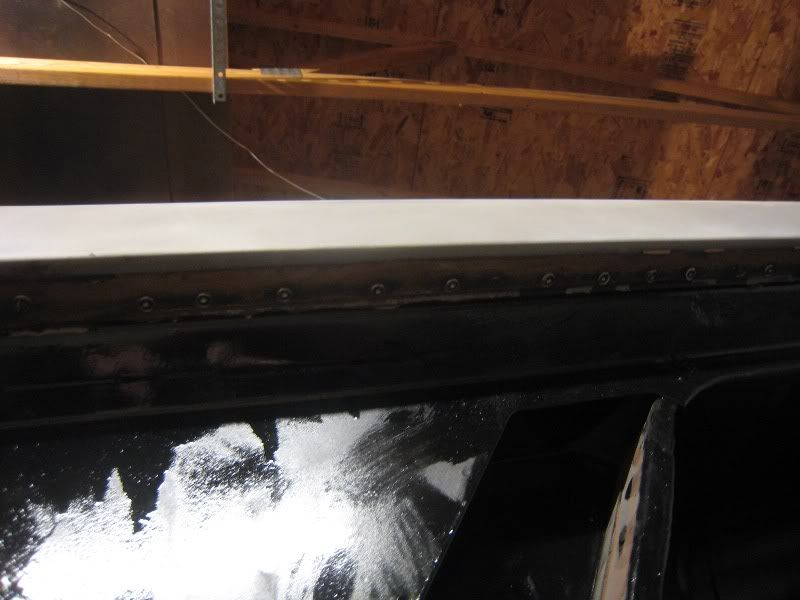
Got the quarters in the mail on Wednesday and test fitted them. They fit pretty good. My rocker alignment may be off a little but I had to press the lower part of it in to get it to fit between the rocker and door post. Anyone else have this issue or is it just me?
How has everyone else attached the quarters before welding? I usually use sheet metal screws to butt the 2 peices together first but I'm concerned I won't be able to get the drill on the inside of the wheel well to screw the sheet metal screws upwards.
I'm going to head out there today when I get home from work and give it a shot. I'll post some pics later too.
Re: 72 restore/mild build
Posted:
Fri Jan 21, 2011 3:48 pmby Jesus_man
I thought I remember seeing some type of temporary rivets that you can use. I have no idea how expensive they are, but the little experience I have with them, they seem to work well.
I think these are it:
http://www.datinfab.com/clekostemporarypoprivets.aspxonly because I now remember my buddy calling them Clekos
J.D.
Re: 72 restore/mild build
Posted:
Sat Jan 22, 2011 5:51 pmby dsmith01
Re: 72 restore/mild build
Posted:
Sat Jan 22, 2011 6:50 pmby JGZ
Can I ask who manufactured your 1/4 panels?
Re: 72 restore/mild build
Posted:
Sun Jan 23, 2011 1:41 amby Entourage
That is strange that they aren't fitting like a glove. I just finished getting mine placed (not welded yet) and they fit great. I have the Dynacorn rear quarters from Bronco Hut - I am interested in which brand those are as well.
Re: 72 restore/mild build
Posted:
Sun Jan 23, 2011 8:51 amby dsmith01
They are the dynacorn "OEM" models that JBG sells. They fit great otherwise, its just the height.
Re: 72 restore/mild build
Posted:
Tue Feb 22, 2011 12:06 pmby dsmith01
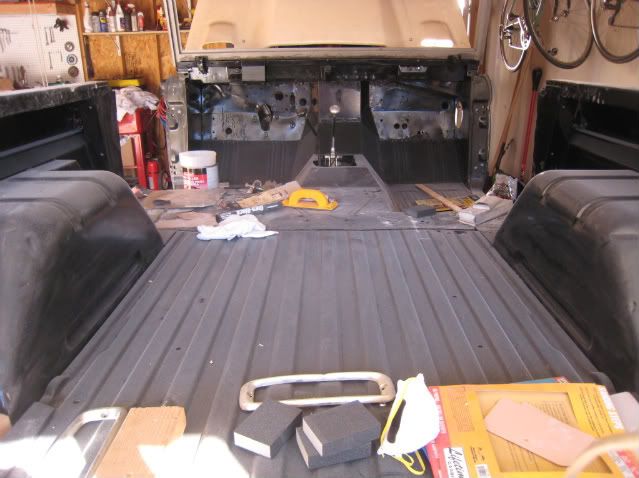
Finished up

the quarters up yesterday. The passenger side fits much better. I also traced out the side marker lights and fender flares. Anyone see a reason why I should wait until the body is painted before cutting these out?
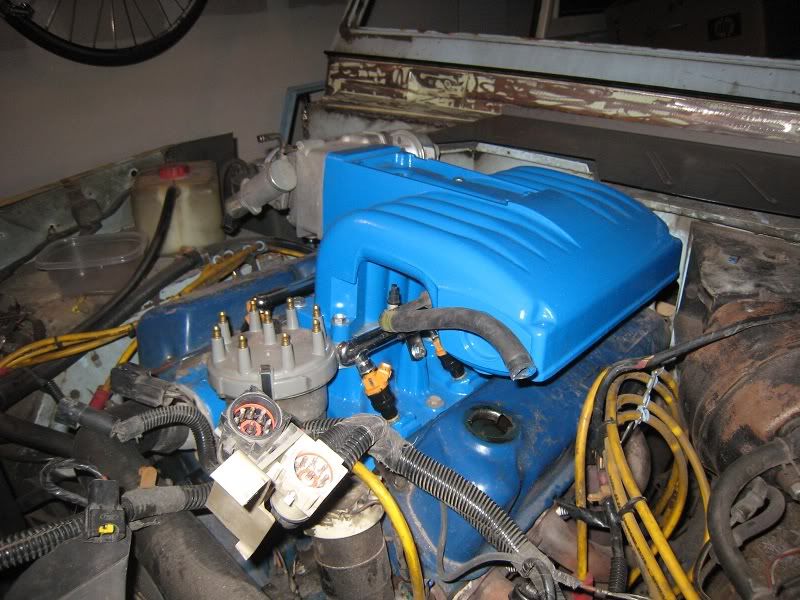
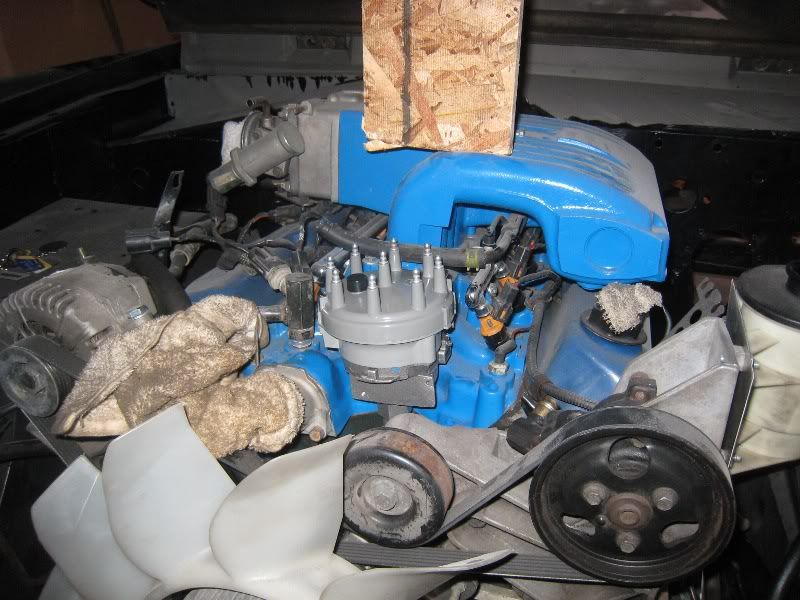
Also got the new distributor installed yesterday. Just need to install the TFI.
Re: 72 restore/mild build
Posted:
Tue Feb 22, 2011 12:10 pmby Jesus_man
Are you doing remote TFI? If not, I would recommend it. You want to mount that thing in the coolest location you can as they will die exposed to heat.
I'm no body guy, but I'd think you want to do all your cutting and drilling even before primer.
J.D.
Re: 72 restore/mild build
Posted:
Tue Feb 22, 2011 12:16 pmby Entourage
Looks amazing! I would cut them before - would be painful to cut your new paint later. I didn't cut mine because I am not doing marker lights or side emblems. I am going to do a single fuel aviation style filler like the one on the Raffle Build but do not know exactly where it will go, so I will likely be cutting my new paint just like I told you not to do

Re: 72 restore/mild build
Posted:
Tue Feb 22, 2011 12:23 pmby crawlercreations
Looks like a great build! Well done! You probably already know but you are going to need a set of EFI valve covers with the EFI. EFI runs a completely sealed system meaning the computer needs to know exactly how much air is entering the engine. On the EFI valve covers the passenger side has a tall fill area that has a nipple off of it for fresh air intake. A hose runs from the valve cover to the top of the throttle body. PCV valve is in the rear of the lower intake and gets connected to the upper intake through another hose.
Keep up the good work!! It is looking great!
Re: 72 restore/mild build
Posted:
Tue Feb 22, 2011 12:26 pmby dsmith01
Makes sense to cut before. Just thought I'd ask - kindof an irreversable mistake.
Not sure what to do about the TFI...I really didn't want to do any more wiring than necessary but I also don't want to keep replacing bad TFIs

. Thanks for the info.
Good to know about the valve covers. I didn't know that. Looks like I've just added some more parts to the list.
Re: 72 restore/mild build
Posted:
Tue Feb 22, 2011 1:52 pmby Jesus_man
I have a remote TFI and even it go hot enough to leave me stranded once. Now I carry a spare. I went a pick-n-pull and grabbed all the ones I could. Seems like there were many Ford, Merc vehicles they could come off of. A little research and you'll find out what years to target and then once you see what they look like, you can crawl around other vehicles to find more. IIRC the cars had them mounted under the windshield and under the vent there on the passenger side. Trucks had them mounted on the drivers side fender. I had a local Autozone test mine.
Here's what they look like:

Reading:
http://www.therangerstation.com/tech_li ... te_tfi.htmJ.D.