airbur wrote:Yep, that's what odd. It was a one piece rear main in the kit....but just too small. The kit was Ford Racing and included provisions for both a one piece and two piece seal.
Booger wrote:I can't wait to hear this thing rumble.
I'd like to put a roller cam in mine sometime in the future. Right now it needs a good set of heads. I don't think their is 20k miles on my 351 since I built it in 95.
Were they new heads 20K miles ago? Are they OEM? I looked at retrofitting the older non-roller blocks before I found this '94...the one thing that sux is the cost of the lifters with connecting arms....it's outrageous!
The new ARP main studs arrived yesterday so I may actually be able to get started this weekend. I'll try and take lots of pics along the way.
The heads are just the original 1974 351W heads, new valves and guides but no other work done. Even uses the large spark plug instead of the newer smaller ones. I think it's gonna need valve seals so I may just pop for a good set of heads to let it breathe a bit better.
Bob - Turning hydrocarbons into noise since 1970
Spiritual owner of the now Zoso mobile (1974 Bronco Ranger - EFI 351W-4R70W-ARB front and rear-STC softtop- High Country hood-3 1/2" WH lift- Cross inboard rear shock mnt- Duffs bumpers- Warn 8274- 33's- Cheby disc conversion)
Booger wrote:I can't wait to hear this thing rumble.
I'd like to put a roller cam in mine sometime in the future. Right now it needs a good set of heads. I don't think their is 20k miles on my 351 since I built it in 95.
Were they new heads 20K miles ago? Are they OEM? I looked at retrofitting the older non-roller blocks before I found this '94...the one thing that sux is the cost of the lifters with connecting arms....it's outrageous!
The new ARP main studs arrived yesterday so I may actually be able to get started this weekend. I'll try and take lots of pics along the way.
The heads are just the original 1974 351W heads, new valves and guides but no other work done. Even uses the large spark plug instead of the newer smaller ones. I think it's gonna need valve seals so I may just pop for a good set of heads to let it breathe a bit better.
And efi.......
Rob
74 Ranger EFI351w, 4r70w, ARB 5.13 9in, ARB 5.13D44, and a bunch of other goodies. Best of all the family memories.
04 Mustang Cobra, KenneBell 2.2 feeding a lot of boost on E85. Tire shredding machine
New project: 77 Bronco Ranger, body work and more body work.
Very little left of a 72 durango tan explorer sport
airbur wrote:Yep, that's what odd. It was a one piece rear main in the kit....but just too small. The kit was Ford Racing and included provisions for both a one piece and two piece seal.
5.0 seal is the small one.
Maybe they fouled up the kit then and sent me the wrong one:( Oh well, new set on it's way:)
Didn't get much accomplished today but I did get the ring-grinder delivered. Also found out that the custom cam I have has completely changed the 351W's firing order (thanks to Viper for the reminder:)) I watched the section of the engine building video on piston installation and realized that since the new rods have ARP bolts, I need to pickup some ARP Ultra-Torque lube as none came in the kit. Called all around and no one had it but O'Riley was able to order it in for pickup tomorrow.
Correction: Firing order is the same......I'm learning....slowly I tell you;)
Anyone ever show you the trick on where to place the oil control rings? An old timer building race cars showed me where you position the gaps on the oil rings away from the splash/sling. I had never thought about it but once you see it it'll make complete sense.
Rob
74 Ranger EFI351w, 4r70w, ARB 5.13 9in, ARB 5.13D44, and a bunch of other goodies. Best of all the family memories.
04 Mustang Cobra, KenneBell 2.2 feeding a lot of boost on E85. Tire shredding machine
New project: 77 Bronco Ranger, body work and more body work.
Very little left of a 72 durango tan explorer sport
ZOSO wrote:Anyone ever show you the trick on where to place the oil control rings? An old timer building race cars showed me where you position the gaps on the oil rings away from the splash/sling. I had never thought about it but once you see it it'll make complete sense.
Hmmm.....what do you mean by the splash/sling? I'm placing all ring gaps at different angles around the pistons so none overlap.
that is correct on the ring gaps. Start with the oil control rings.
When the crank rotates it has oil on it. It picks up oil from the pan. It is called windage. When its rotating it slings this oil all over the place. when placing the rings position them so the passenger side ring gaps are on the top side on the pistons(towards the lifter valley). The drivers side needs to be opposite. so oil rings have the gap on the bottom side. Just look at the rotation of the engine when running. picture where the oil is going. you want it away from the gap.
Rob
74 Ranger EFI351w, 4r70w, ARB 5.13 9in, ARB 5.13D44, and a bunch of other goodies. Best of all the family memories.
04 Mustang Cobra, KenneBell 2.2 feeding a lot of boost on E85. Tire shredding machine
New project: 77 Bronco Ranger, body work and more body work.
Very little left of a 72 durango tan explorer sport
Ah, I got it. Now I see the benefit of a windage tray also. Thanks.
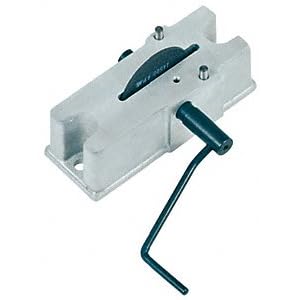
Got 4 of the pistons assembled with rings. So far every single ring has needed the gap widened. That ring grinder works fast! One ring had zero gap and it only took a few turns of the wheel to get to .020. I plan on finishing the other 4 tomorrow and then installing them.
For anyone interested in what type of data a Cam Data Card contains...When I talked to Cam Research, I told them I wanted lots of low end torque with power right away.
You do not have the required permissions to view the files attached to this post.
Get a coffee can and poor some fresh oil in it. Drop the whole piston In it before you put it in the cylinder. Remember no such thing as too much oil/lube during assembly. Get a oil pump primer. Prime it when you are ready to fire it up.
Rob
74 Ranger EFI351w, 4r70w, ARB 5.13 9in, ARB 5.13D44, and a bunch of other goodies. Best of all the family memories.
04 Mustang Cobra, KenneBell 2.2 feeding a lot of boost on E85. Tire shredding machine
New project: 77 Bronco Ranger, body work and more body work.
Very little left of a 72 durango tan explorer sport
I finished sizing each of the rings and installed them on the pistons. Then I pulled the caps off each, installed the bearings, cleaned and lubed them up and inserted all the pistons into the block. Each one got a little easier but it was messy with the oil and lube. I decided to use a small oil can pump to coat each piston.
Now for the bad news.....after I got the whole thing together I gave it a few turns and found that at certain points, a cap nut will come in contact with the camshaft...ish! I talked to the machine shop and also Cam Research and found that this is fairly common with the big strokers. The two options are to go to a smaller base-circle cam (which compromises it's strength) or try and shave a bit off the cap nuts to see if I can gain clearance. I'm hoping the latter works.
It's pretty slick to see all those pistons moving up and down.
photo 1.JPG
photo 2.JPG
photo 3.JPG
photo 4.JPG
photo 5.JPG
You do not have the required permissions to view the files attached to this post.
Last edited by airbur on Wed Oct 19, 2011 3:25 pm, edited 1 time in total.
Talked with CHP today. Turns out that this kit requires the use of a small circle base cam. Since I already had a custom cam made, they are going to swap out my connecting rods for H beam rods that have better clearance. Main catch is that I'll have to have everything rebalanced. Not a huge deal but will require complete disassembly.
airbur wrote:Talked with CHP today. Turns out that this kit requires the use of a small circle base cam. Since I already had a custom cam made, they are going to swap out my connecting rods for H beam rods that have better clearance. Main catch is that I'll have to have everything rebalanced. Not a huge deal but will require complete disassembly.
Yea....the whole process has been. Unfortunately, I asked CHP about this issue also before I bought and they said it wasn't a problem. They seem to be cool about it so far though offering to exchange out the rods.
Talked with CHP and my machine shop again today. We've decided to try and shave down the sides of the connecting rods a bit. From what CHP tells me...this is a very common practice with this kit and also the Cheby 383.
I disassembled the block today and pulled out all the pistons...a depressing project. Cleaned up all the grease and removed the bearings. Boxed them up and will take them up to SpitFire tomorrow and they'll grind them while I wait (hint....use a machine shop near your house...driving to north Denver from Castle Pines sux). If all goes right, once I re-install them they'll clear the cam.
For "fun" I attempted to mock-up the timing chain install. Turns out the cam gear hits the cam thrust plate mounting bolts. A call to CamResearch and Scott let me know that there should have been new bolts in the kit and also that I have to counter sink them into the thrust plate. So I need to go pickup a couple bolts and get that project going.
You do not have the required permissions to view the files attached to this post.
Hit up the Ace Hardware stainless isle yet again. Took me a few minutes but I was able to find exactly the right bolt. Counter sunk the holes and they fit perfectly. Tested the cam gear and it slid right on...no interference.
You do not have the required permissions to view the files attached to this post.