www.ColoradoClassicBroncos.com
A place for Coloradans to unite with our love of 66-77 Ford Broncos
Landsharks 76er Refresh and Build
Re: Landsharks 76er Refresh and Build
![]() by landshark » Mon Nov 21, 2011 9:06 pm
by landshark » Mon Nov 21, 2011 9:06 pm
-
landshark - Official CCB Member

- Posts: 3942
- Joined: Thu Oct 13, 2011 11:16 pm
- Location: Denver, Wash Park Area
Re: Landsharks 76er Refresh and Build
![]() by landshark » Wed Nov 30, 2011 9:54 am
by landshark » Wed Nov 30, 2011 9:54 am
neither are very good pics.. i have been through allot of CB.com
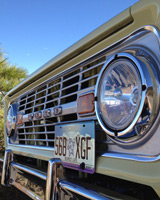
If anyone sees any please post up.. iam collecting photos to get a good idea of the color.
In other news I submitted my first order for parts, got in on the new rear spring sale on toms figured saving close to $80 was a good enough reason to order now rather than wait on that.
My plans are 2.5 in suspension lift and 1 in body lift, all new bearings, bushing and steering components, rebuild both axles, check ring and pinon for wear and any damage, reseal with new bearings, races seals in both axles, all new ujoints including rebuilding both driveshafts and axle shafts etc etc...
I'm a little blown away about the ridiculous price the inverted Y steering is.. considering other options right now as I built a bulletproof 1 ton front end with dom on my fullsize for less than they are asking for 76 steering... I will have to see how bad the front end TRE's are once i get it on jack stands...
How much of a difference does a t style steering setup really make on the street? I expect to keep this truck 90% steet 10% dirt roads...
-
landshark - Official CCB Member
- Posts: 3942
- Joined: Thu Oct 13, 2011 11:16 pm
- Location: Denver, Wash Park Area
Re: Landsharks 76er Refresh and Build
![]() by Jesus_man » Wed Nov 30, 2011 10:16 am
by Jesus_man » Wed Nov 30, 2011 10:16 am

Thought it would be easier to find more and I'm not sure it's the right color...
http://www.ucora.org
-

Jesus_man - Official CCB Member
- Posts: 5987
- Joined: Thu Nov 11, 2010 9:36 am
- Location: California
Re: Landsharks 76er Refresh and Build
![]() by landshark » Wed Nov 30, 2011 6:53 pm
by landshark » Wed Nov 30, 2011 6:53 pm
-
landshark - Official CCB Member
- Posts: 3942
- Joined: Thu Oct 13, 2011 11:16 pm
- Location: Denver, Wash Park Area
Re: Landsharks 76er Refresh and Build
![]() by landshark » Mon Dec 05, 2011 8:29 am
by landshark » Mon Dec 05, 2011 8:29 am
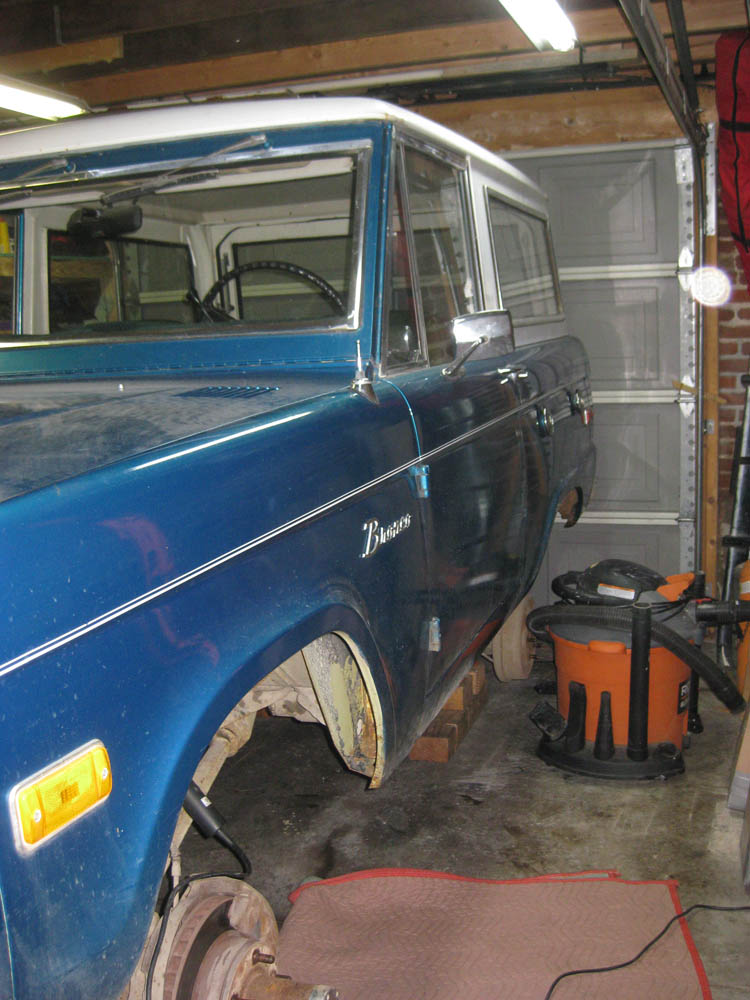
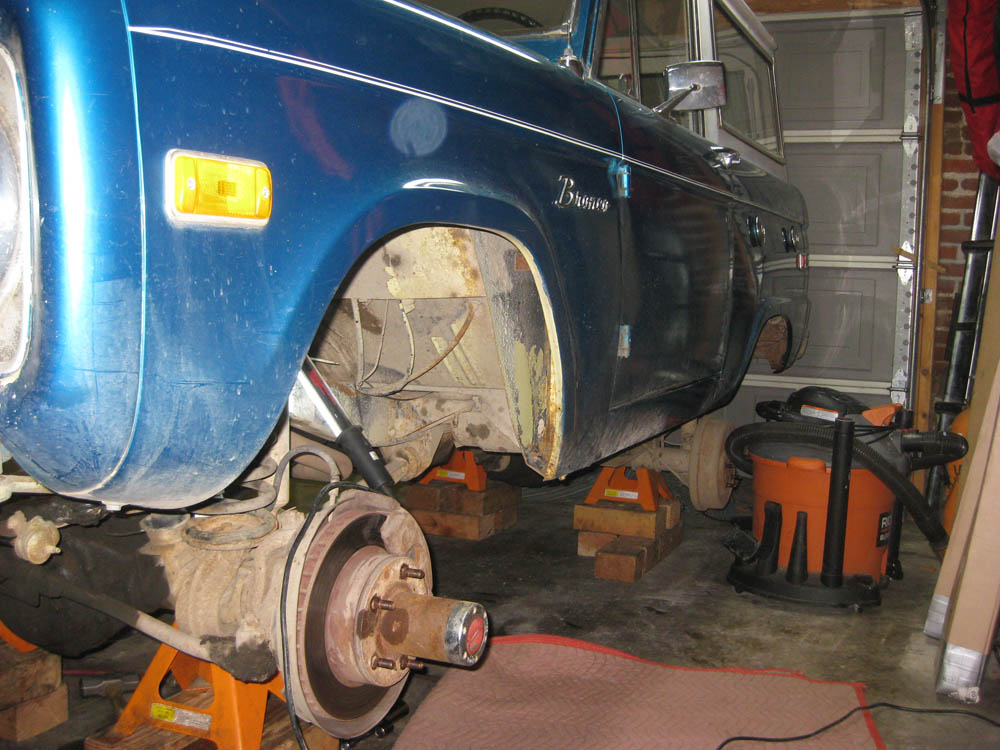
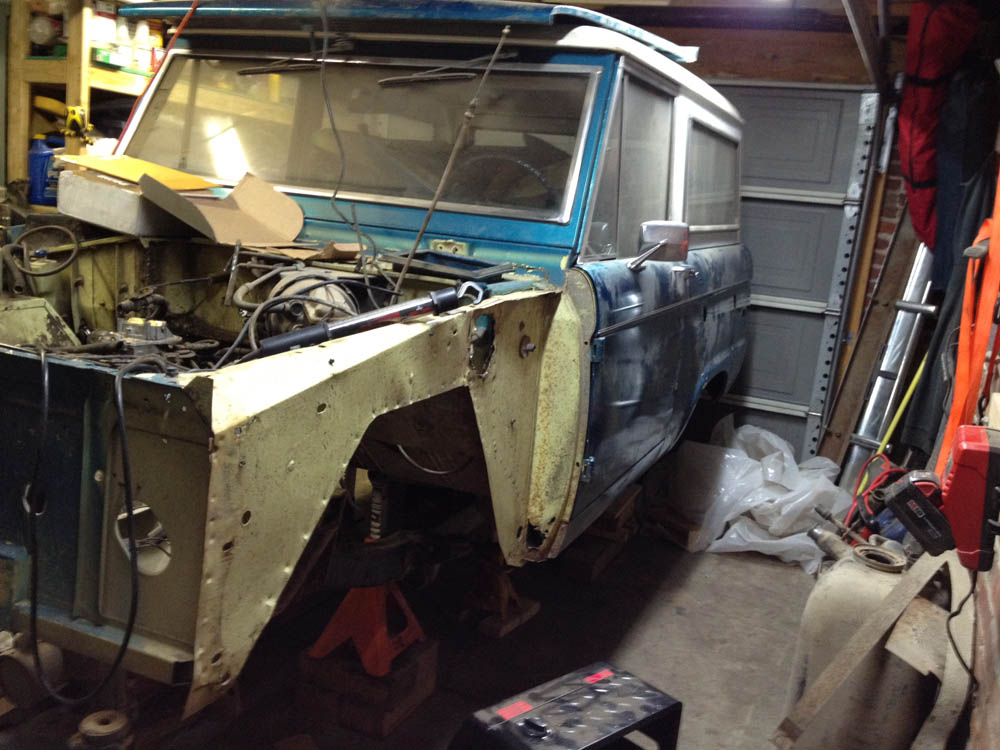
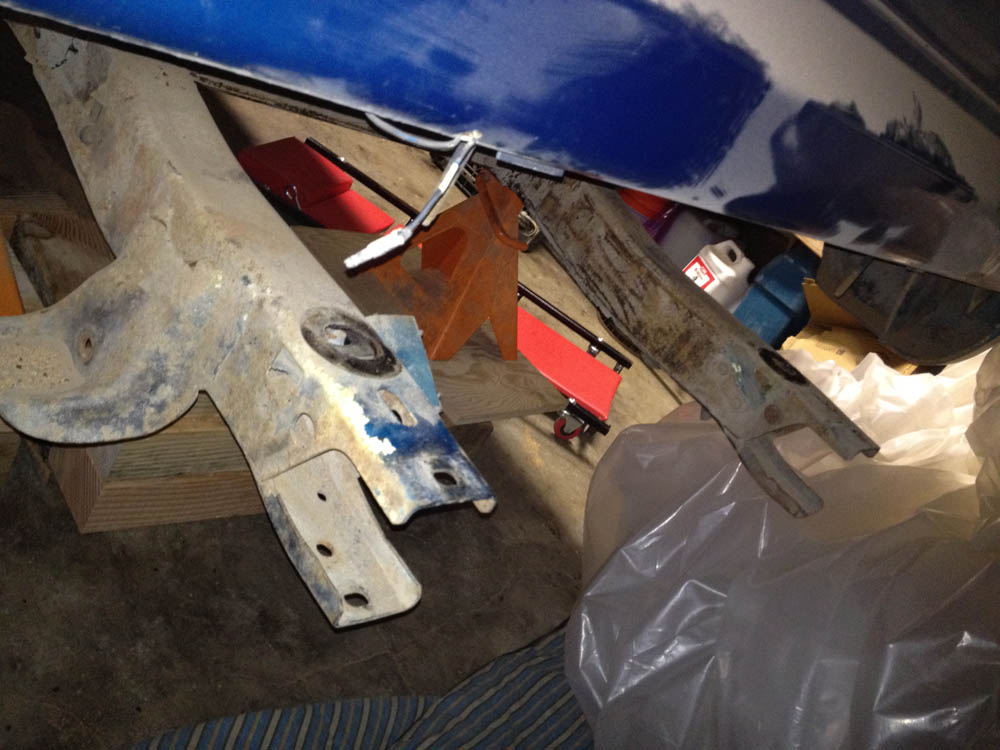
Got the bronco in the garage yesterday and started tearing into it. Going to take it slow, iam putting everything I take off into freezer bags and labeling them to keep track of bolts and parts etc.. been through this before and really want to avoid the traditional "where's this go?".
A few questions.
I have already received my rear 11 pack 2.5 inch leaf springs and was wondering if I should go with the 3.5" coils up front to make sure Iam level? anyone have any experience in this? I want to avoid the traditional rake these broncos love.. dont plan to run a winch or anything for the foreseeable future... but i know the springs will settle.
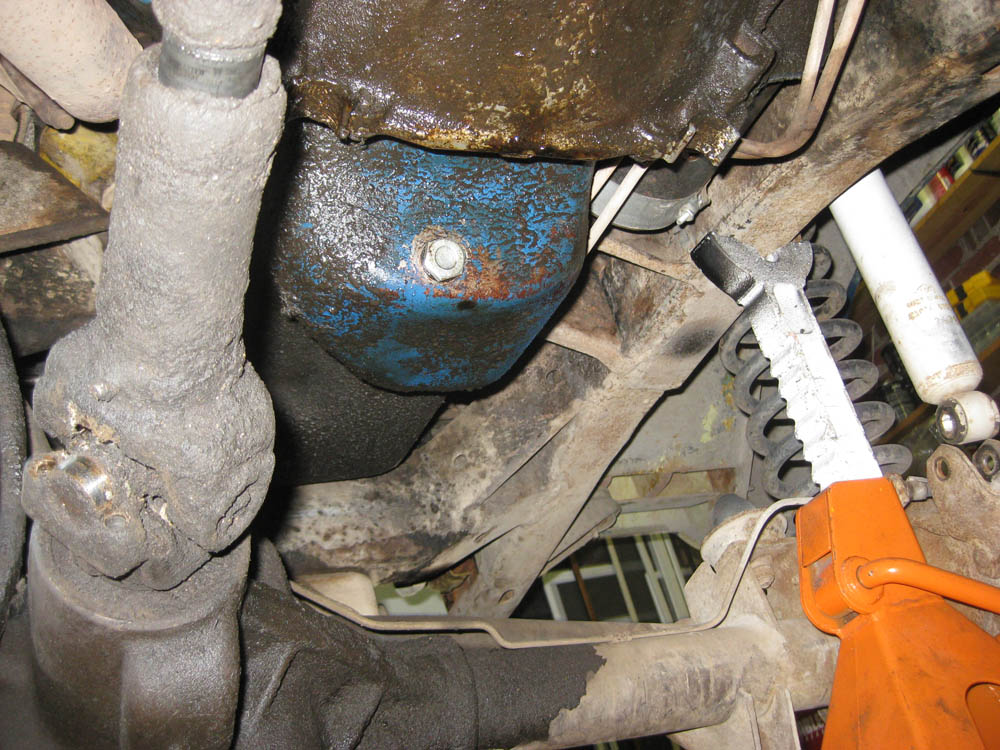
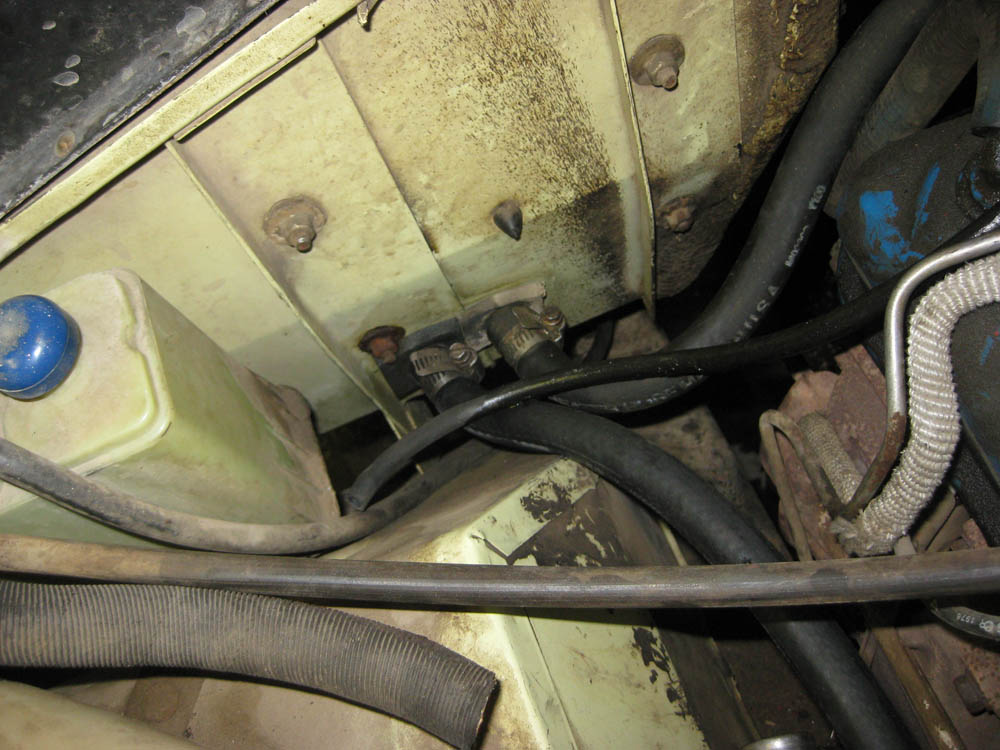
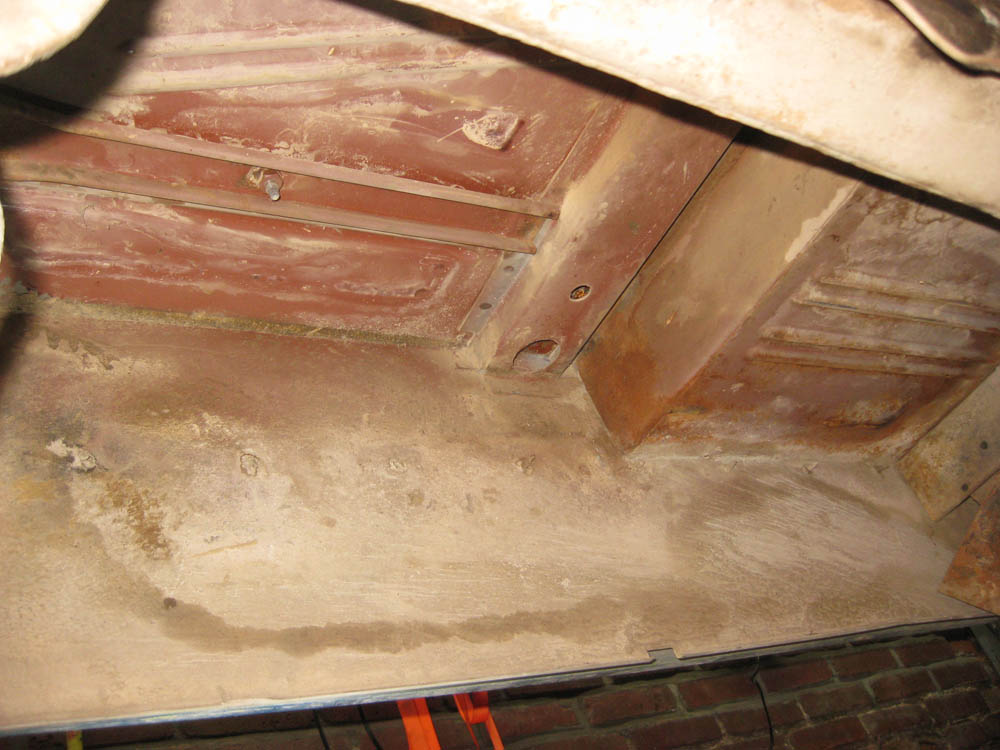
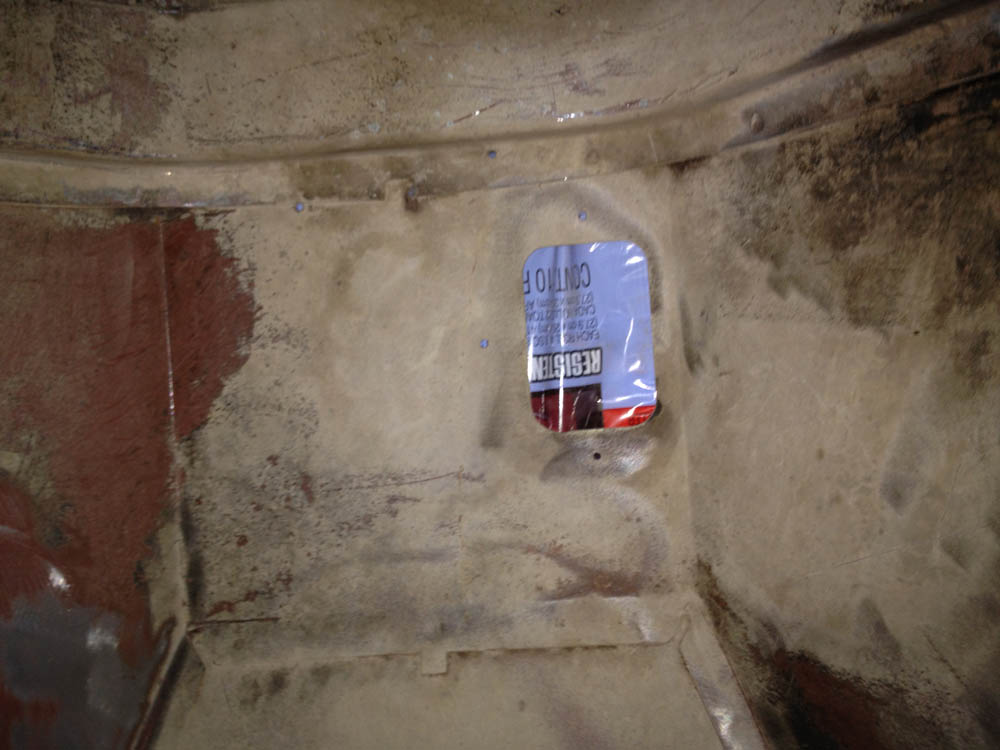
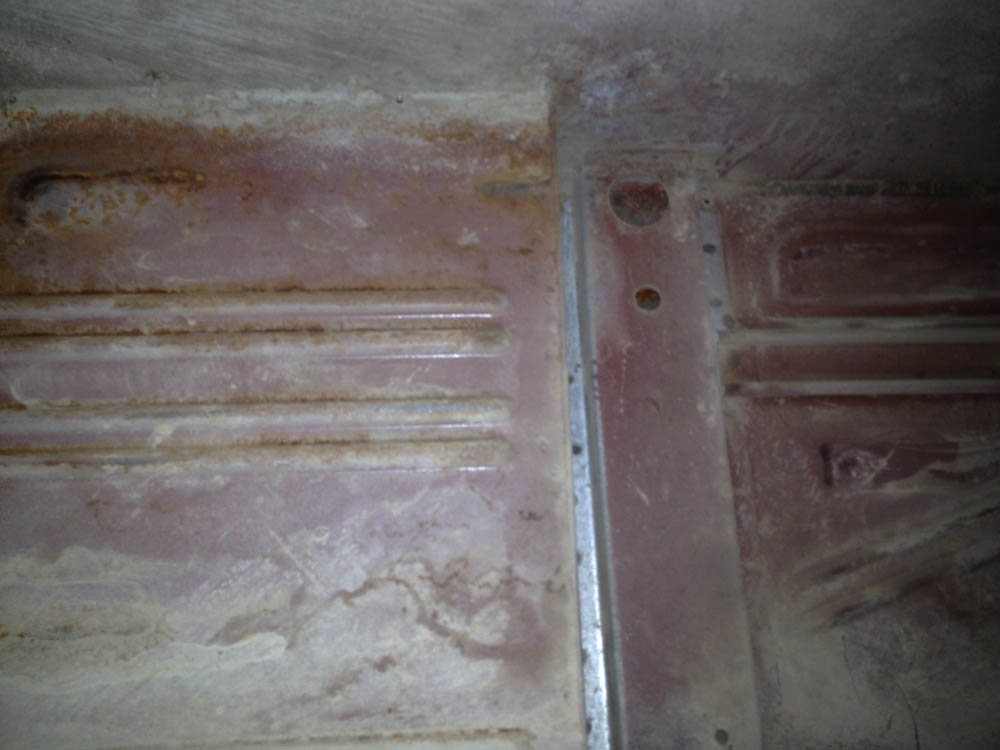
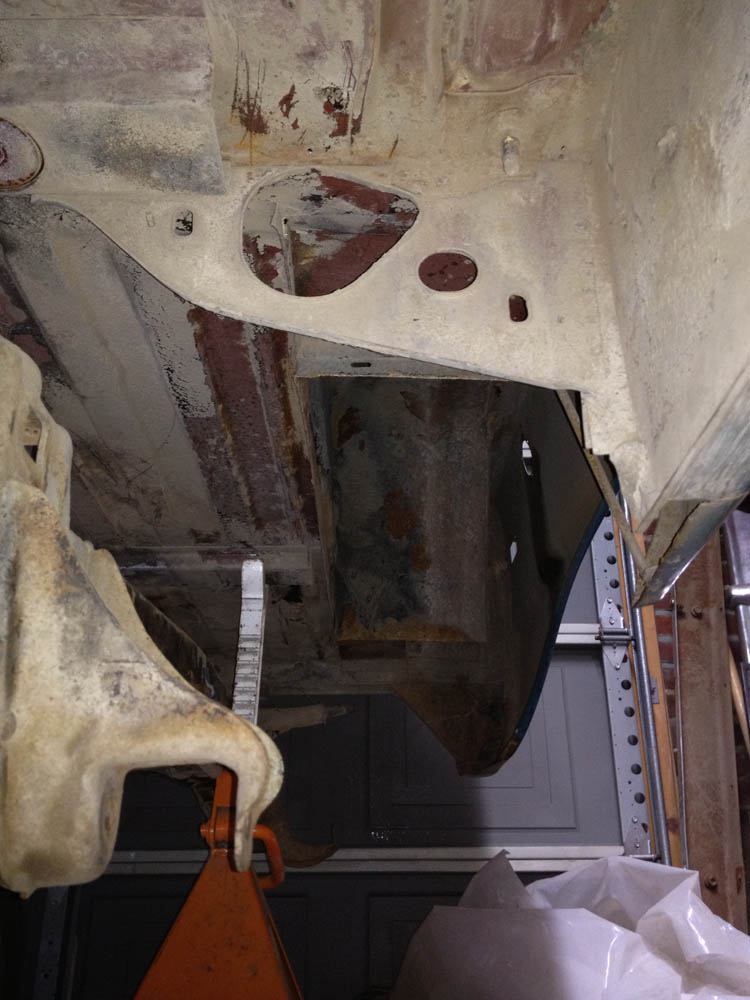
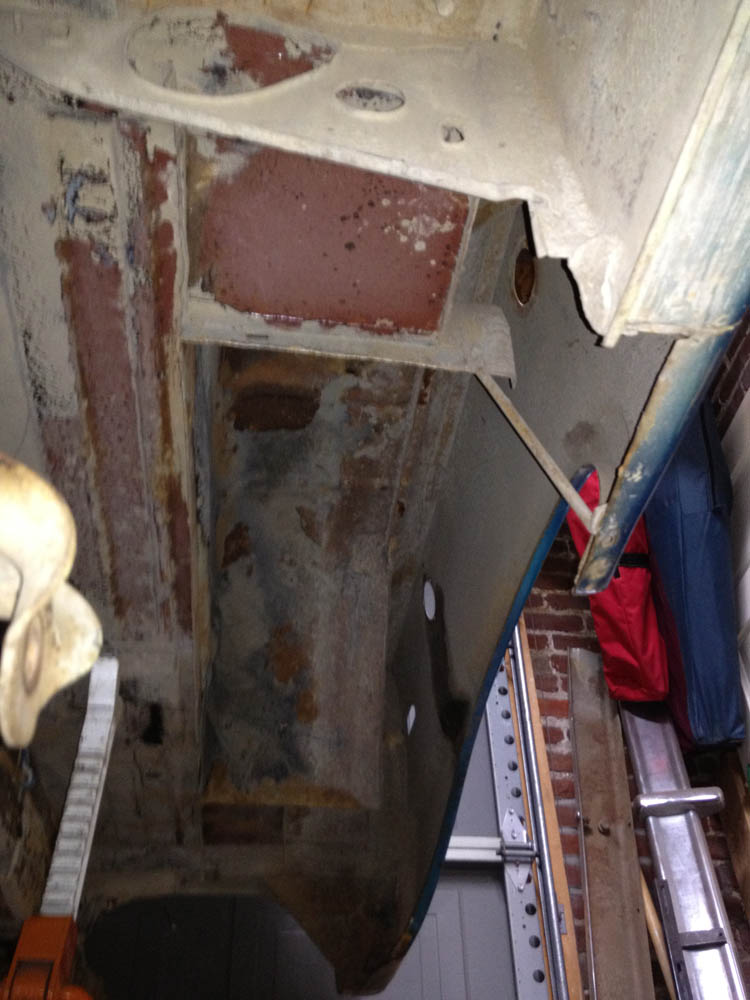
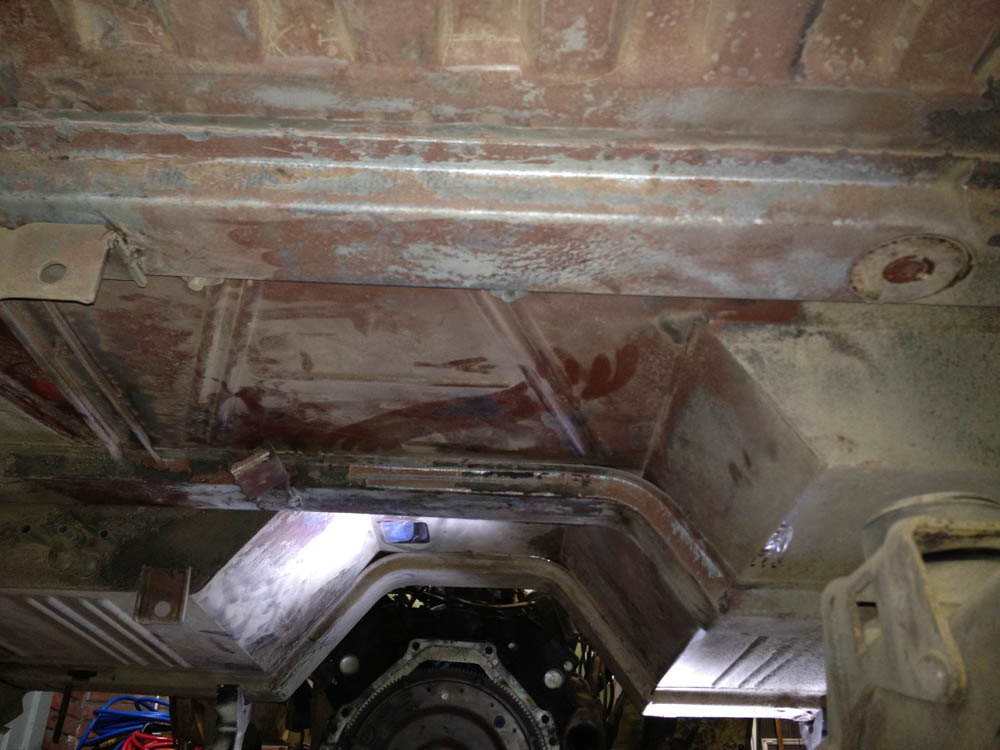
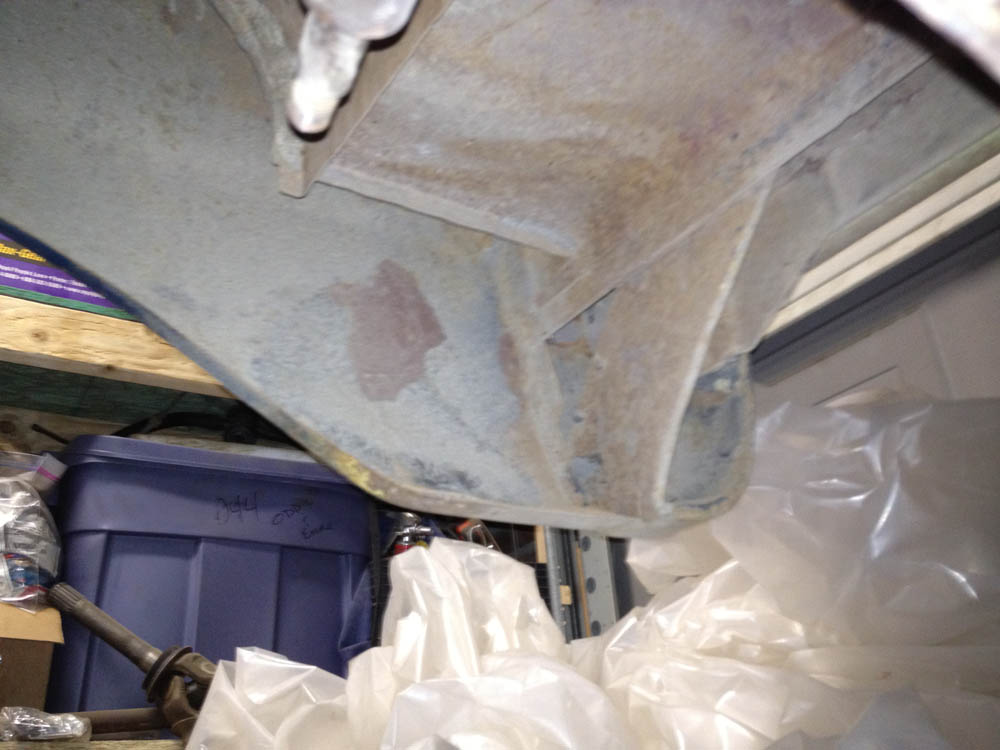
My plan is to strip the truck from underneath, fuel tanks, fuel lines, most wiring, axles etc etc.. and then start cleaning up the frame and bottom of the tub. I think iam going to por15 the axles, radius arms and frame.. what about the underside of the tub? I do not have the luxury of removing the the tub, just dont have the space (will take a pic to show you where iam working) so would I be able to reach up into the spaces under the tub without spraying? My only concern is I will be missing some of the areas if I can't get the tub off.. i might be able to lift it up off the frame.. but only about 4-6"
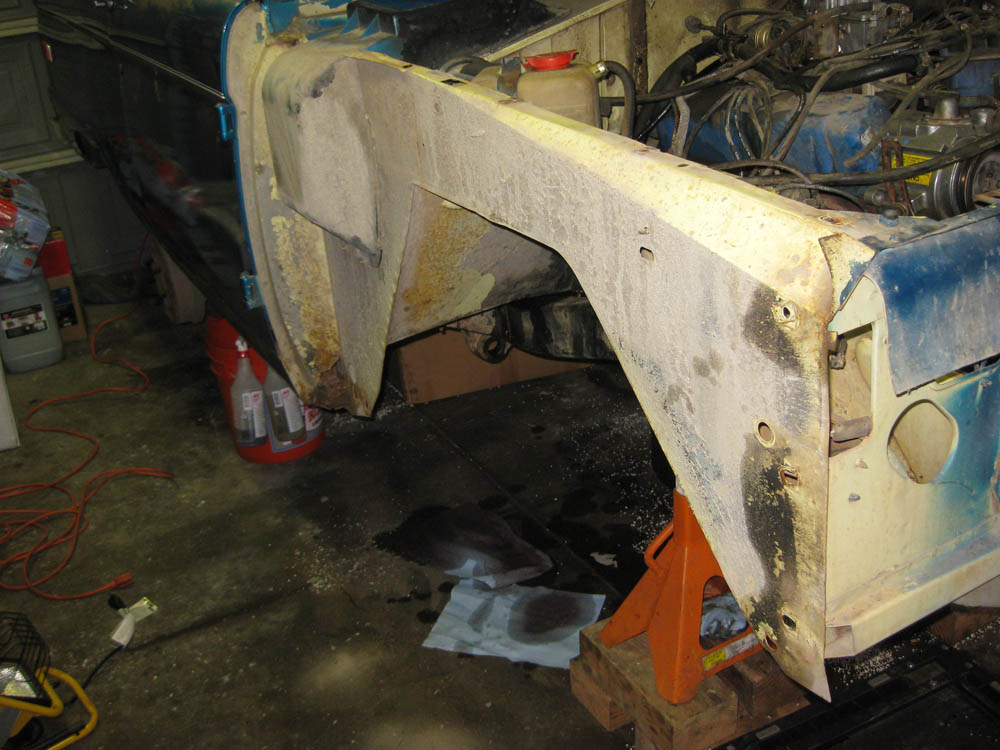
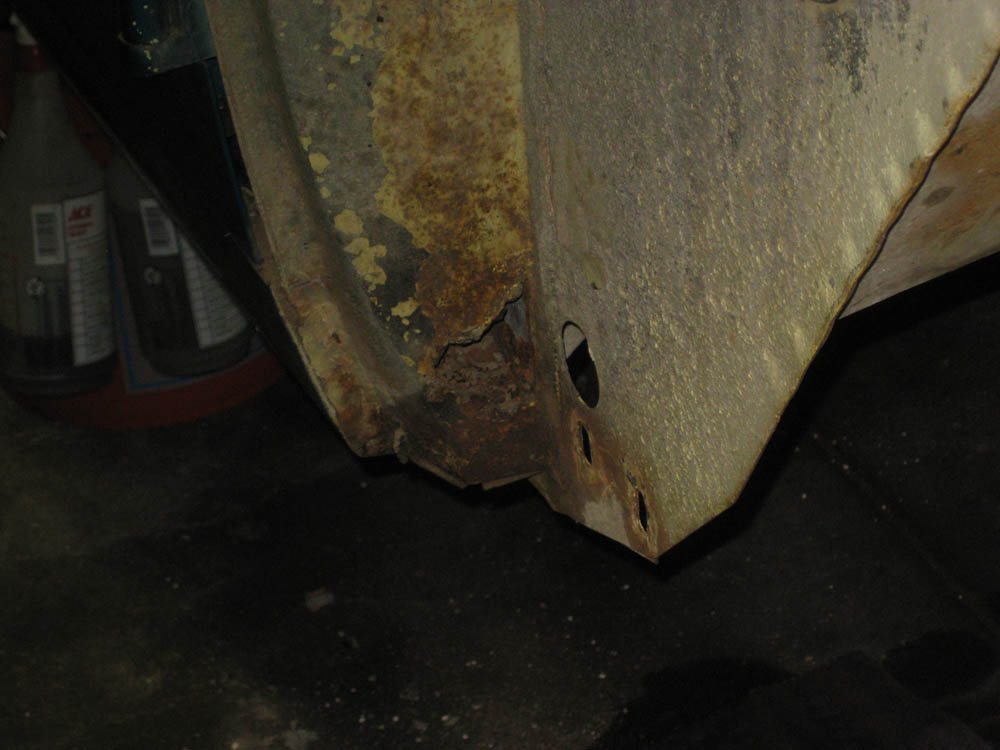
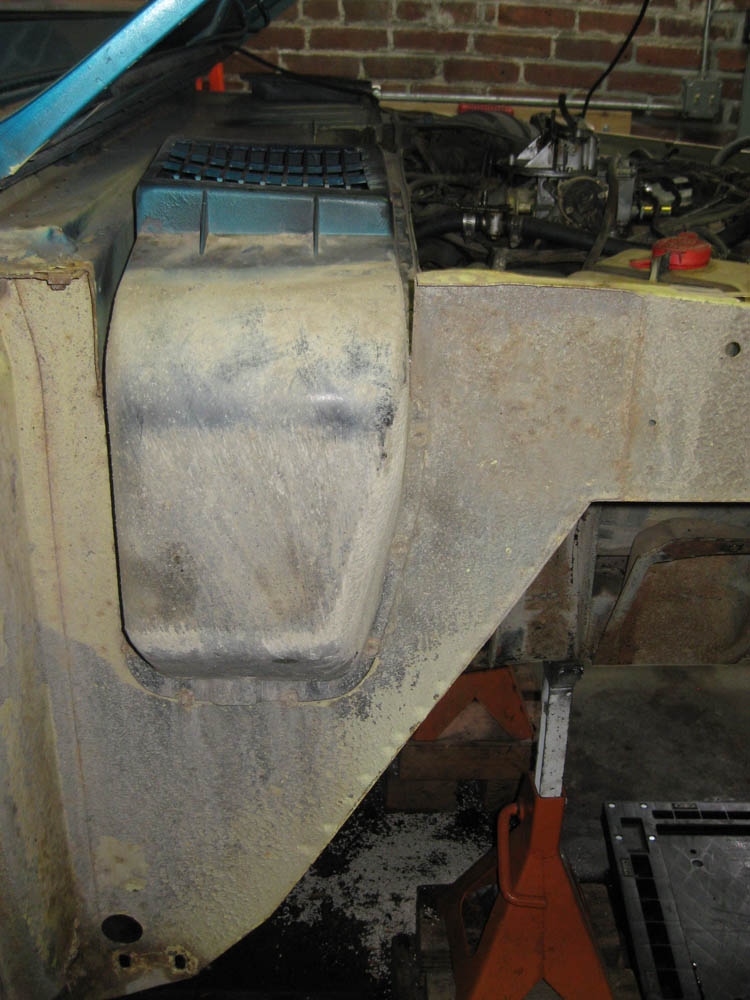
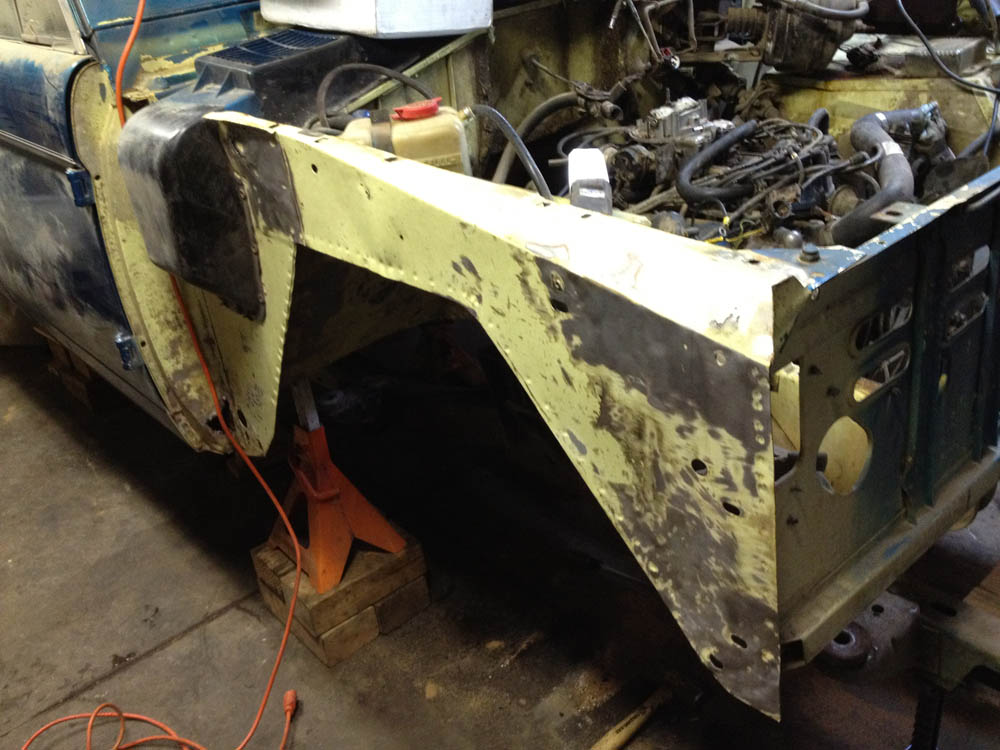
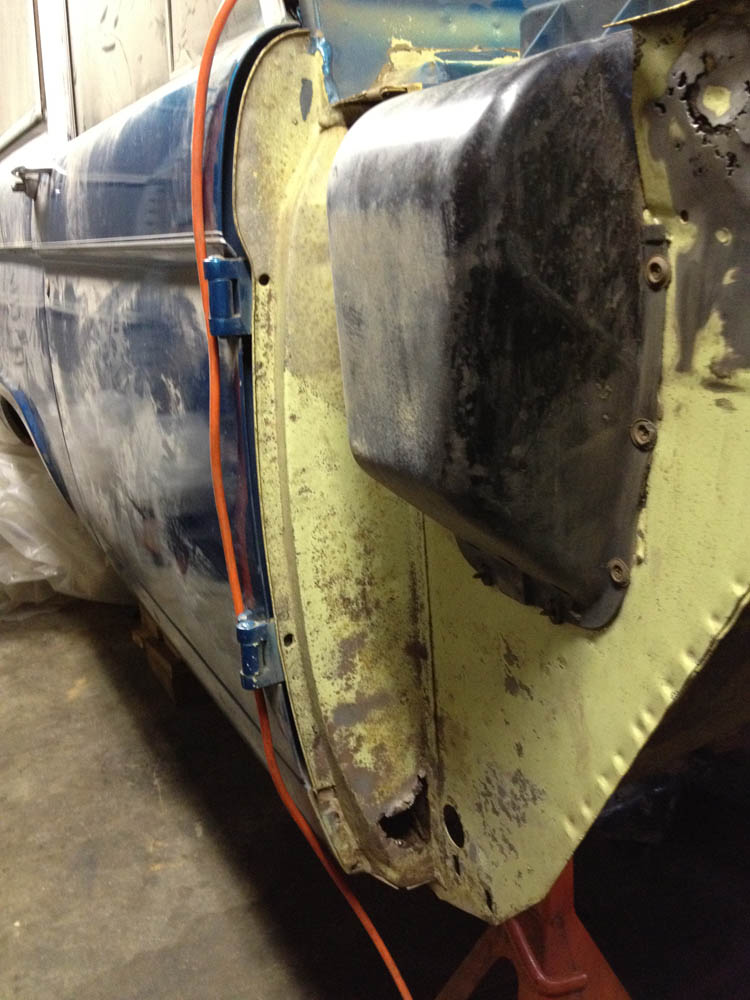
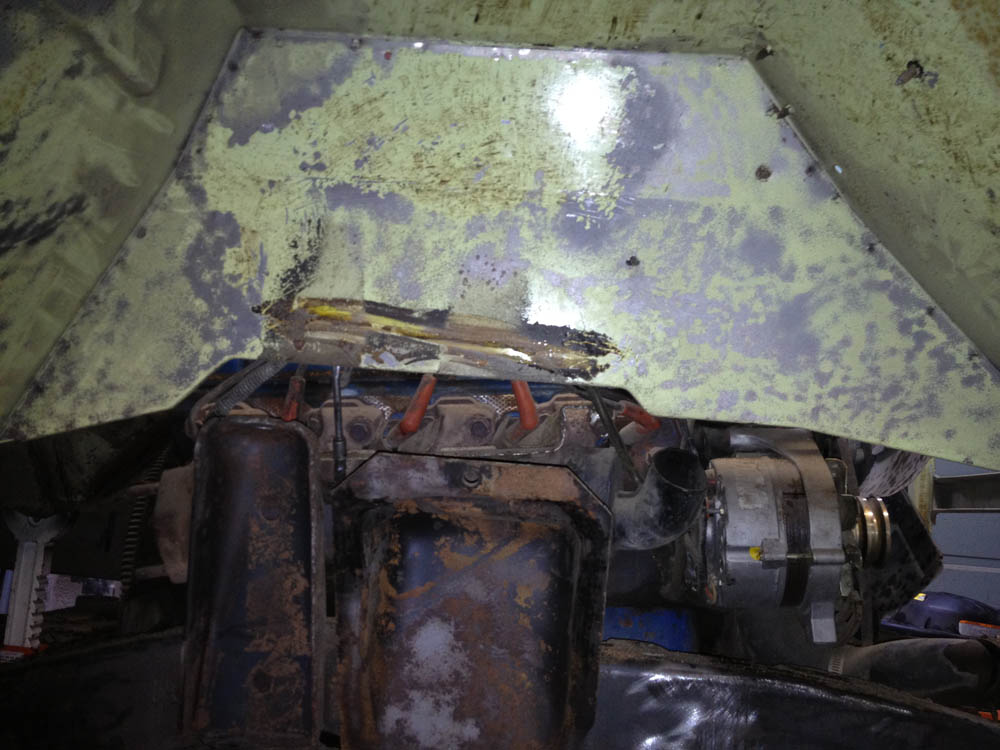
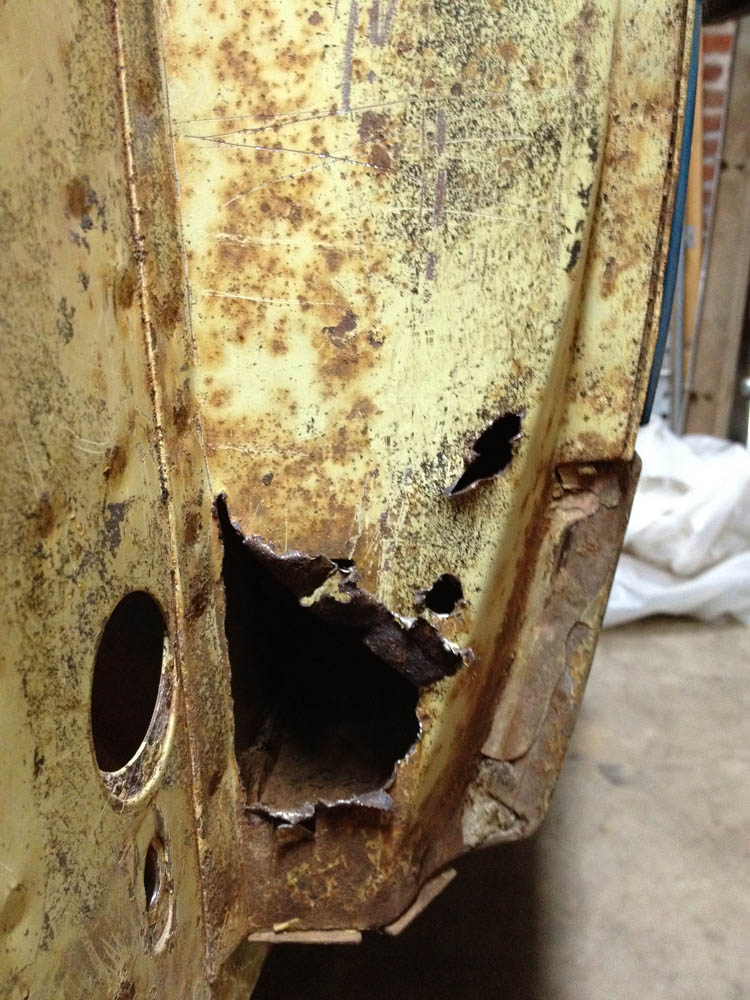
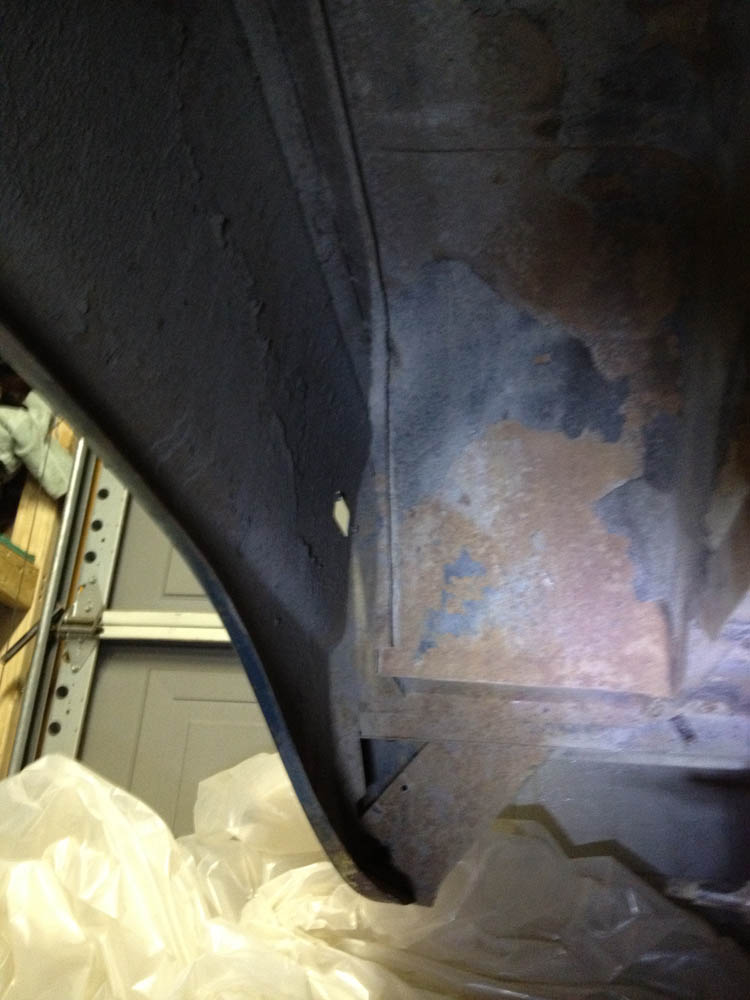
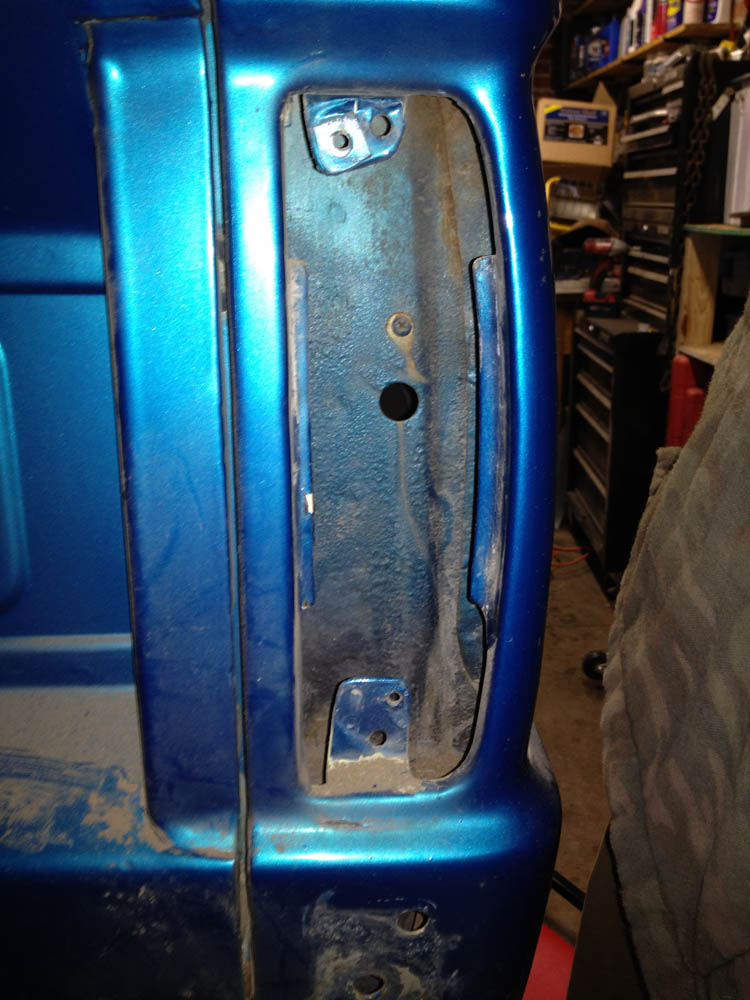
my other concern is the few rust areas i do have.. should i just take care of them now and then seal the underside of the tub? the rust areas i know about are the side walls of the engine bay (about a 12" x 12" area on both sides) and the seam in the rear quarter panels...
I do not have a welder and I have never welded.. so not sure what I could do in my garage unless someone would be willing to do a couple small welds?
here are the two spots in the engine bay.


Suggestions?
-
landshark - Official CCB Member
- Posts: 3942
- Joined: Thu Oct 13, 2011 11:16 pm
- Location: Denver, Wash Park Area
Re: Landsharks 76er Refresh and Build
![]() by landshark » Tue Dec 06, 2011 9:47 pm
by landshark » Tue Dec 06, 2011 9:47 pm
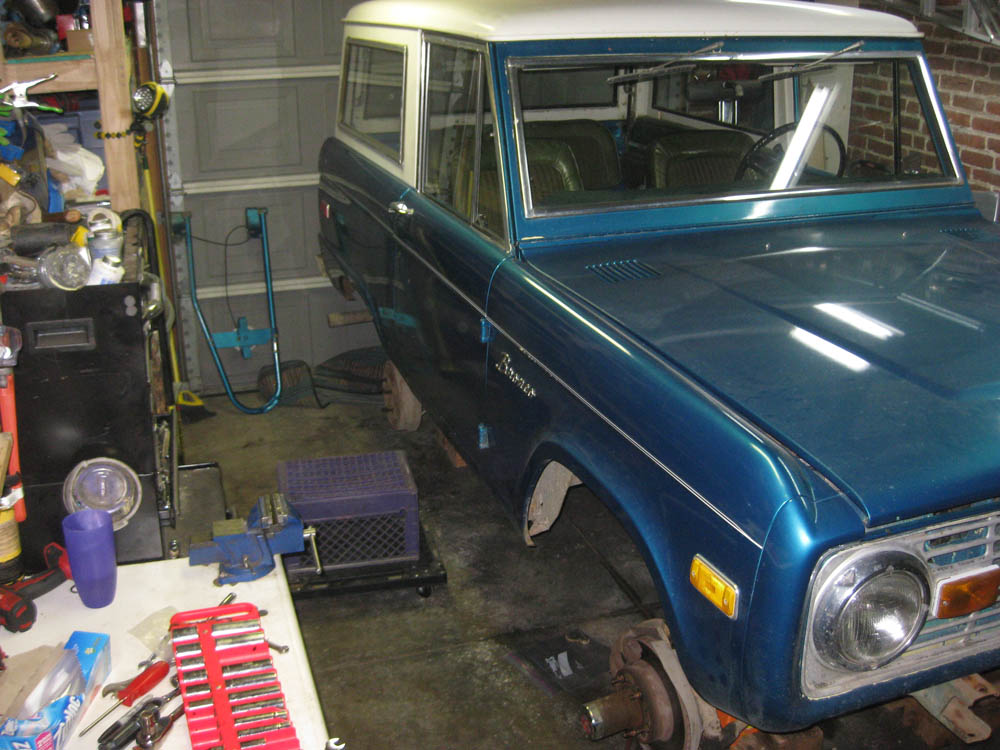
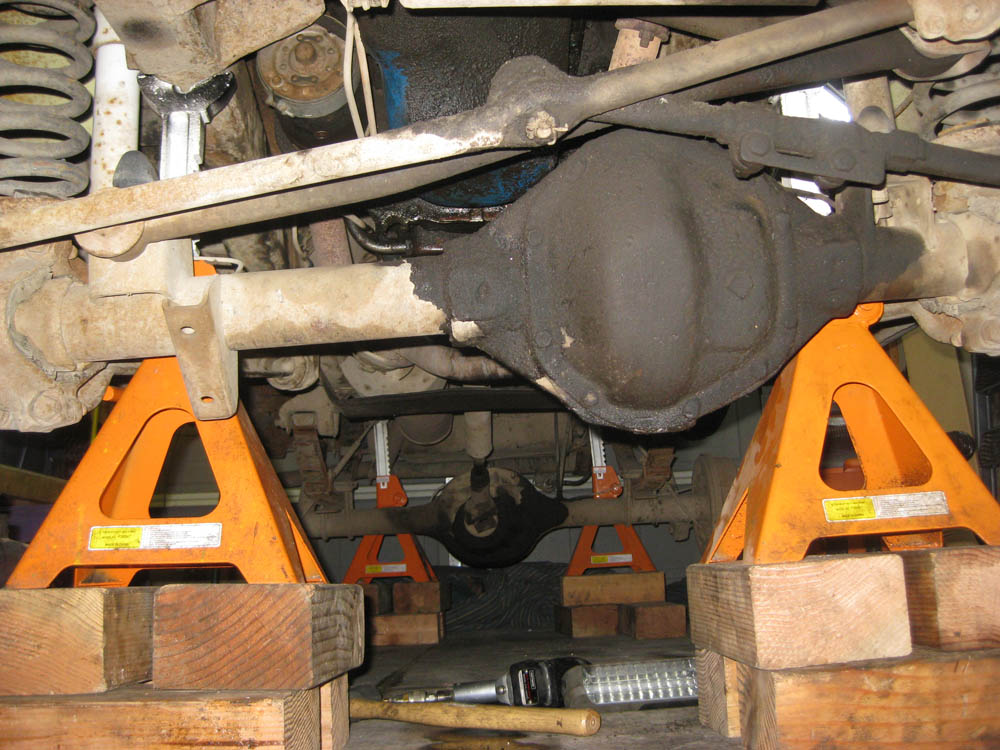
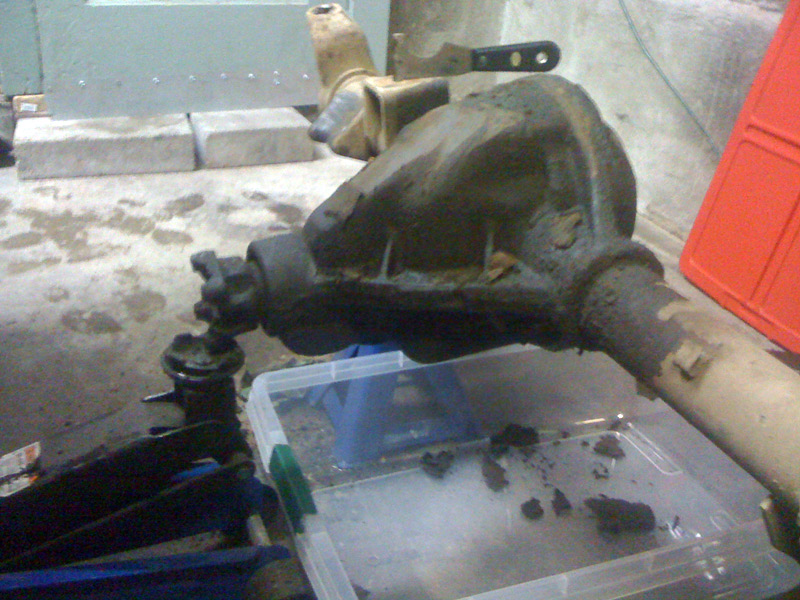
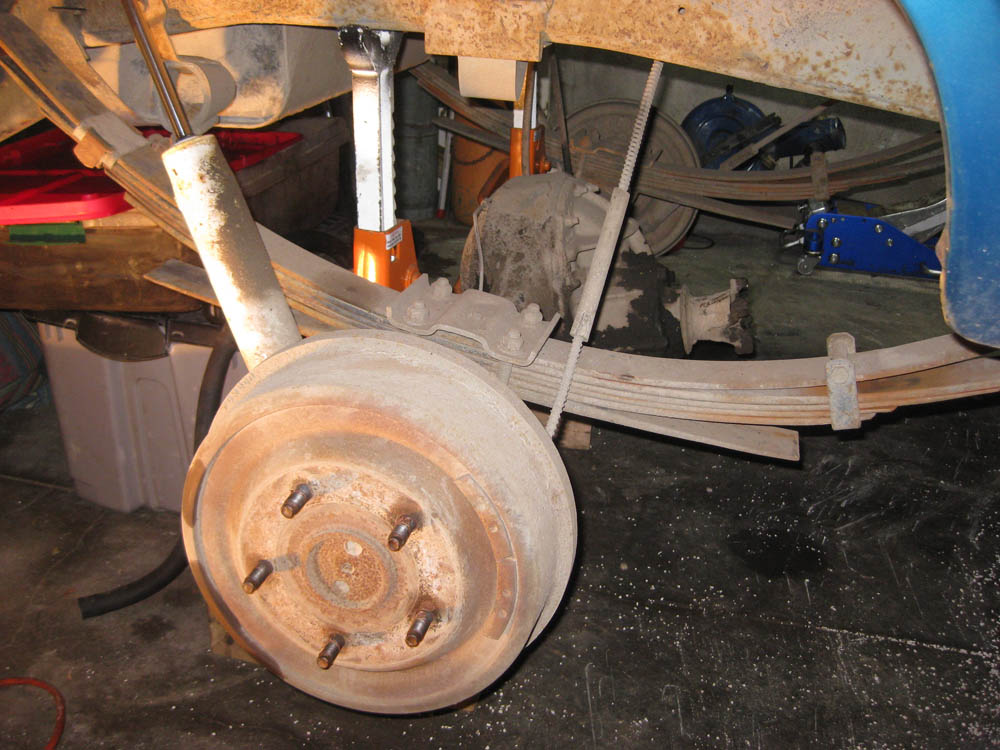
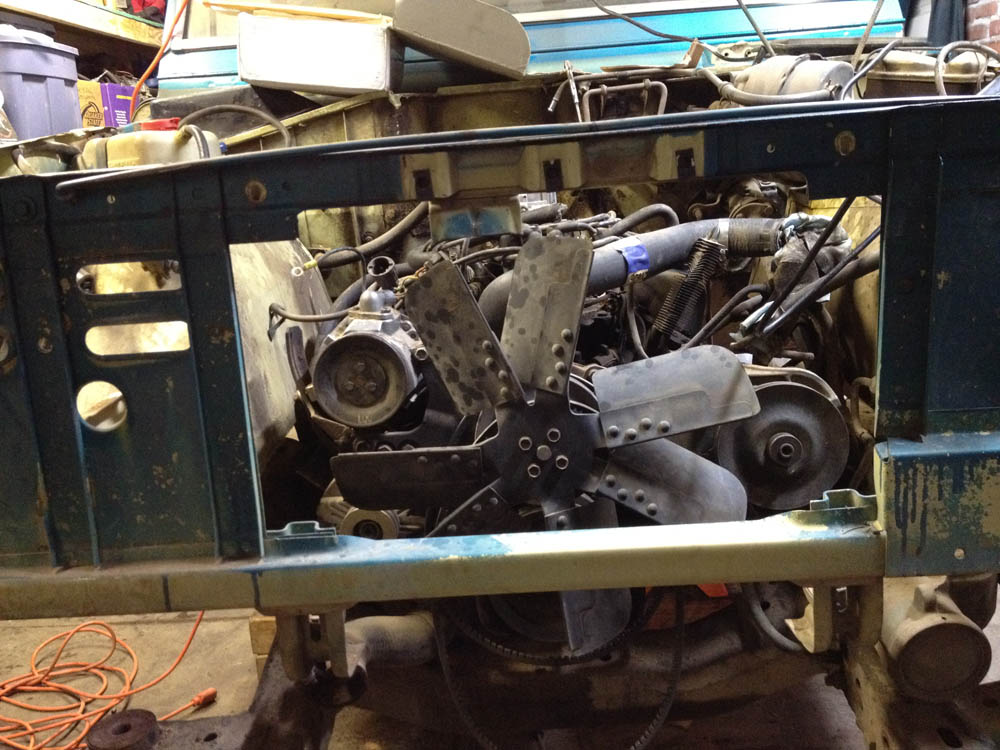
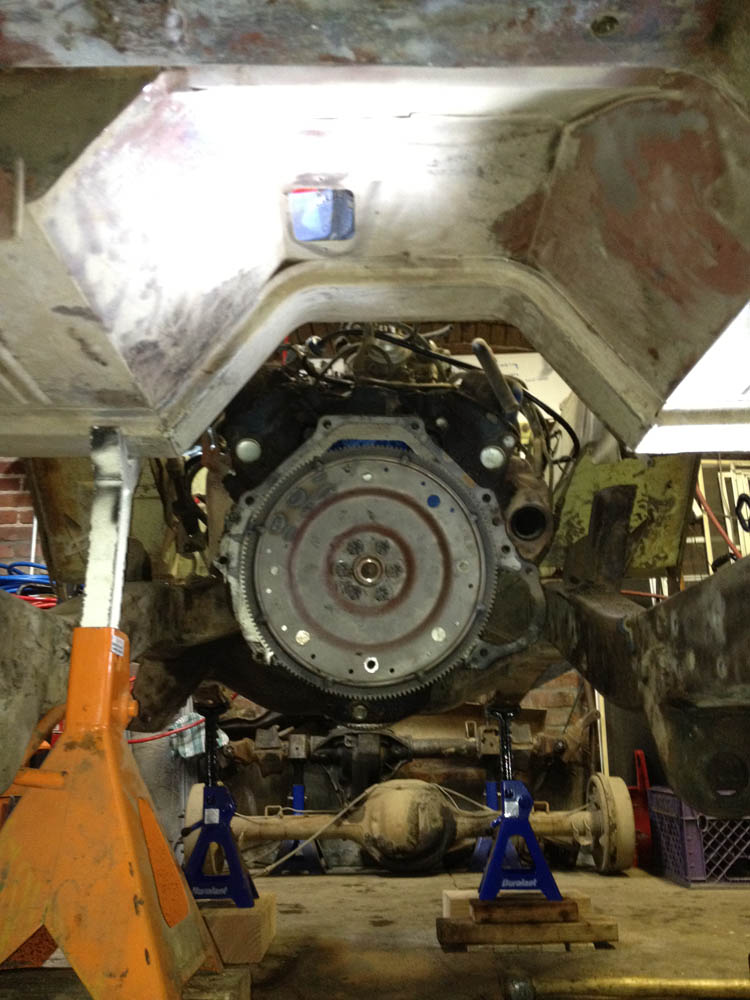
I got the bronco into the garage, took the tire carrier off, wheels and tires and started to pull the front end out of it...
tight fit but I think it will work out...
i think all the grease and gunk have saved the axles and frame ;)

some people have paint.. I prefer gunk
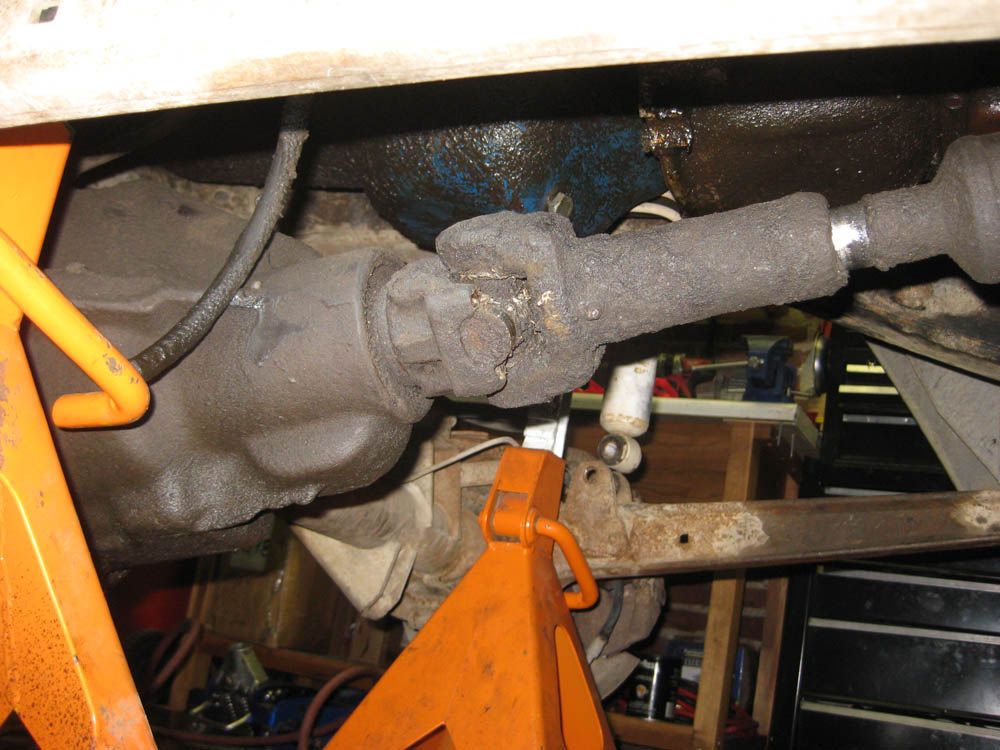
I think the bushings are a bit worn...

and the front axle is detached.. just need to remove the radius arms and pull the axle out.. then I will go through it and start to rebuild it, good news so far - no stubborn bolts or nuts... I'm still amazed that the truck is in as good condition as it is.
hope to have the axle done by the weekend and hopefully painted.. then move onto removing the transmission and transfer case and get those cleaned up and sent out to Viper...
-
landshark - Official CCB Member
- Posts: 3942
- Joined: Thu Oct 13, 2011 11:16 pm
- Location: Denver, Wash Park Area
Re: Landsharks 76er Refresh and Build
![]() by ZOSO » Wed Dec 07, 2011 6:06 am
by ZOSO » Wed Dec 07, 2011 6:06 am
74 Ranger EFI351w, 4r70w, ARB 5.13 9in, ARB 5.13D44, and a bunch of other goodies. Best of all the family memories.
04 Mustang Cobra, KenneBell 2.2 feeding a lot of boost on E85. Tire shredding machine
New project: 77 Bronco Ranger, body work and more body work.
Very little left of a 72 durango tan explorer sport
-

ZOSO - Moderator

- Posts: 3908
- Joined: Mon Nov 15, 2010 4:58 pm
- Location: Henderson, Co
Re: Landsharks 76er Refresh and Build
![]() by landshark » Thu Dec 08, 2011 9:22 am
by landshark » Thu Dec 08, 2011 9:22 am
Picking up new rotors, rebuild kit for the calipers and some other bits and pieces I need to replace today and hopefully get the axle cleaned, painted and most of the new bearings, seals and other parts back on it before next week. Would love to start cleaning up the underside of the bronco however I want to do one thing at a time to keep myself sane!
-
landshark - Official CCB Member
- Posts: 3942
- Joined: Thu Oct 13, 2011 11:16 pm
- Location: Denver, Wash Park Area
Re: Landsharks 76er Refresh and Build
![]() by landshark » Fri Dec 09, 2011 2:35 pm
by landshark » Fri Dec 09, 2011 2:35 pm
Picked up my POR-15 supplies and the rest of my axle parts today, so hoping to make some good progress this weekend if I can get the lights up and decorations on the tree ;)
-
landshark - Official CCB Member
- Posts: 3942
- Joined: Thu Oct 13, 2011 11:16 pm
- Location: Denver, Wash Park Area
Re: Landsharks 76er Refresh and Build
![]() by landshark » Wed Dec 21, 2011 8:28 pm
by landshark » Wed Dec 21, 2011 8:28 pm
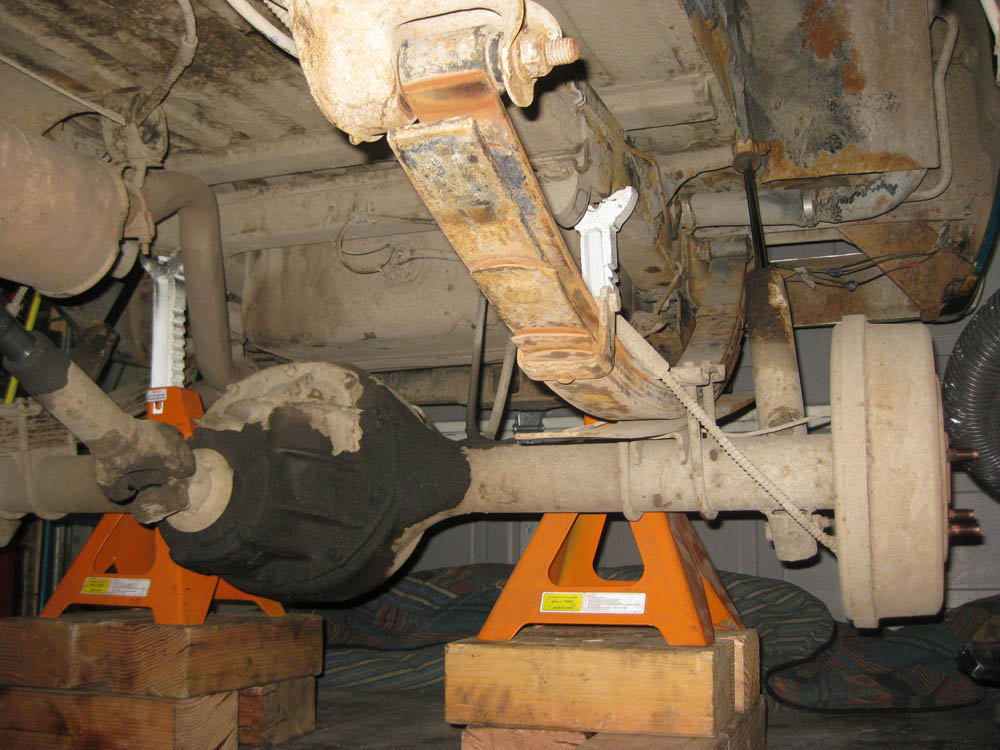
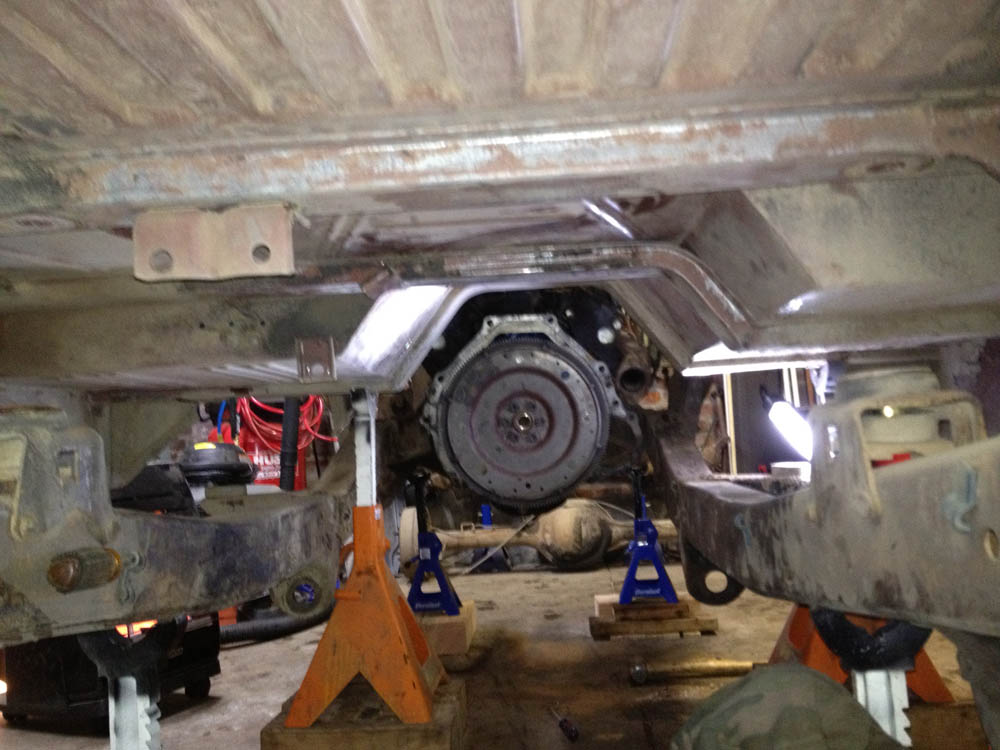
I also have both drive shafts off.. they are dirty.. one more than the other.. and there is allot of caked on oil and dirt on one.. am i able to get these blasted or do they frown upon caked no oil dirt and mess?
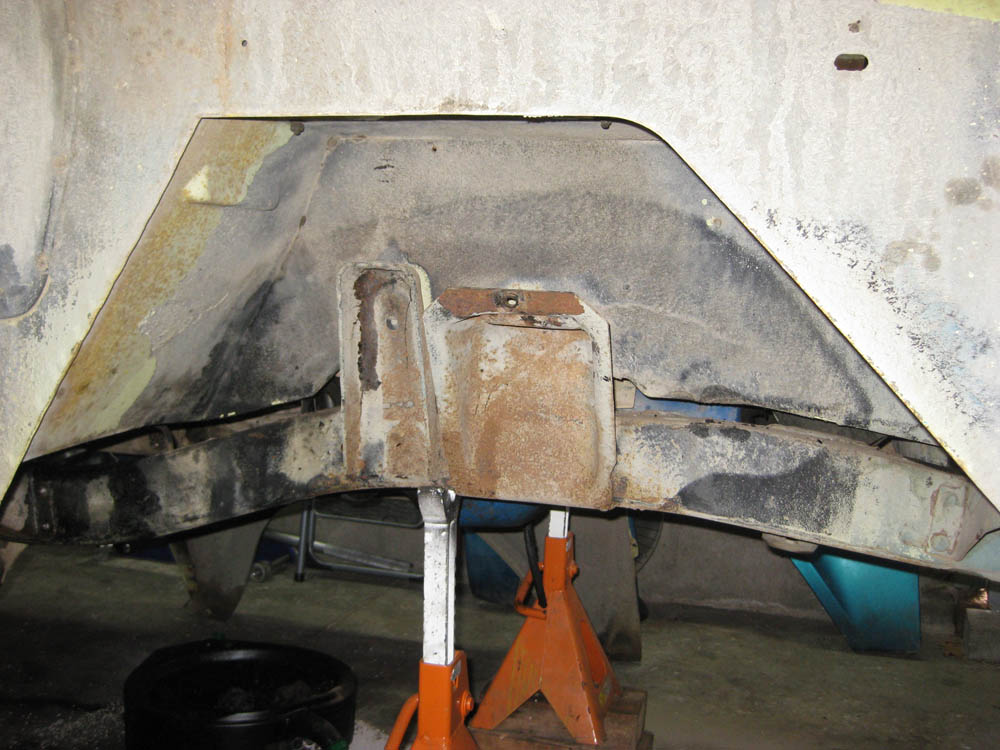
Here are some progress pics...
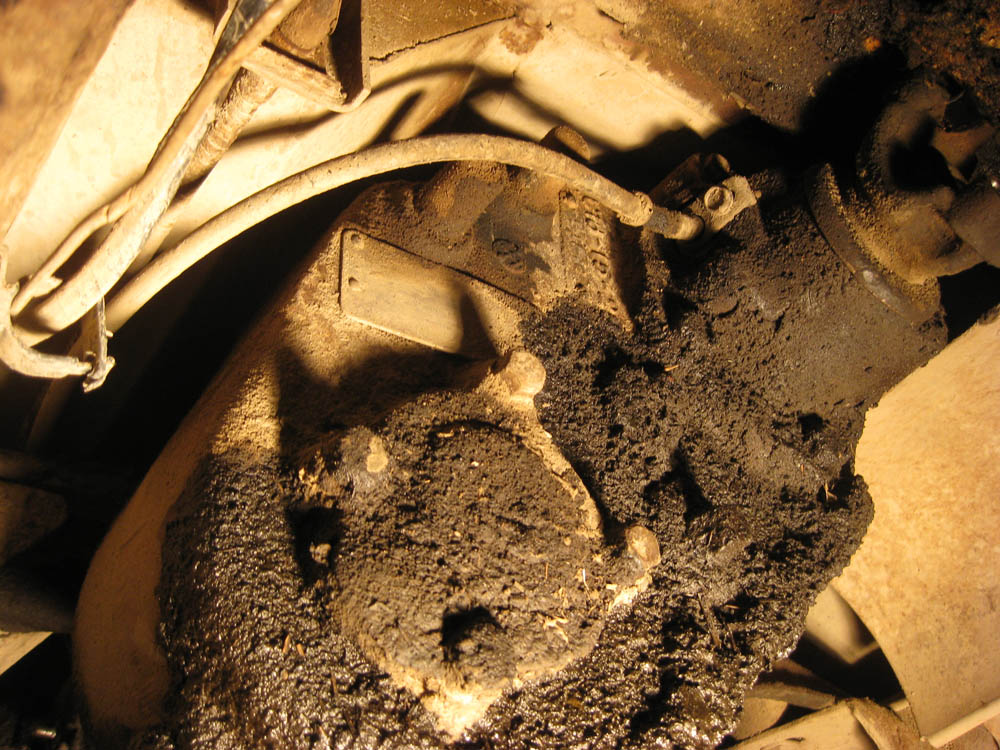
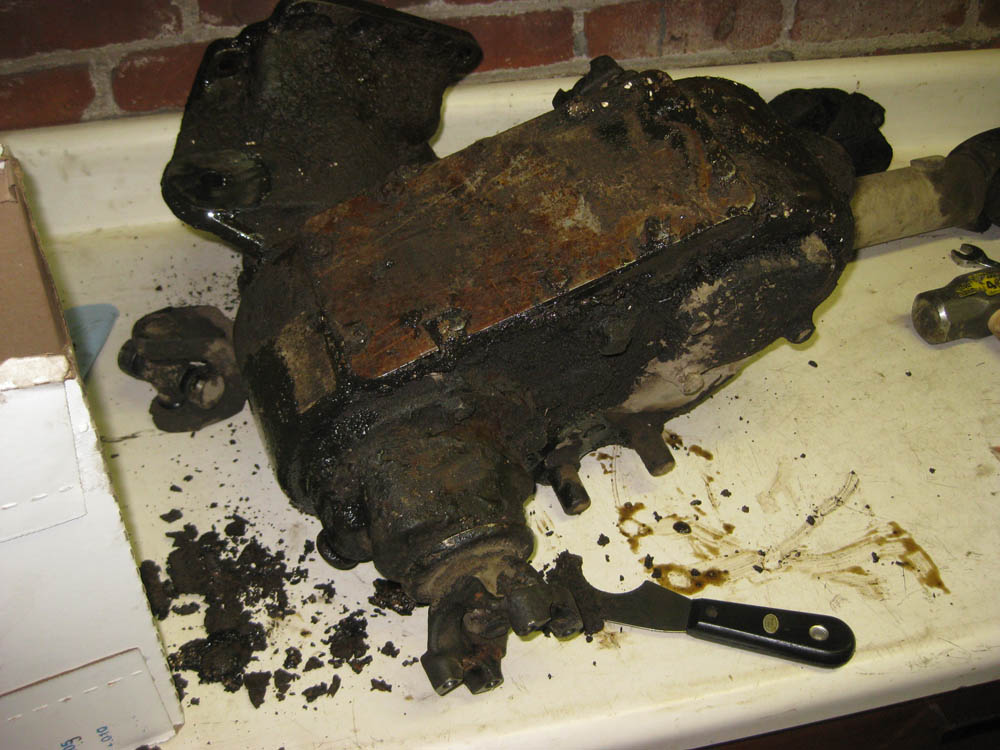
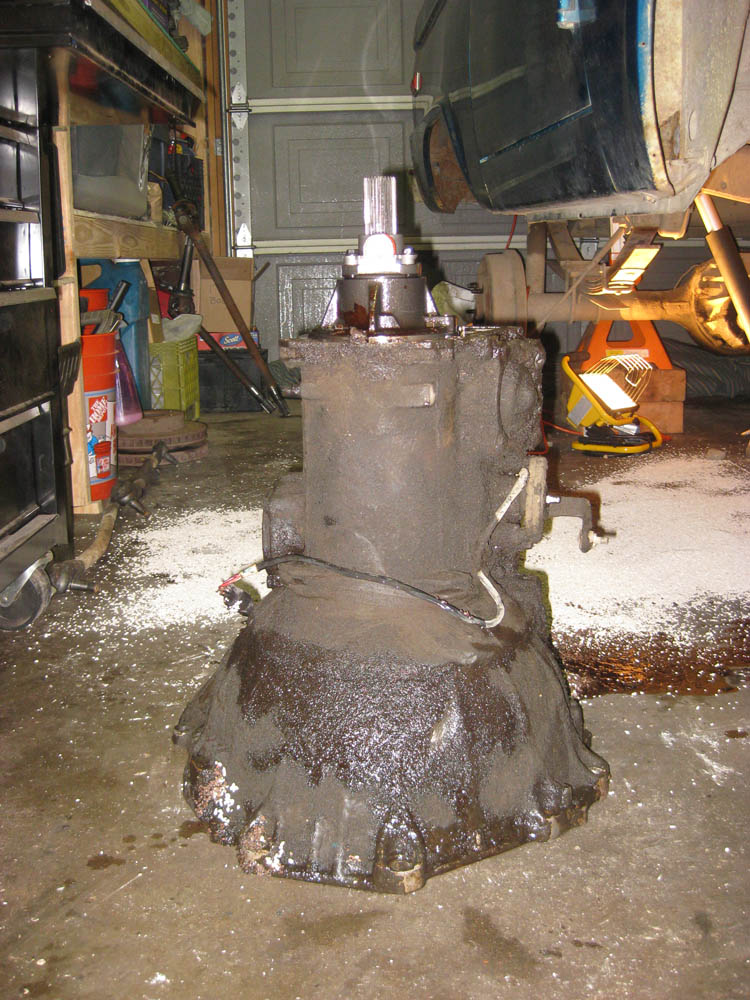

so next up is more cleaning.. then removing the rear axle and springs, then drop the tanks.. and then.. more cleaning...
-
landshark - Official CCB Member
- Posts: 3942
- Joined: Thu Oct 13, 2011 11:16 pm
- Location: Denver, Wash Park Area
Re: Landsharks 76er Refresh and Build
![]() by landshark » Mon Jan 09, 2012 10:56 pm
by landshark » Mon Jan 09, 2012 10:56 pm
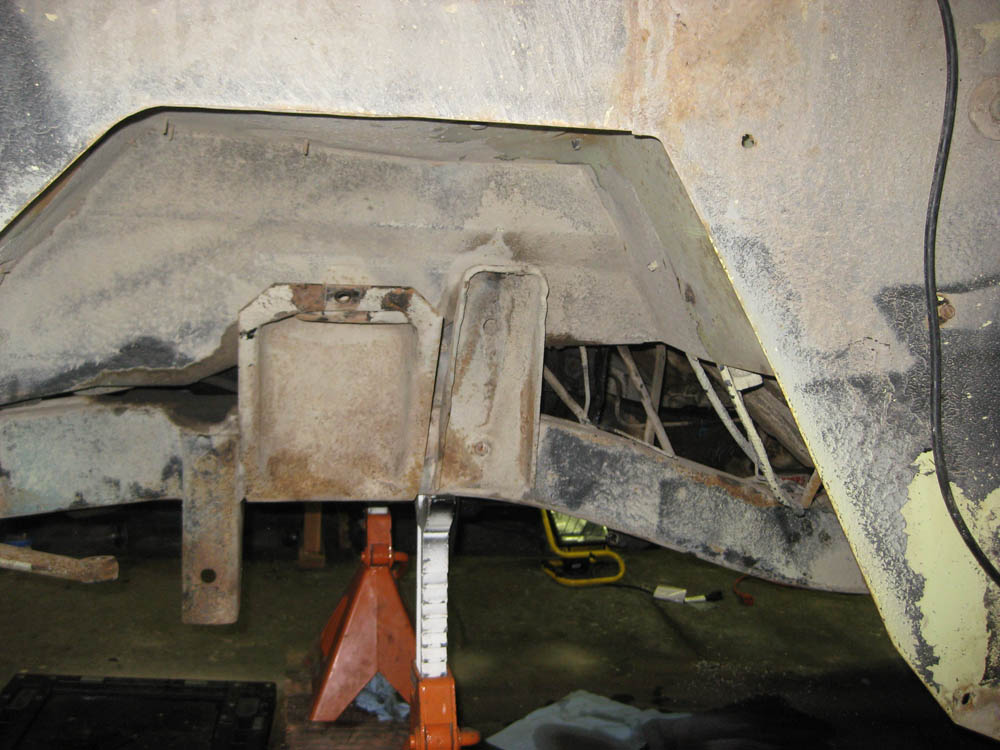
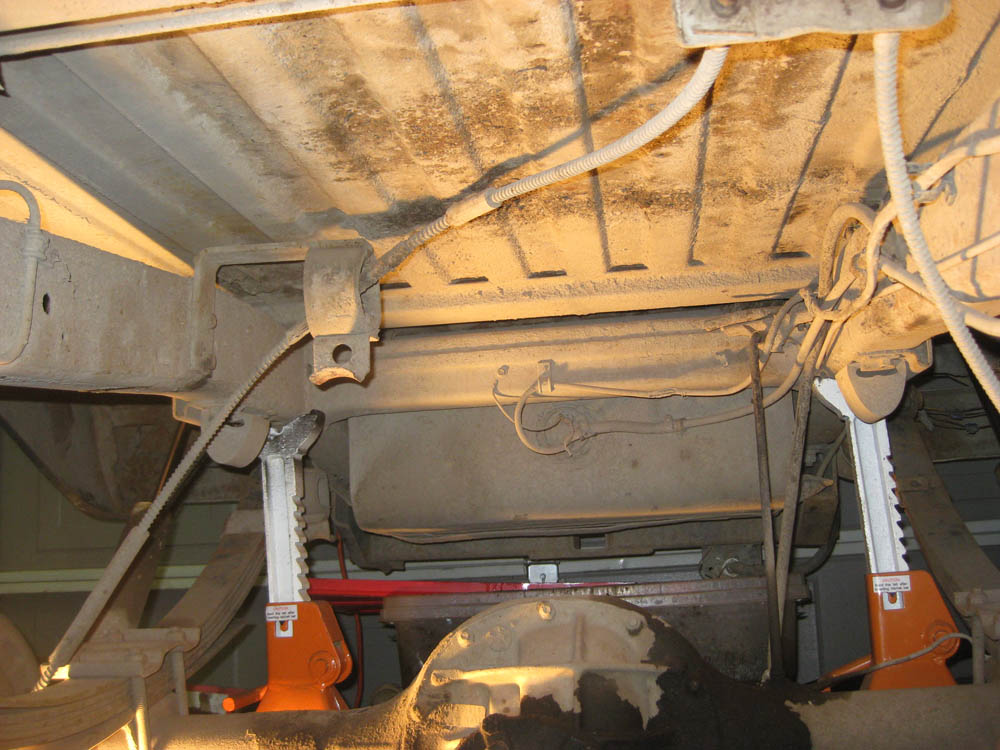
anyway got everything stripped off the underbody and frame and started pulling the body mounts off.. so far so good. Tomorrow I'm hanging plastic around the bronco so I can sand blast the underbody and frame and get it all prepped for por15 and chassis saver.. Hope the compressor is up to the task, its going to be working double overtime!
Anyway most of these pics are boring.. but not much else to take pics of right now.. just a very dirty garage ;)


-
landshark - Official CCB Member
- Posts: 3942
- Joined: Thu Oct 13, 2011 11:16 pm
- Location: Denver, Wash Park Area
Re: Landsharks 76er Refresh and Build
![]() by Viperwolf1 » Tue Jan 10, 2012 1:06 am
by Viperwolf1 » Tue Jan 10, 2012 1:06 am
- Viperwolf1
Re: Landsharks 76er Refresh and Build
![]() by landshark » Tue Jan 10, 2012 8:49 am
by landshark » Tue Jan 10, 2012 8:49 am
-
landshark - Official CCB Member
- Posts: 3942
- Joined: Thu Oct 13, 2011 11:16 pm
- Location: Denver, Wash Park Area
Re: Landsharks 76er Refresh and Build
![]() by Viperwolf1 » Tue Jan 10, 2012 10:07 am
by Viperwolf1 » Tue Jan 10, 2012 10:07 am
- Viperwolf1
Re: Landsharks 76er Refresh and Build
![]() by landshark » Tue Jan 10, 2012 10:11 am
by landshark » Tue Jan 10, 2012 10:11 am
-
landshark - Official CCB Member
- Posts: 3942
- Joined: Thu Oct 13, 2011 11:16 pm
- Location: Denver, Wash Park Area
Re: Landsharks 76er Refresh and Build
![]() by Viperwolf1 » Tue Jan 10, 2012 10:14 am
by Viperwolf1 » Tue Jan 10, 2012 10:14 am
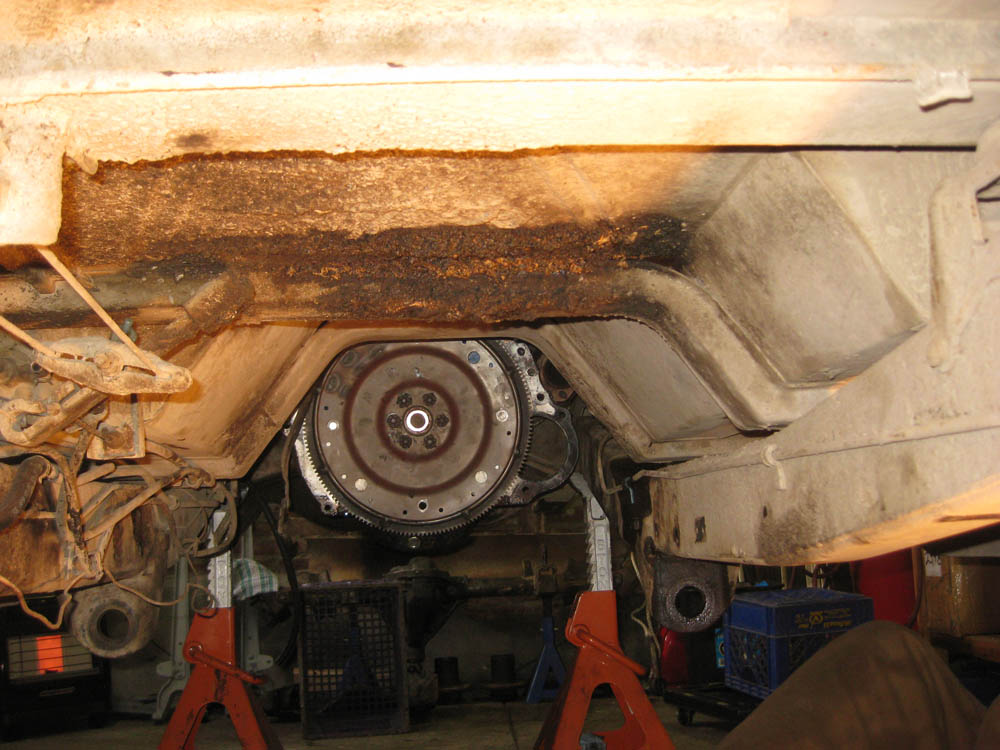
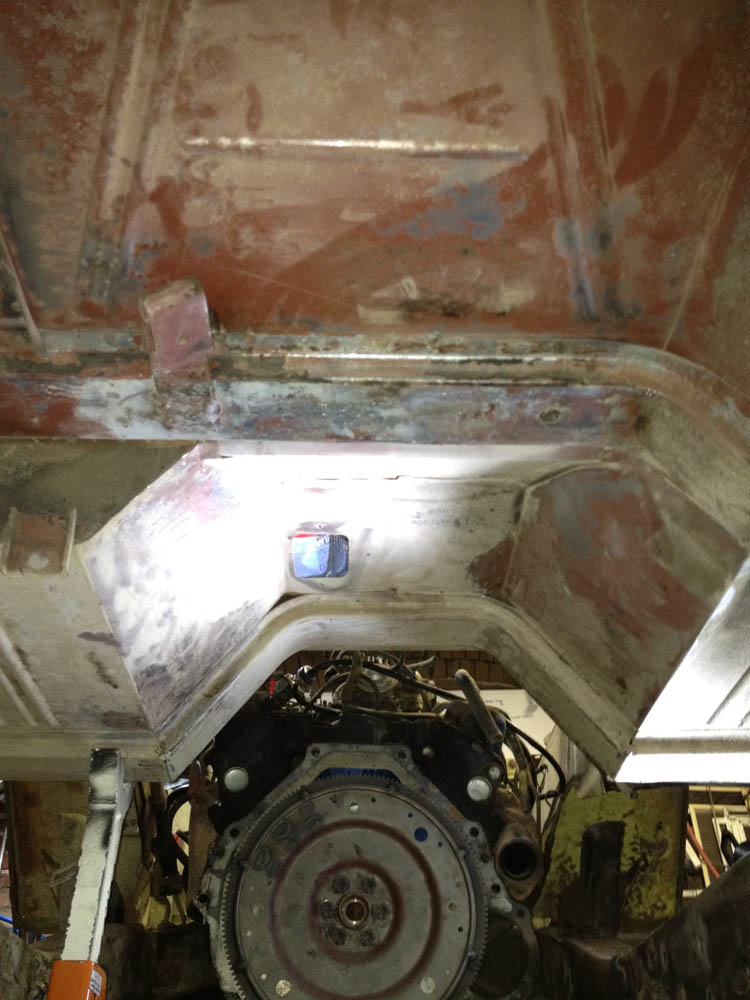
landshark wrote:so i just measure the distance the larger holes are from each other? like a bolt pattern i presume?
The larger ones are the drain plug holes. The bolt holes are the smaller.
- Viperwolf1
Re: Landsharks 76er Refresh and Build
![]() by landshark » Tue Jan 10, 2012 10:17 am
by landshark » Tue Jan 10, 2012 10:17 am
-
landshark - Official CCB Member
- Posts: 3942
- Joined: Thu Oct 13, 2011 11:16 pm
- Location: Denver, Wash Park Area
Re: Landsharks 76er Refresh and Build
![]() by ClayJ » Tue Jan 10, 2012 1:39 pm
by ClayJ » Tue Jan 10, 2012 1:39 pm
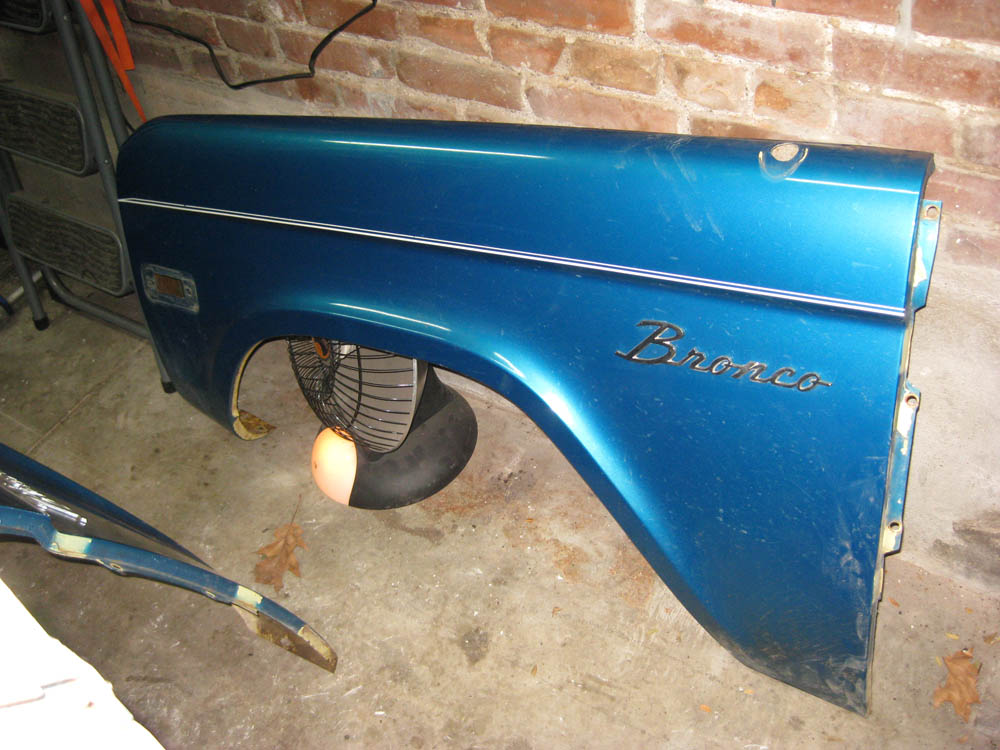
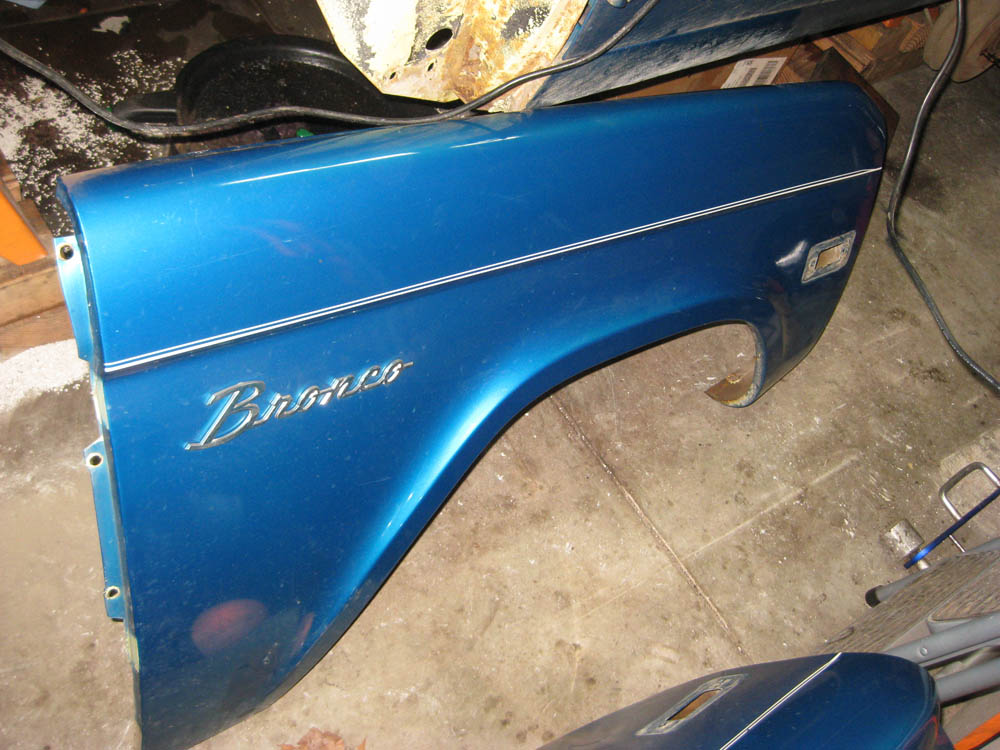
landshark wrote:Color Code is "U" which is Glen Green apparently, however I have not really found any really good photos.. still looking for some good examples. I think it will be returning to Glen Green when time and money allow...
Wasn't Billy's Bronco Glen Green?
-

ClayJ - Official CCB Member
- Posts: 521
- Images: 0
- Joined: Fri Oct 01, 2010 7:45 am
- Location: Colorado Springs
Re: Landsharks 76er Refresh and Build
![]() by Booger » Tue Jan 10, 2012 6:43 pm
by Booger » Tue Jan 10, 2012 6:43 pm
Spiritual owner of the now Zoso mobile (1974 Bronco Ranger - EFI 351W-4R70W-ARB front and rear-STC softtop- High Country hood-3 1/2" WH lift- Cross inboard rear shock mnt- Duffs bumpers- Warn 8274- 33's- Cheby disc conversion)
-

Booger - Official CCB Member
- Posts: 809
- Joined: Thu Dec 23, 2010 5:55 pm
- Location: Broomfield
Re: Landsharks 76er Refresh and Build
![]() by Moab Mike » Wed Jan 11, 2012 8:22 pm
by Moab Mike » Wed Jan 11, 2012 8:22 pm
Viperwolf1 wrote:I can get you a new 11 7/16" pattern flexplate pretty cheap, $30-ish dollars. Measure the one you have first but the drain plug holes spaced away from the bolt holes tell me it's the 10.5" pattern.
I ran into the same problem with my Bronco. 75' and 76' ran the smaller flex plate and torque converter, something to do with the thermactor (or smog). 73', 74' and 77' ran the larger flex plate and torque converter. My flex plate had the mounting holes chewed up and I couldn't find a replacement. I ended up replacing it with the larger flex plate and torque converter.
Chris, I'll buy your old flex plate and TC if you want to sell it.
-

Moab Mike - Official CCB Member
- Posts: 1940
- Joined: Mon Jan 03, 2011 1:59 pm
- Location: Witness Protection Program
Re: Landsharks 76er Refresh and Build
![]() by Viperwolf1 » Wed Jan 11, 2012 9:42 pm
by Viperwolf1 » Wed Jan 11, 2012 9:42 pm
- Viperwolf1
Re: Landsharks 76er Refresh and Build
![]() by landshark » Thu Jan 12, 2012 6:33 pm
by landshark » Thu Jan 12, 2012 6:33 pm
-
landshark - Official CCB Member
- Posts: 3942
- Joined: Thu Oct 13, 2011 11:16 pm
- Location: Denver, Wash Park Area
Re: Landsharks 76er Refresh and Build
![]() by Moab Mike » Thu Jan 12, 2012 6:37 pm
by Moab Mike » Thu Jan 12, 2012 6:37 pm
landshark wrote:i keep forgetting to measure but i assume its the smaller flex plate.. any problems then going to the larger one? do i need to?
The flexplate bolt pattern needs to match the torque converter. I don't think the smaller flexplate bolt pattern matches the larger TC or the opposite way either. You'll need to purchase both to swap.
-
Moab Mike - Official CCB Member
- Posts: 1940
- Joined: Mon Jan 03, 2011 1:59 pm
- Location: Witness Protection Program
Re: Landsharks 76er Refresh and Build
![]() by landshark » Thu Jan 12, 2012 6:41 pm
by landshark » Thu Jan 12, 2012 6:41 pm
-
landshark - Official CCB Member
- Posts: 3942
- Joined: Thu Oct 13, 2011 11:16 pm
- Location: Denver, Wash Park Area
Re: Landsharks 76er Refresh and Build
![]() by Viperwolf1 » Thu Jan 12, 2012 7:48 pm
by Viperwolf1 » Thu Jan 12, 2012 7:48 pm
- Viperwolf1
Re: Landsharks 76er Refresh and Build
![]() by landshark » Thu Jan 12, 2012 9:35 pm
by landshark » Thu Jan 12, 2012 9:35 pm
-
landshark - Official CCB Member
- Posts: 3942
- Joined: Thu Oct 13, 2011 11:16 pm
- Location: Denver, Wash Park Area
Re: Landsharks 76er Refresh and Build
![]() by landshark » Sun Jan 15, 2012 10:58 pm
by landshark » Sun Jan 15, 2012 10:58 pm
 d around the door pillars the worse they seem. So it would seem I will probably replacing both door pillars here shortly. I kept on poking in them and finding more and more rot. I think it would just save time and headaches to replace the whole thing. Oh well knew I would be finding some surprises!
-
landshark - Official CCB Member
- Posts: 3942
- Joined: Thu Oct 13, 2011 11:16 pm
- Location: Denver, Wash Park Area
Re: Landsharks 76er Refresh and Build
![]() by landshark » Mon Jan 16, 2012 10:08 pm
by landshark » Mon Jan 16, 2012 10:08 pm
Went pretty smooth, went slow and made sure we didn't die.


Started to really
around the rust areas.. looks like a Door post replacement is in the future.. I will patch up the fender holes before I finish sealing the underbody...

Making progress on the underbody after experimenting with various stripping techniques… best one I found for getting the undercoat off was a paint scraper.. hitting the hard to reach nooks and crannies with the blaster.
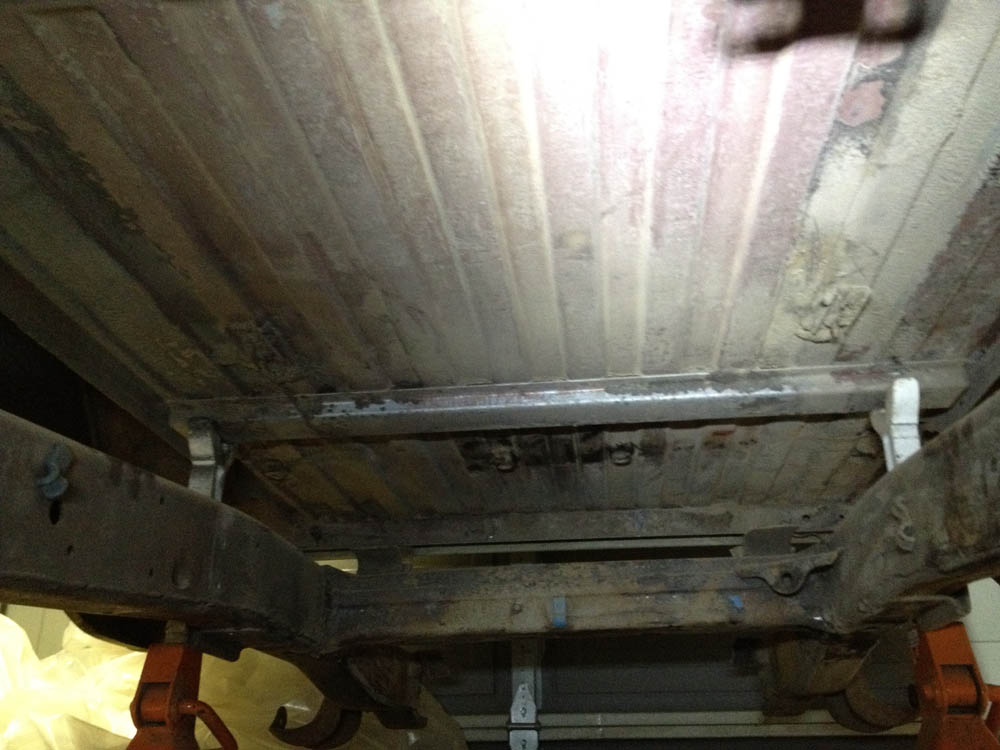

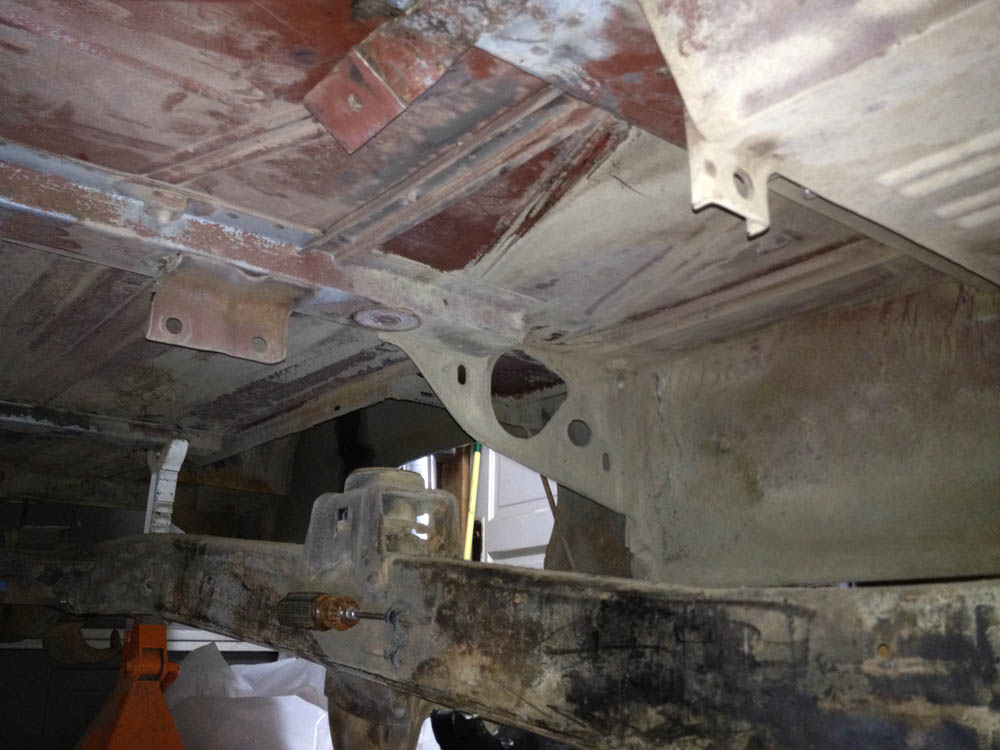
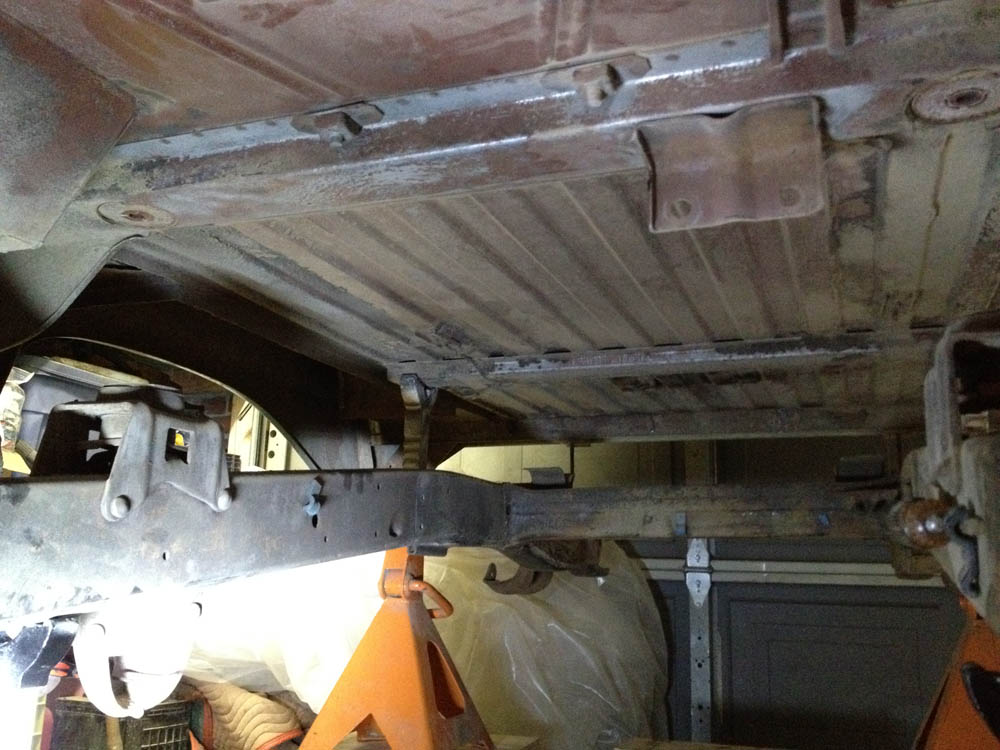


well now that i have access to the whole frame I will concentrate cleaning it up and then move back to the body sides and rear fenders.. then touchup, cleaning everything in the garage after my blasting sessions and then marine clean, metal prep and POR-15… still haven't decided what to coat the body with, leaning toward a spray on product.. something not goopy and can easily be blasted off...
-
landshark - Official CCB Member
- Posts: 3942
- Joined: Thu Oct 13, 2011 11:16 pm
- Location: Denver, Wash Park Area
Re: Landsharks 76er Refresh and Build
![]() by Jesus_man » Tue Jan 17, 2012 7:35 am
by Jesus_man » Tue Jan 17, 2012 7:35 am
http://www.ucora.org
-
Jesus_man - Official CCB Member
- Posts: 5987
- Joined: Thu Nov 11, 2010 9:36 am
- Location: California
Re: Landsharks 76er Refresh and Build
![]() by airbur » Tue Jan 17, 2012 11:27 am
by airbur » Tue Jan 17, 2012 11:27 am
-

airbur - Official CCB Member
- Posts: 1721
- Images: 0
- Joined: Wed Sep 29, 2010 7:39 am
- Location: Castle Pines, CO
Return to General 4x4 Technical
Who is online
Users browsing this forum: No registered users and 6 guests