www.ColoradoClassicBroncos.com
A place for Coloradans to unite with our love of 66-77 Ford Broncos
Landsharks 76er Refresh and Build
Re: Landsharks 76er Refresh and Build
![]() by Shawns Fords » Tue Jan 17, 2012 4:26 pm
by Shawns Fords » Tue Jan 17, 2012 4:26 pm
- Shawns Fords
- Official CCB Member

- Posts: 779
- Images: 0
- Joined: Sat Oct 02, 2010 6:36 pm
Re: Landsharks 76er Refresh and Build
![]() by landshark » Tue Jan 17, 2012 4:41 pm
by landshark » Tue Jan 17, 2012 4:41 pm
they also make a BLACKCOTE which looks to be glossy vs matt finish.. for the under side of the truck i dont think it matters too much.. iam covering the axles frame and hardwre in por-15 then chassis saver... so i think that combo will work ;)
-

landshark - Official CCB Member
- Posts: 3942
- Joined: Thu Oct 13, 2011 11:16 pm
- Location: Denver, Wash Park Area
Re: Landsharks 76er Refresh and Build
![]() by Jesus_man » Tue Jan 17, 2012 5:11 pm
by Jesus_man » Tue Jan 17, 2012 5:11 pm
http://www.ucora.org
-

Jesus_man - Official CCB Member
- Posts: 5987
- Joined: Thu Nov 11, 2010 9:36 am
- Location: California
Re: Landsharks 76er Refresh and Build
![]() by Gunnibronco » Tue Jan 17, 2012 5:38 pm
by Gunnibronco » Tue Jan 17, 2012 5:38 pm
74-AWB 98", ZF5, Atlas4, TGW HP1060 and HP1014 axles, ARBs, 37's, 3.5" lift-5.5" front coil springs, Tahoe rear springs, EFI 302, h-boost, York OBA, 4x4x2, custom dash & gauges
72 U15- Explorer Sport-Candyapple Red (1 of 141)
-
Gunnibronco - Official CCB Member
- Posts: 4074
- Joined: Mon Jan 03, 2011 5:07 pm
- Location: Gardnerville, NV
Re: Landsharks 76er Refresh and Build
![]() by landshark » Tue Jan 17, 2012 6:11 pm
by landshark » Tue Jan 17, 2012 6:11 pm
I will look up anchor paint and check it out!
-
landshark - Official CCB Member
- Posts: 3942
- Joined: Thu Oct 13, 2011 11:16 pm
- Location: Denver, Wash Park Area
Re: Landsharks 76er Refresh and Build
![]() by Gunnibronco » Tue Jan 17, 2012 6:39 pm
by Gunnibronco » Tue Jan 17, 2012 6:39 pm
74-AWB 98", ZF5, Atlas4, TGW HP1060 and HP1014 axles, ARBs, 37's, 3.5" lift-5.5" front coil springs, Tahoe rear springs, EFI 302, h-boost, York OBA, 4x4x2, custom dash & gauges
72 U15- Explorer Sport-Candyapple Red (1 of 141)
-
Gunnibronco - Official CCB Member
- Posts: 4074
- Joined: Mon Jan 03, 2011 5:07 pm
- Location: Gardnerville, NV
Re: Landsharks 76er Refresh and Build
![]() by landshark » Mon Jan 30, 2012 11:10 pm
by landshark » Mon Jan 30, 2012 11:10 pm
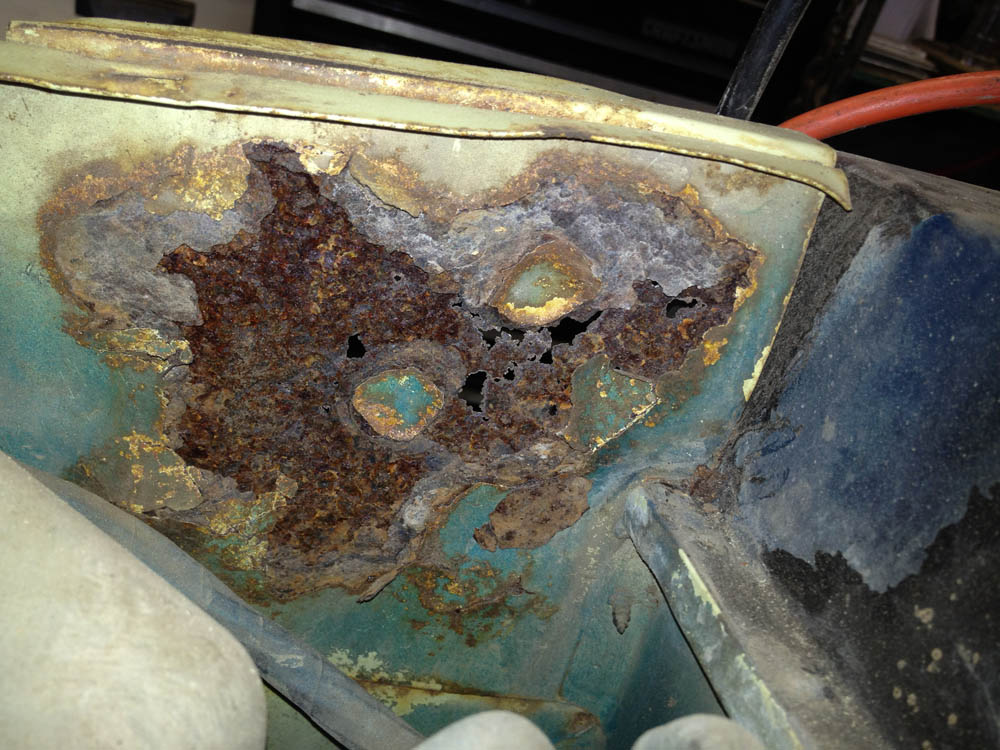
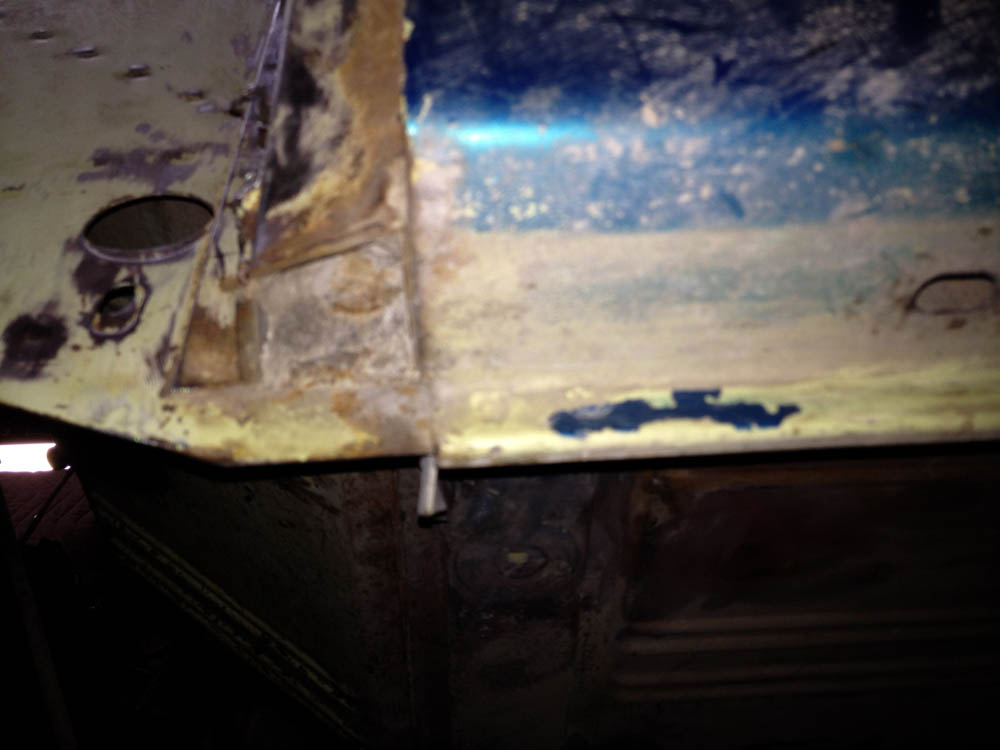
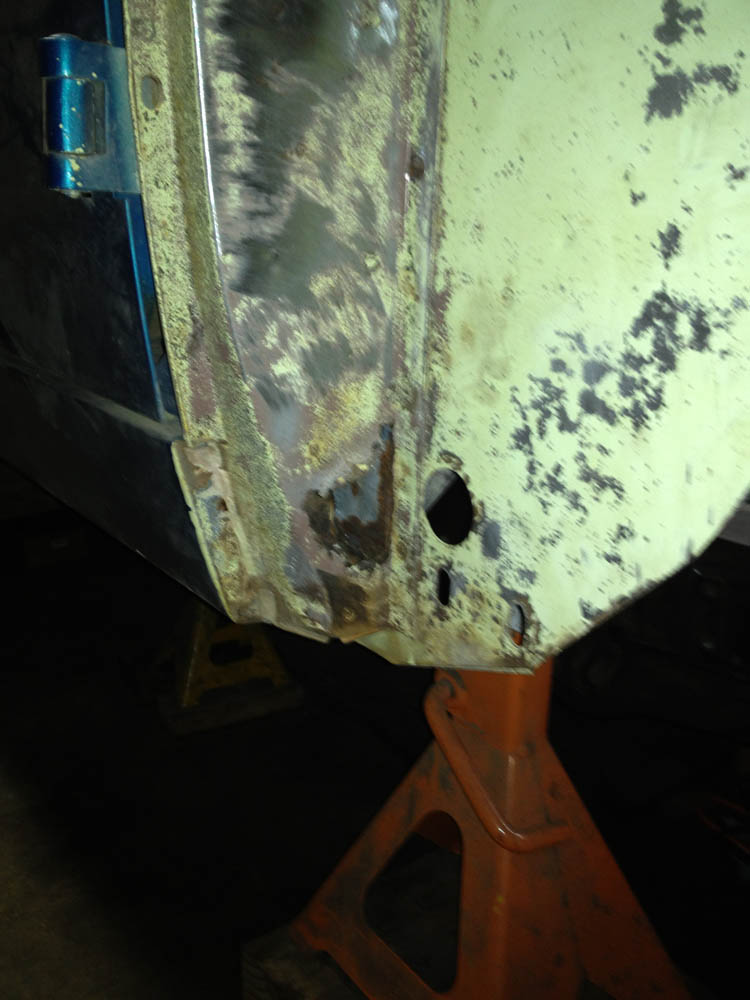
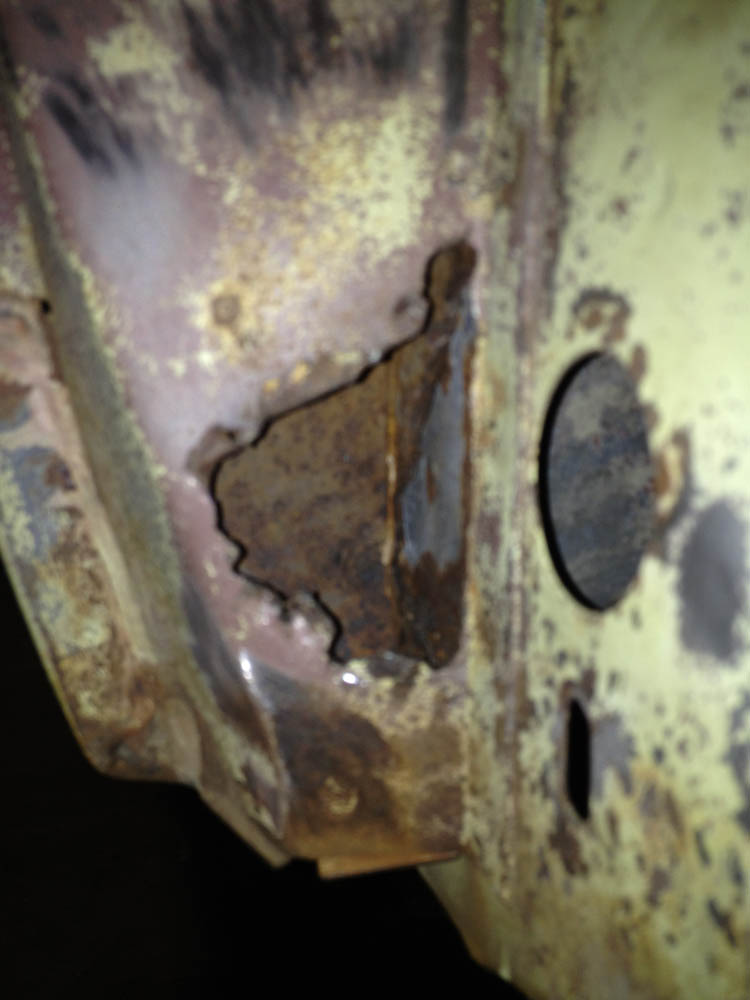
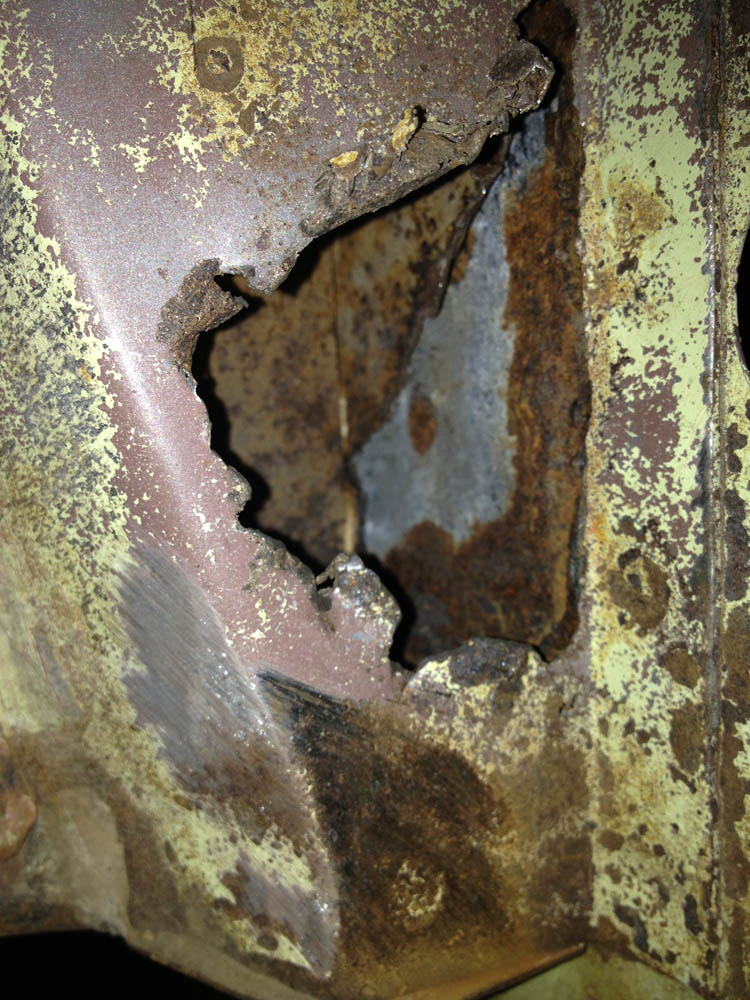
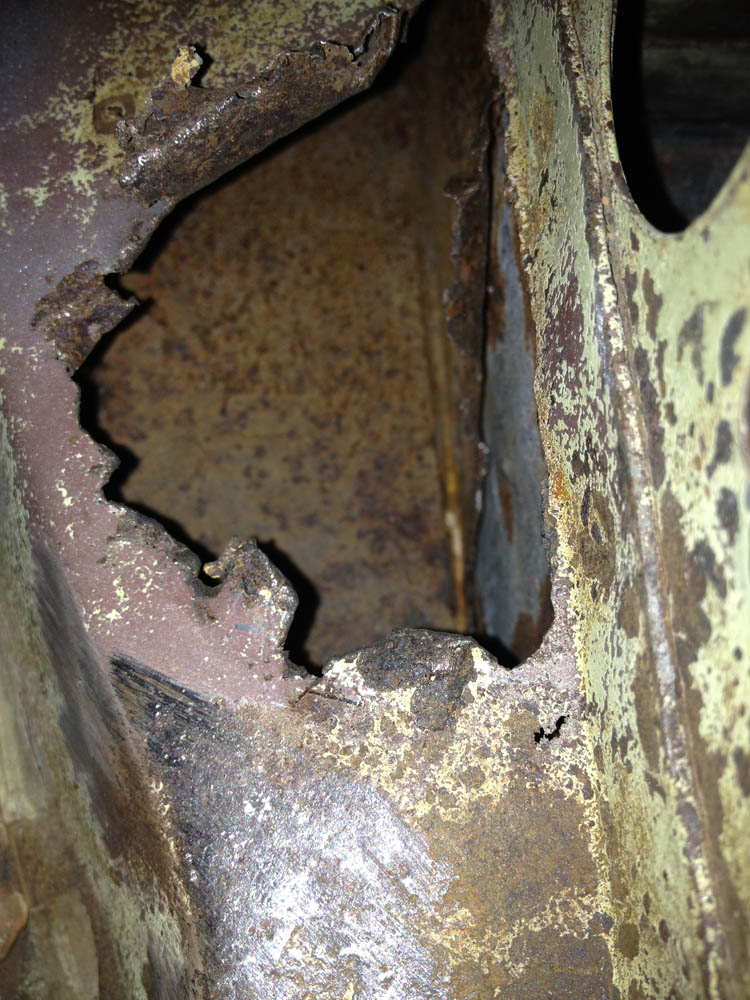
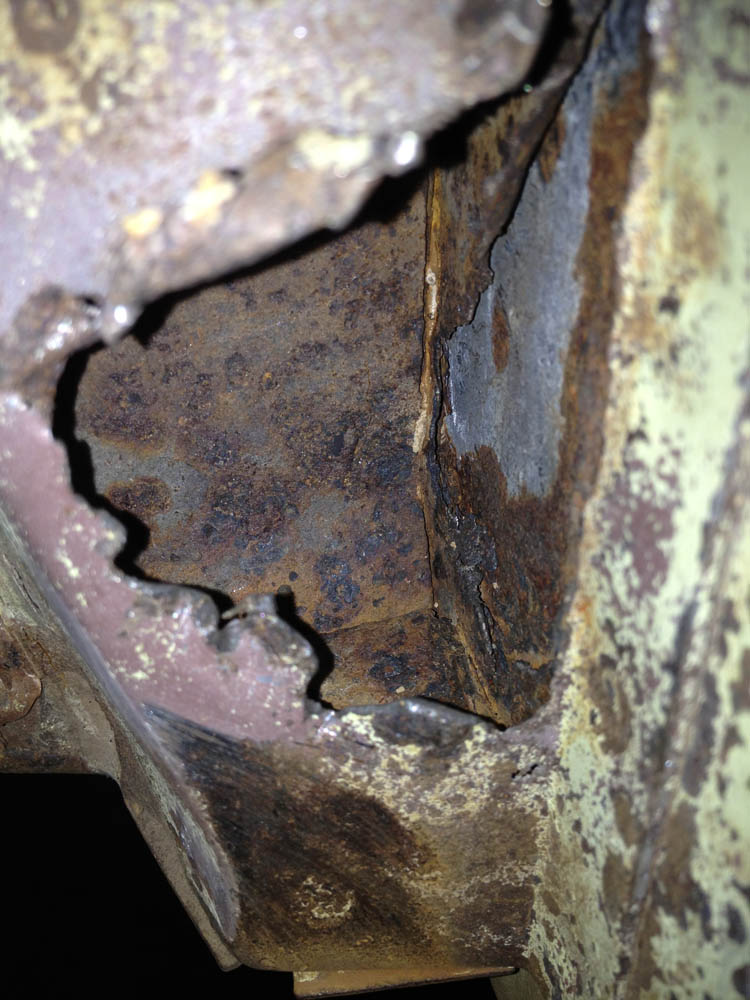
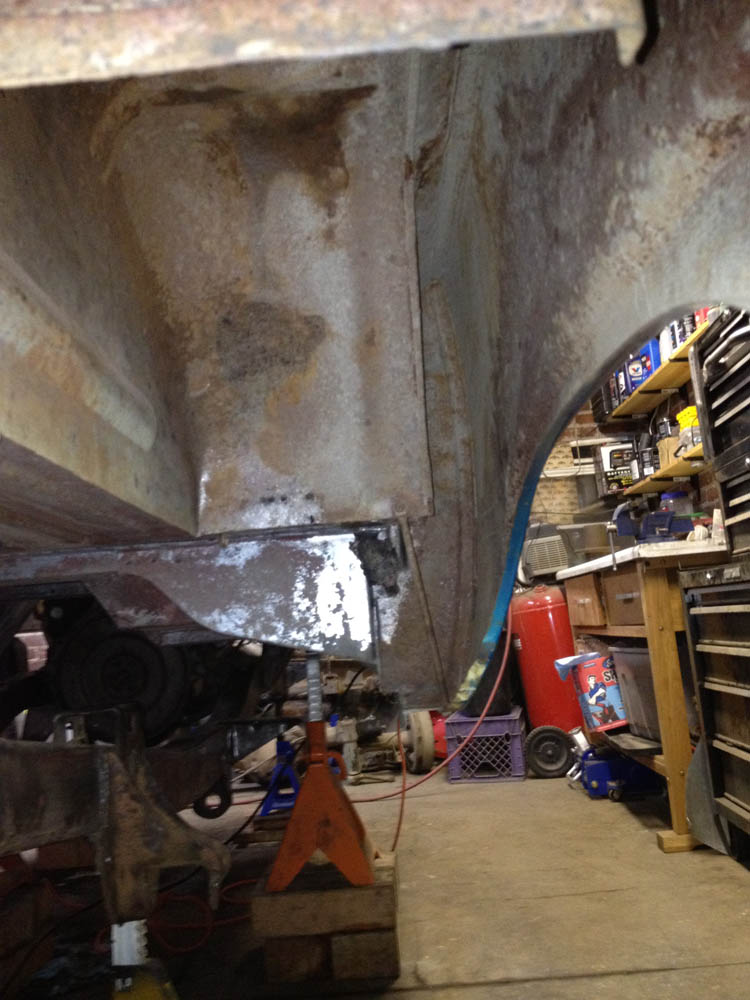
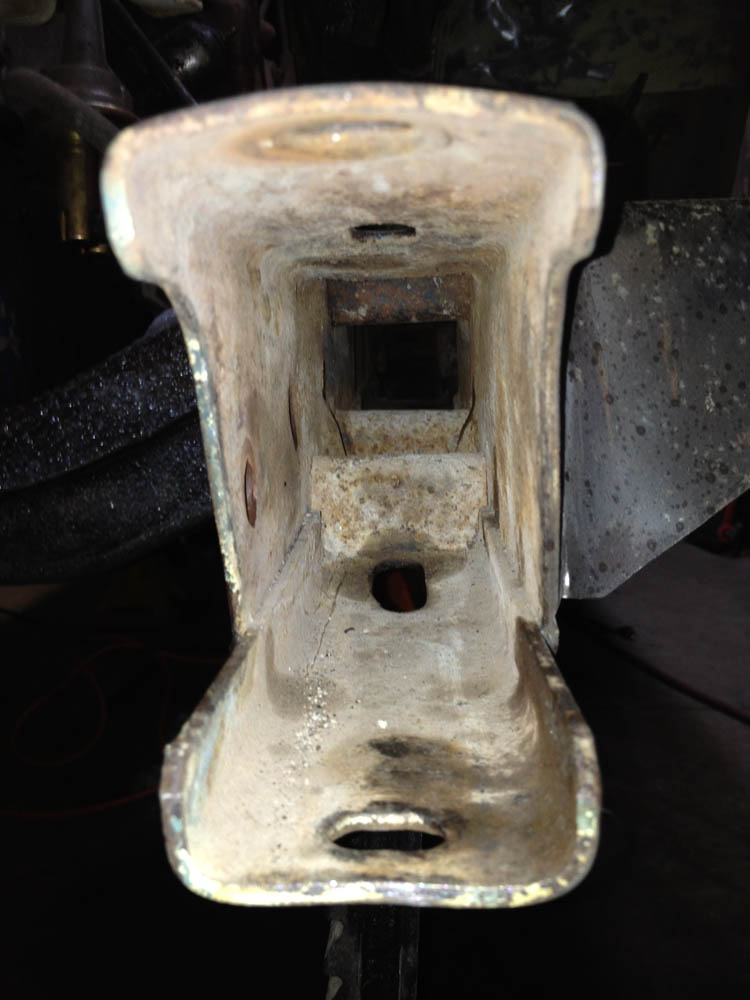
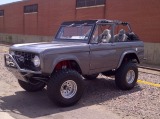
Anyway i have started thinking about the rust spots that need to be repaired and took a few photos of the problem areas. I have a good idea on what to do on most of the areas however a little advice is always welcome!
I'm fighting the urge to get the suspension together and then stripping down the tub and just get it blasted patched and then painted... but sadly its not in my budget right now... so reluctantly it can wait.
Anyway, here is a breakdown of what I have to patch, replace or ???
The front side walls of the engine bay are pretty obvious, patch them up (after i get the frame back on the body). Pretty straight forward.
Drivers Side

Passenger Side

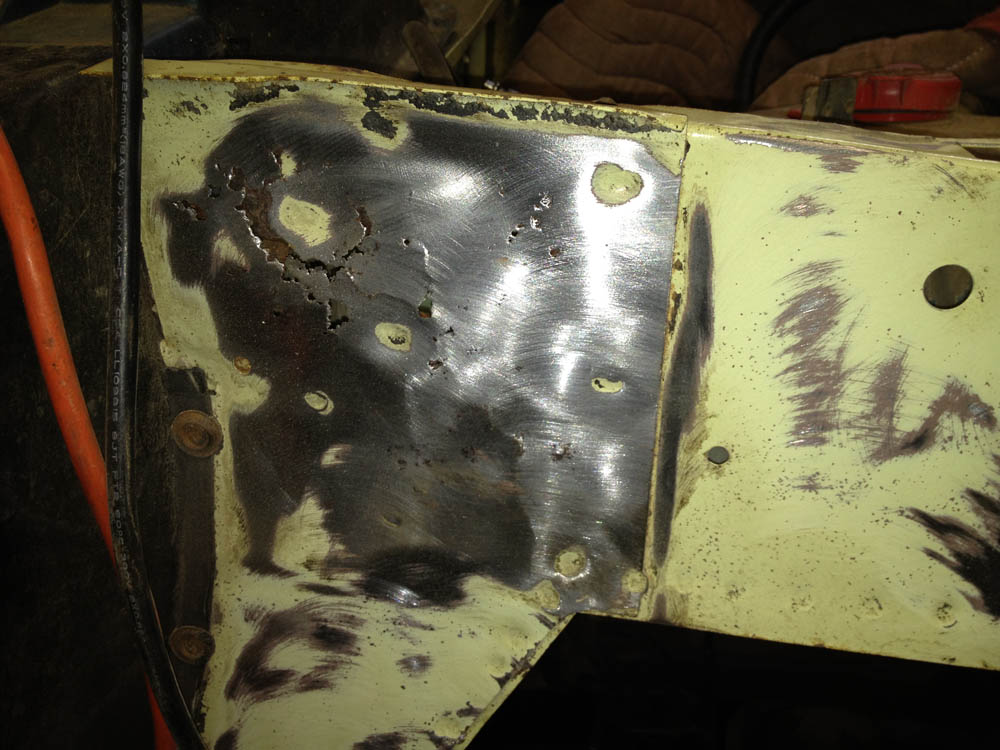
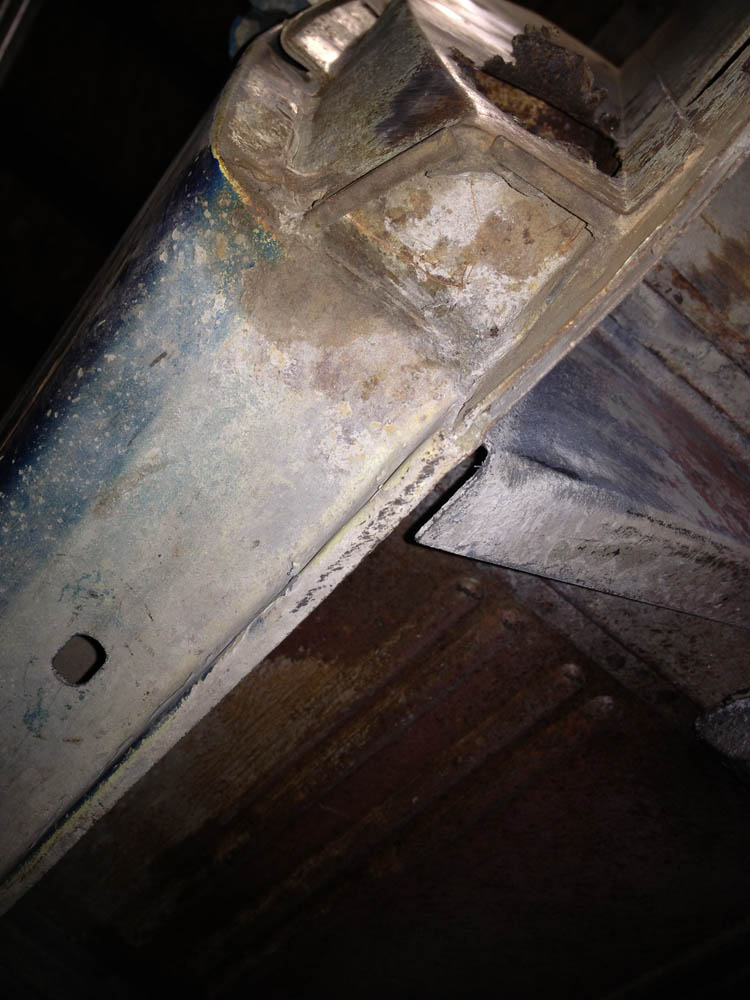
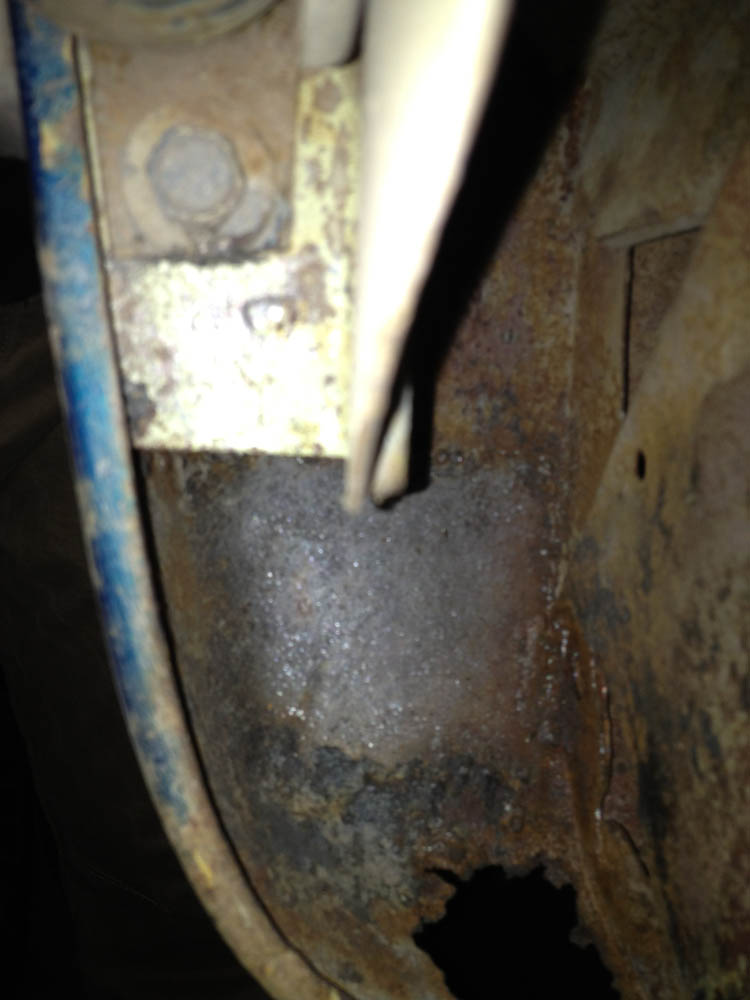
Next up is the front side front door pillar post on the drivers side. I was thinking the whole post would have to be replaced. But maybe i can patch it and make sure i seal the inside real good with a decent rust inhibitor? i tried to get some pics up inside.. the rot really doesn't go up too far and I couldn't find any underneath or on the hinge side of the post... what would you guys do?
Drivers side pillar.
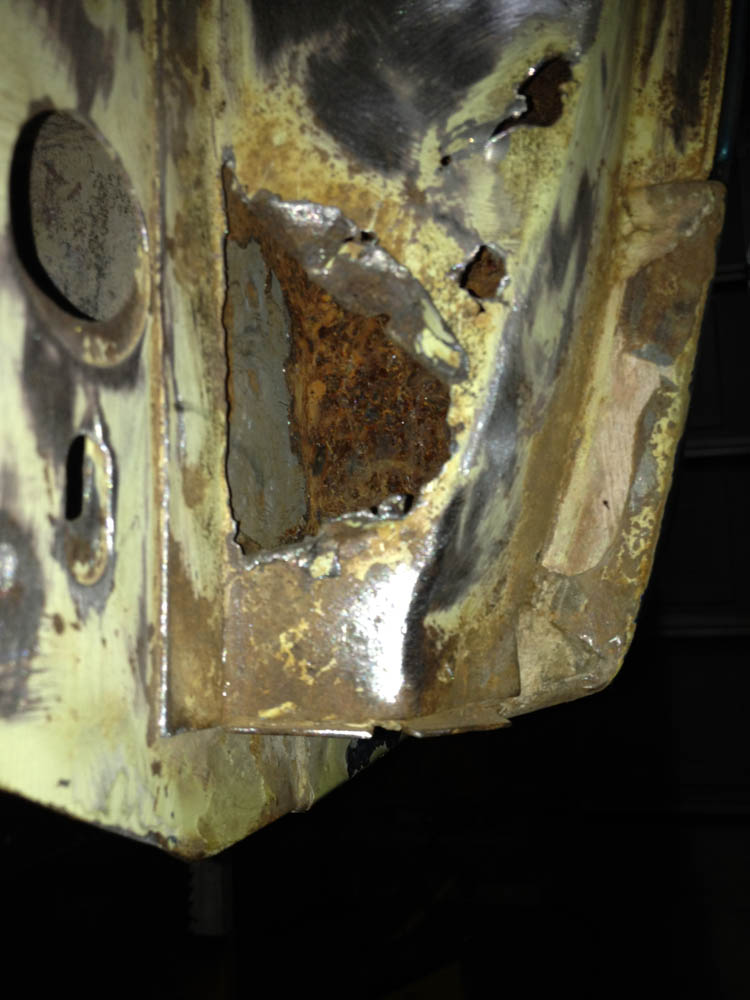

Passenger side door pillar...
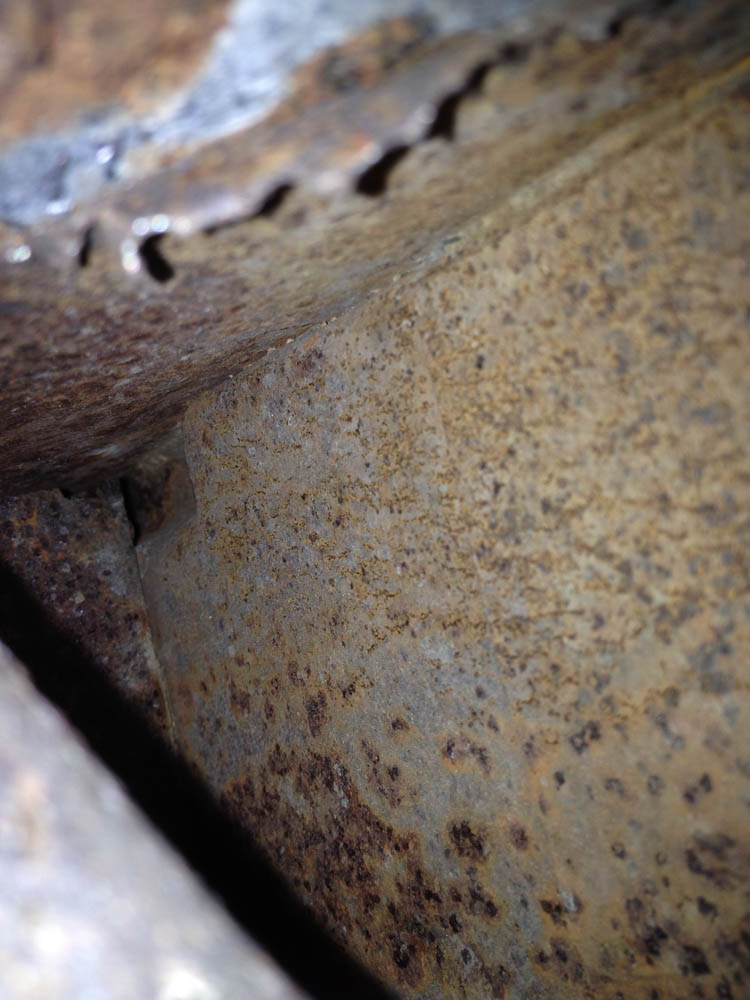
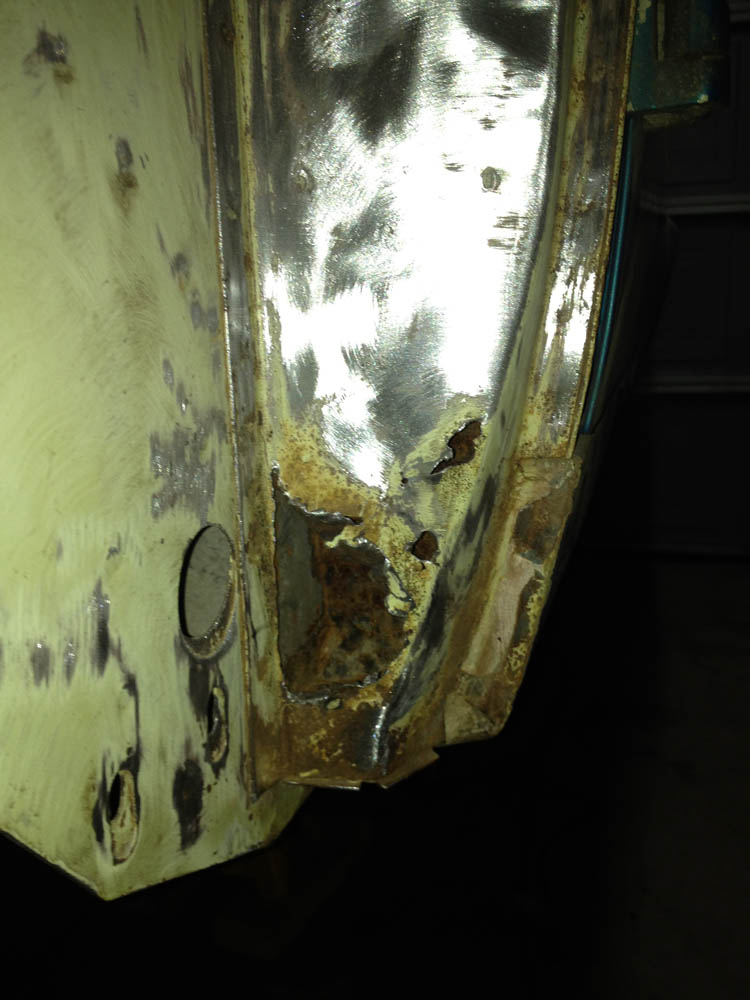
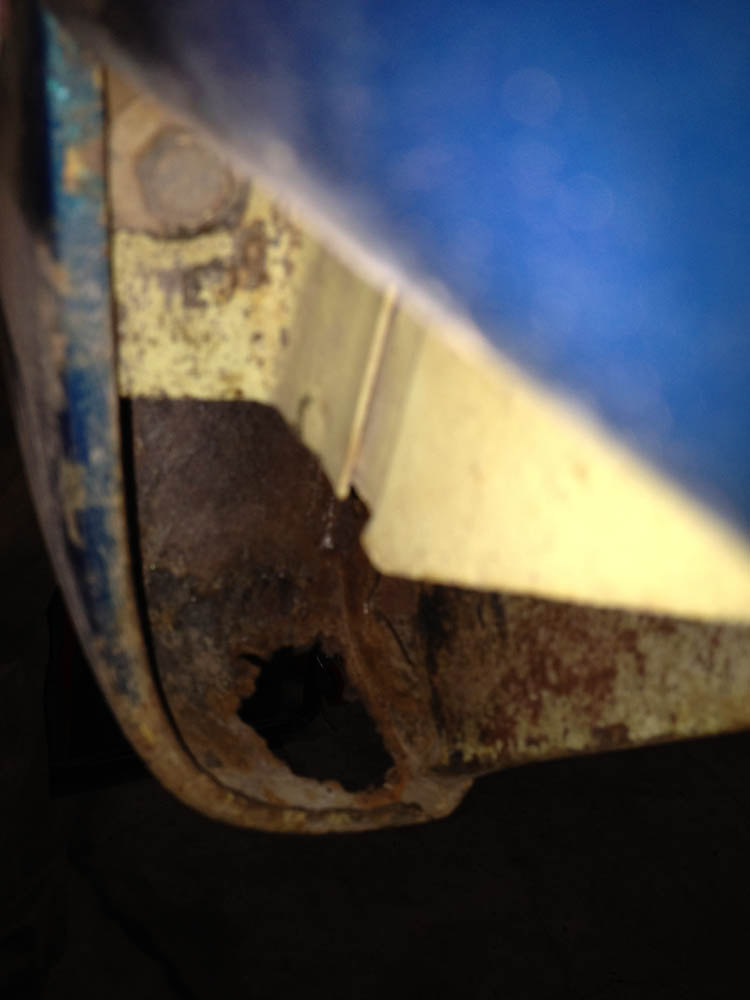
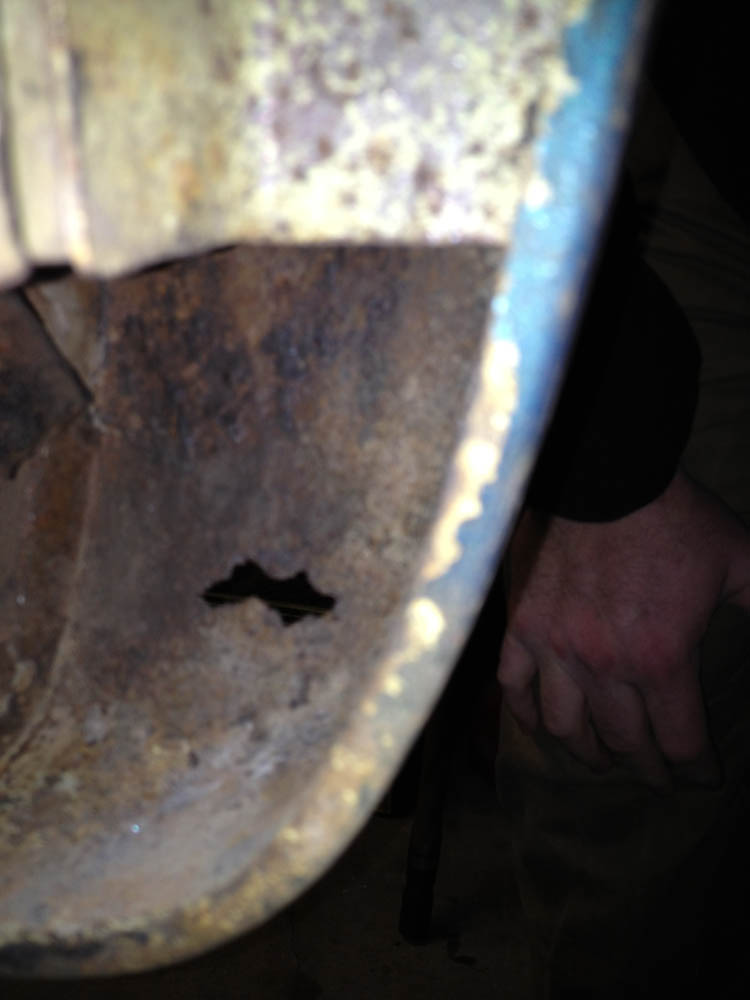
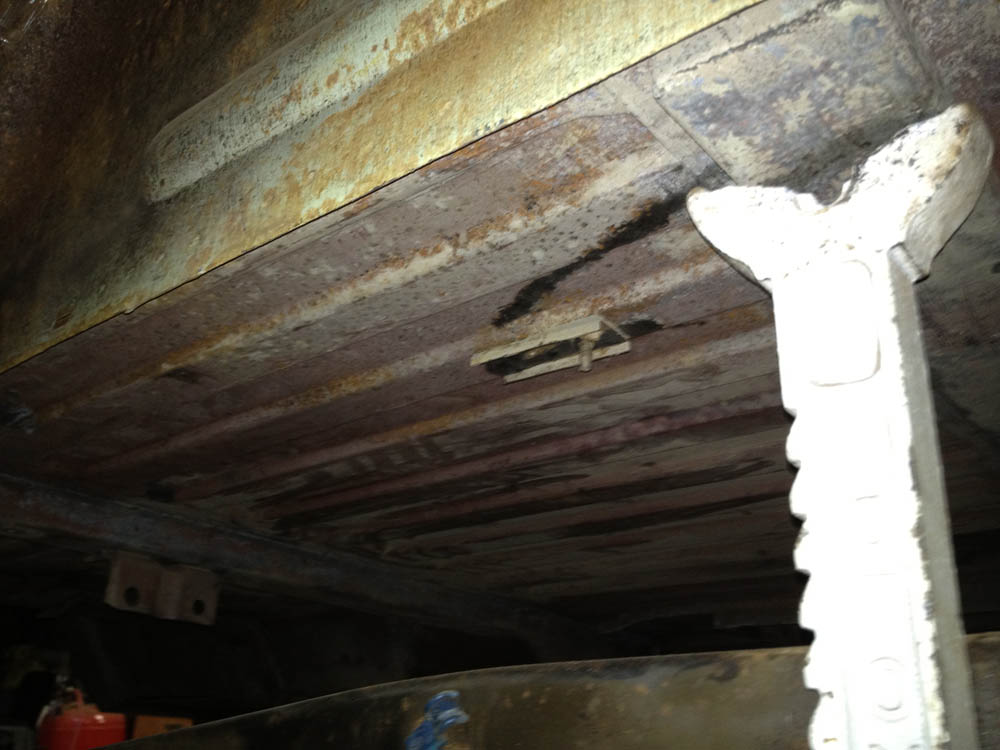
My next areas are the two rear lower corner panels, one had been patched or partially patched as it turns out.. a little bondo on the bottom of the tail light panel.. feel right out when i hit it with the needler.. anyway thinking i should just make up new sections for each side and bend them into shape.. however it might be better to just replace both ends? thoughts?
Drivers side
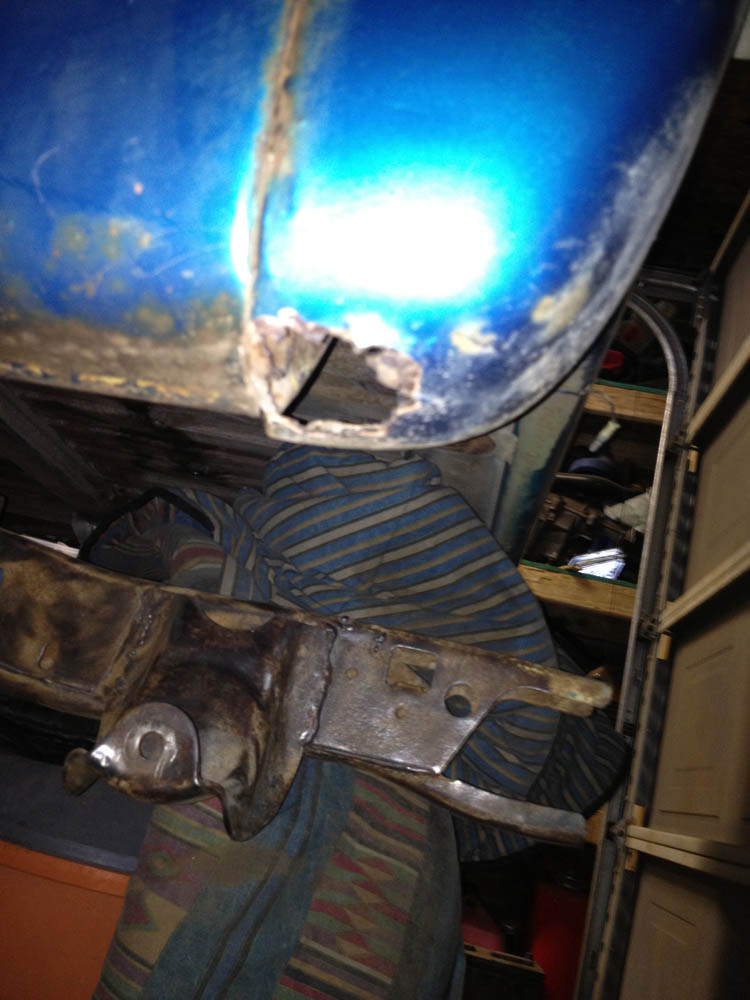

Passenger side
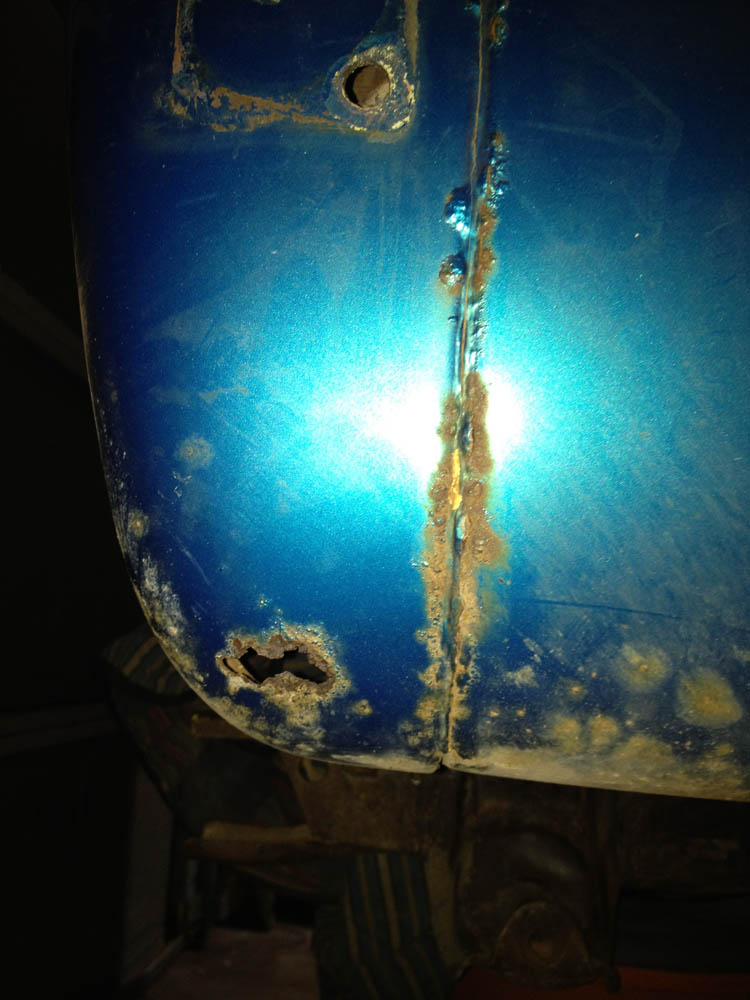
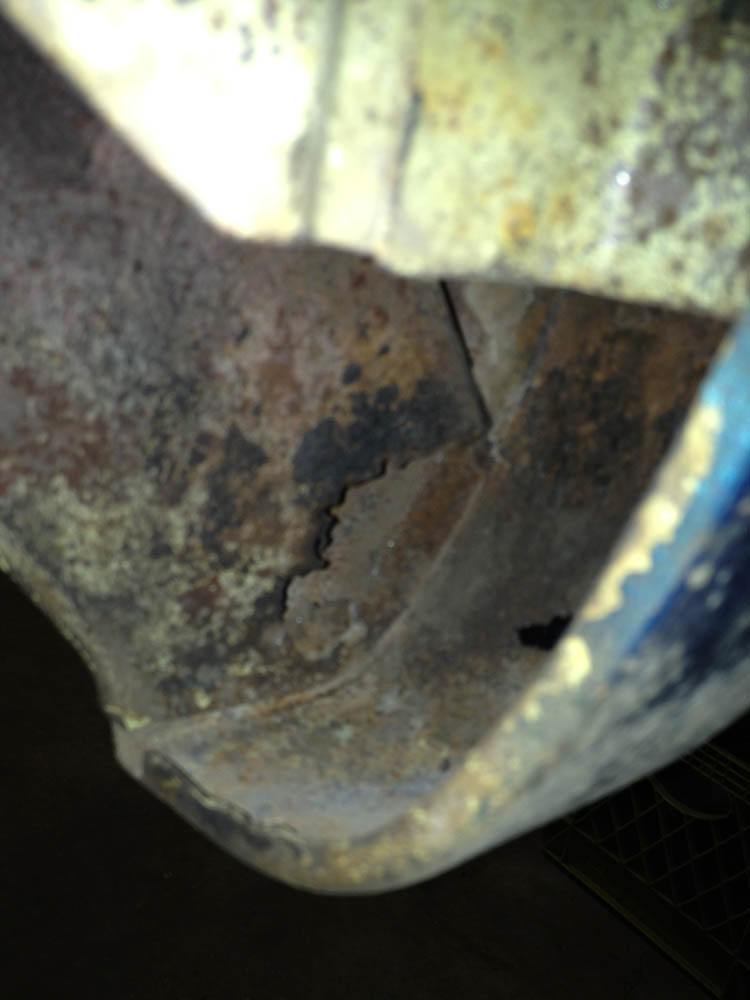
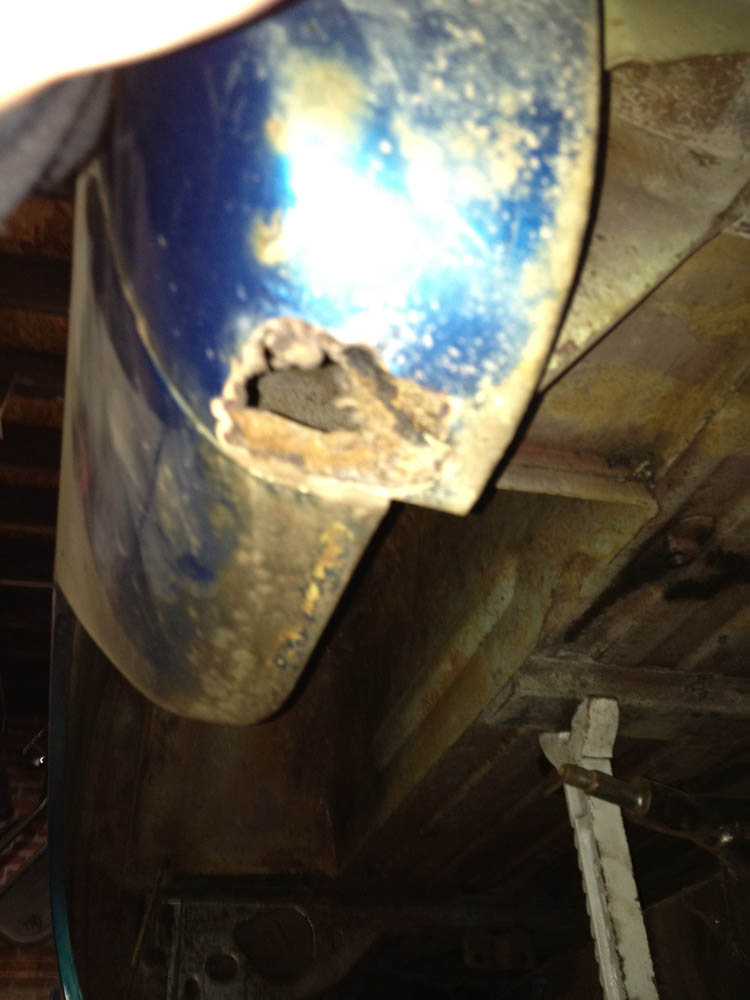
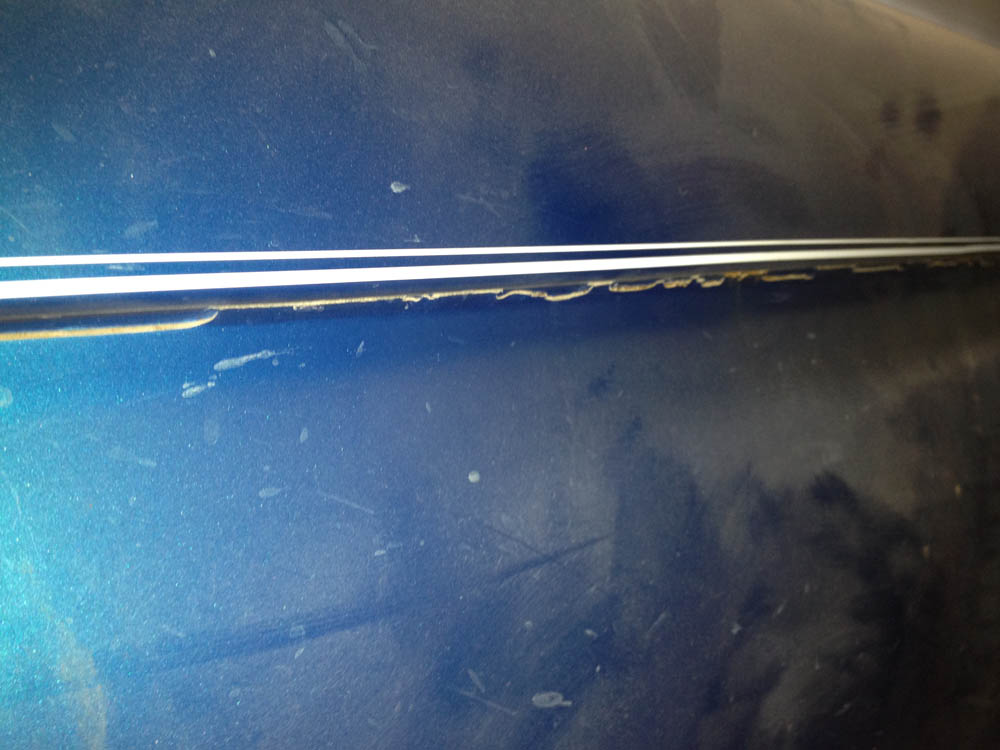
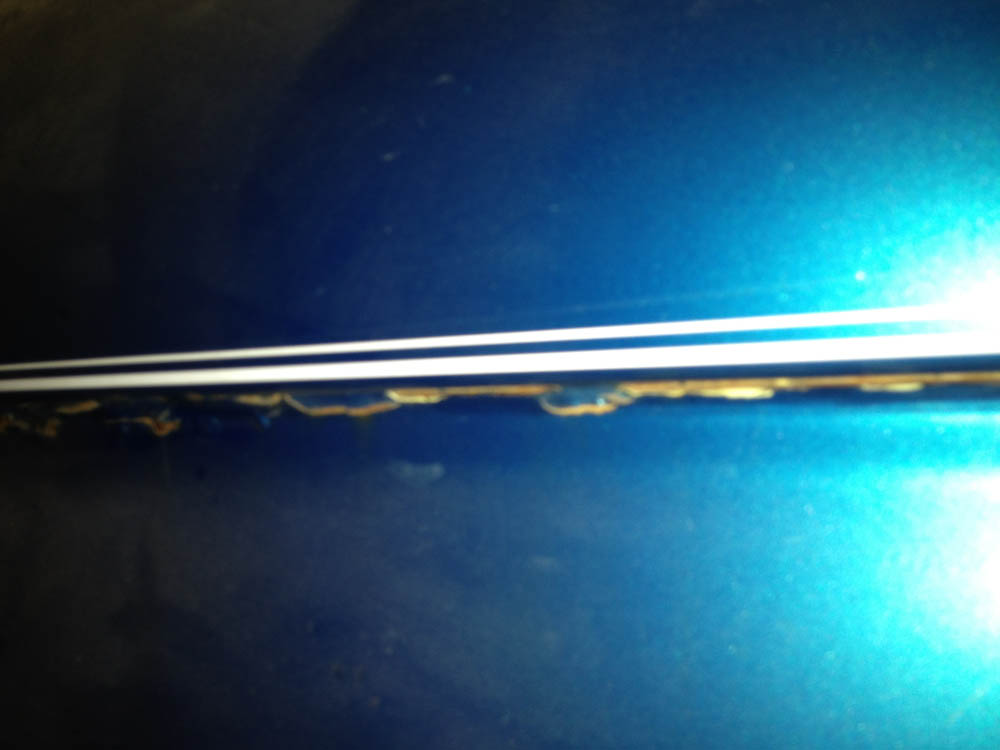
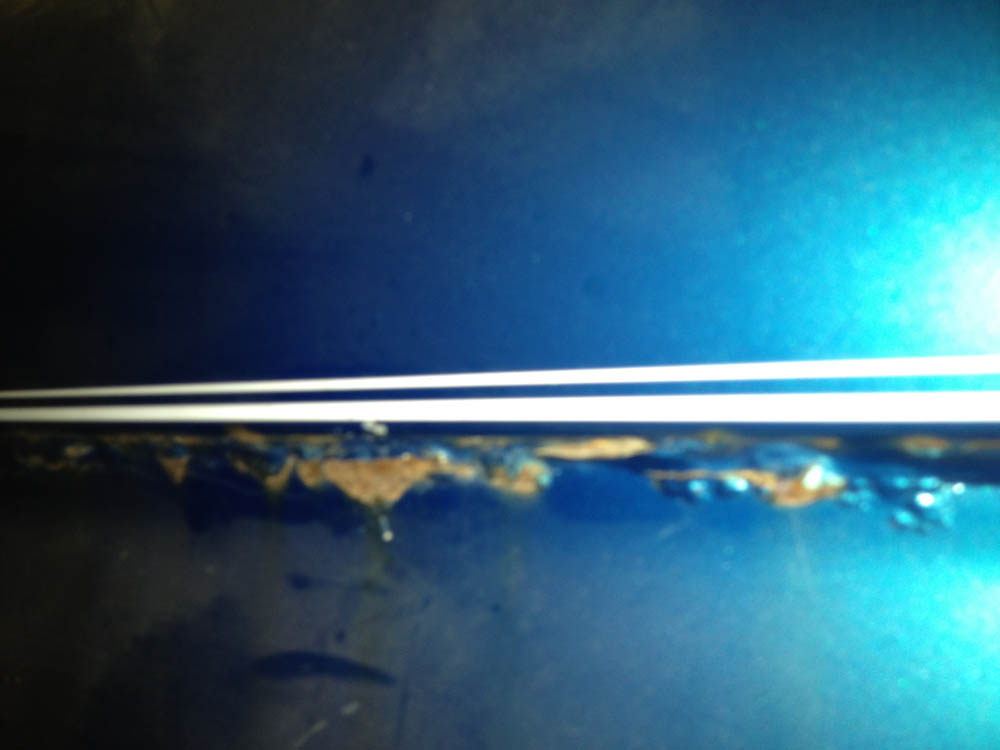
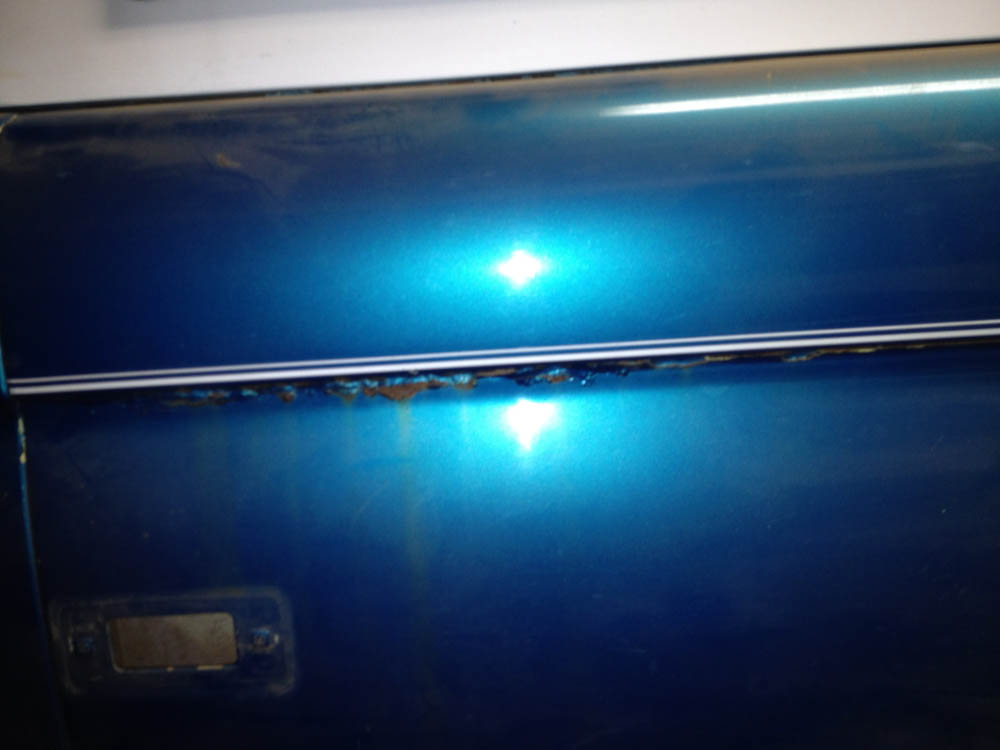
and so the last area(s) the quarter panels... the passenger side seems to be the worse bit. Not sure what to do besides to go and replace both panels.. which would really be a bummer since no other part of the quarter panel is rusted and Iam trying to keep the truck as original as possible.. anyway.. advice?
Drivers side quarter panel.
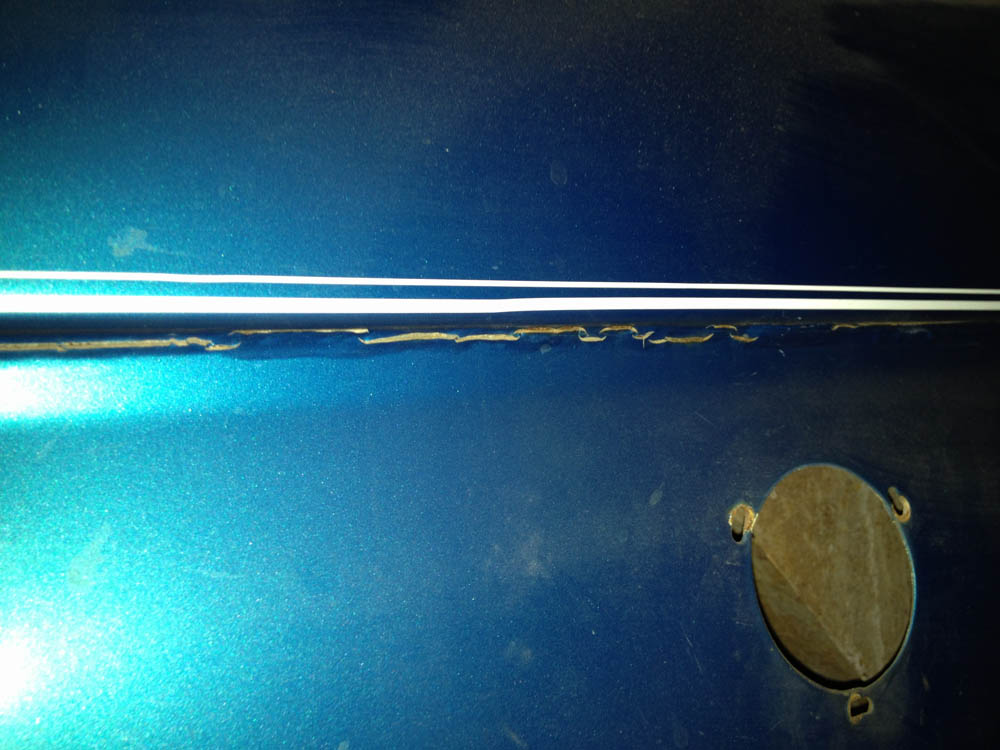
Passenger side quarter panel

Anyway those are my areas to work on... i know compared to some rigs its not that bad.. but I'm not a body guy and seeing how iam restoring this truck back to original and I want to make sure its done right. Any advice is welcome
I expect I can seal the frame and most of the body and then tackle the patches once the suspension is back together...so i have some time...
-
landshark - Official CCB Member
- Posts: 3942
- Joined: Thu Oct 13, 2011 11:16 pm
- Location: Denver, Wash Park Area
Re: Landsharks 76er Refresh and Build
![]() by landshark » Mon Jan 30, 2012 11:19 pm
by landshark » Mon Jan 30, 2012 11:19 pm

got most of the dirt and sand out of the frame.. i will give it a good rinse and do the best i can to clean it up before i drag a rag soaked with por-15 through...

-
landshark - Official CCB Member
- Posts: 3942
- Joined: Thu Oct 13, 2011 11:16 pm
- Location: Denver, Wash Park Area
Re: Landsharks 76er Refresh and Build
![]() by Justin » Tue Jan 31, 2012 8:55 am
by Justin » Tue Jan 31, 2012 8:55 am
-
Justin - Official CCB Member
- Posts: 6198
- Images: 0
- Joined: Sat Oct 09, 2010 11:04 pm
- Location: Lakewood
Re: Landsharks 76er Refresh and Build
![]() by Entourage » Tue Jan 31, 2012 8:55 am
by Entourage » Tue Jan 31, 2012 8:55 am
-
Entourage - Official CCB Member
- Posts: 3275
- Joined: Wed Sep 29, 2010 4:45 pm
- Location: Gilbert, Arizona
Re: Landsharks 76er Refresh and Build
![]() by landshark » Tue Jan 31, 2012 9:09 am
by landshark » Tue Jan 31, 2012 9:09 am
I ended up useing a scaler / needeler form harbor frieght.. it quit working about 2 hours into removing the undercoat but took it apart sanded down the piston and then lubed it up real good and has been great since. I should be completly done with the frame and ready to por-15 it pretty soon, going away this weekend otherwise it would be done.
http://www.harborfreight.com/air-tools/specialty-air-tools/compact-air-needle-scaler-96997.html
i got the inside of the frame pretty good, scraped what i could from the holes in it then put the vacuum in there and got most of the pebbles, sand and other stuff that was in there.. i know its not perfect but i think i will run some water in there before the weekend and let it dry out until monday.
I was going to run a sponge or rag soaked in por-15 through the frame.. i bought one of those nylon drain snakes and think it should work pretty well.
Also was thinking about picking up a sealer that has one of those flexible tubes on it and just give the inside of the frame a good hit..
Honestly iam not too worried about the inside of the frame. I think it will be fine.
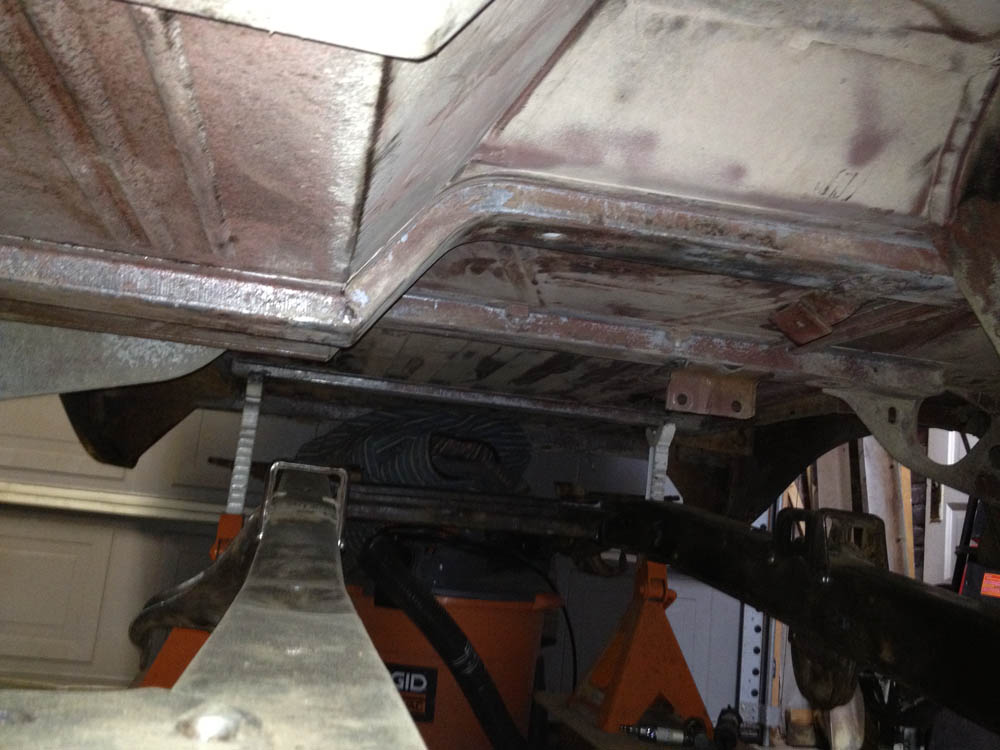
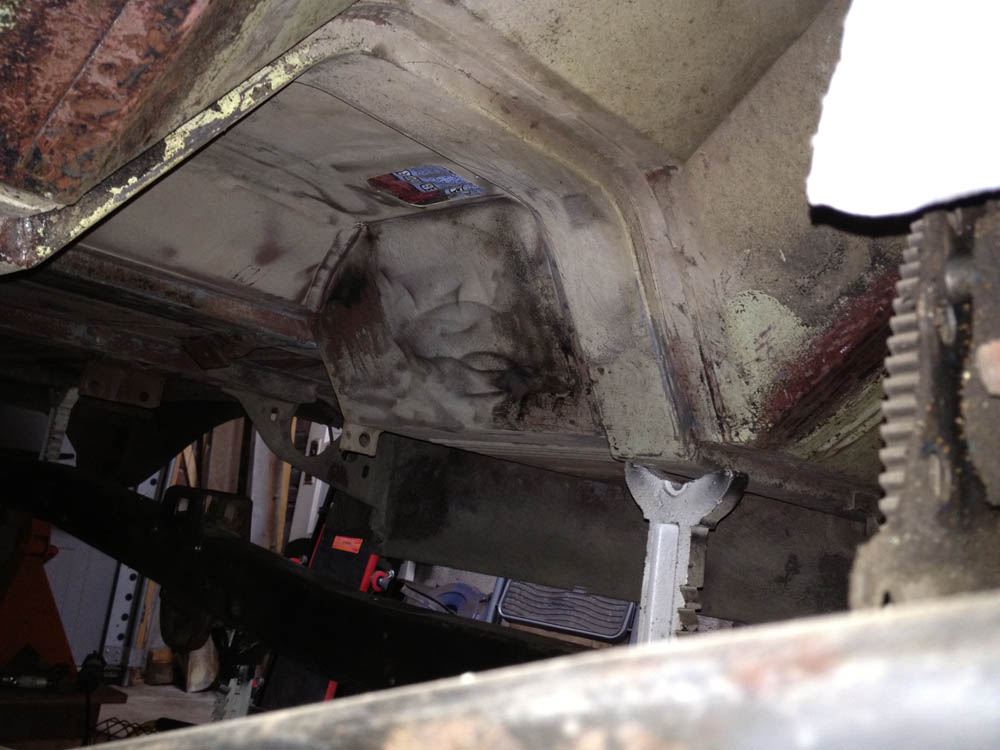
I do have a game plan for the under body. I am going to go over the entire underbody to make sure the old seam sealer is removed then clean the entire thing with a good solvent, prime it, then use Fusor 800EZ for the seams outside and inside, then chassis saver over that.. should work pretty well.
-
landshark - Official CCB Member
- Posts: 3942
- Joined: Thu Oct 13, 2011 11:16 pm
- Location: Denver, Wash Park Area
Re: Landsharks 76er Refresh and Build
![]() by Gunnibronco » Tue Jan 31, 2012 12:14 pm
by Gunnibronco » Tue Jan 31, 2012 12:14 pm
74-AWB 98", ZF5, Atlas4, TGW HP1060 and HP1014 axles, ARBs, 37's, 3.5" lift-5.5" front coil springs, Tahoe rear springs, EFI 302, h-boost, York OBA, 4x4x2, custom dash & gauges
72 U15- Explorer Sport-Candyapple Red (1 of 141)
-
Gunnibronco - Official CCB Member
- Posts: 4074
- Joined: Mon Jan 03, 2011 5:07 pm
- Location: Gardnerville, NV
Re: Landsharks 76er Refresh and Build
![]() by 777mechanic » Wed Feb 01, 2012 8:23 pm
by 777mechanic » Wed Feb 01, 2012 8:23 pm
- 777mechanic
- Official CCB Member
- Posts: 252
- Joined: Sat Oct 23, 2010 8:00 pm
Re: Landsharks 76er Refresh and Build
![]() by landshark » Wed Feb 01, 2012 9:31 pm
by landshark » Wed Feb 01, 2012 9:31 pm
777mechanic wrote:body doesn't look to bad , but make sure that your seams are spotless as in no rust or it will wick water and bubble out after paint . that's what pushed me to have mine blasted and just said the heck with the time line and just do it once and do it right . frame looks great when i shot mine i used cheap chassis prime and flooded it into frame from both ends . great job so far
iam going to probably patch, prime then try to match the paint this year.. then blast the tub/body next year and do a real paint job.. but i will make sure all the rust is taken care of.
thanks the feedback keeps me going
-
landshark - Official CCB Member
- Posts: 3942
- Joined: Thu Oct 13, 2011 11:16 pm
- Location: Denver, Wash Park Area
Re: Landsharks 76er Refresh and Build
![]() by landshark » Wed Feb 08, 2012 9:15 pm
by landshark » Wed Feb 08, 2012 9:15 pm
pulled the rear end apart to get it ready to be blasted and rebuilt. Starting pulling the old bearings and races off tonight.


-
landshark - Official CCB Member
- Posts: 3942
- Joined: Thu Oct 13, 2011 11:16 pm
- Location: Denver, Wash Park Area
Re: Landsharks 76er Refresh and Build
![]() by landshark » Sun Feb 12, 2012 9:50 pm
by landshark » Sun Feb 12, 2012 9:50 pm
a friend of mine dropped off a engine hoist and engine stand as well so hope to have the engine pulled this week and then get back to sealing the tub and the frame and finally get things moving into "put back together" mode!
Yes this is modern art ;)


-
landshark - Official CCB Member
- Posts: 3942
- Joined: Thu Oct 13, 2011 11:16 pm
- Location: Denver, Wash Park Area
Re: Landsharks 76er Refresh and Build
![]() by landshark » Sun Feb 19, 2012 10:07 pm
by landshark » Sun Feb 19, 2012 10:07 pm
Finished building the Dana44 and put it on a dolly to make it easier to roll around the stamp size garage.


-
landshark - Official CCB Member
- Posts: 3942
- Joined: Thu Oct 13, 2011 11:16 pm
- Location: Denver, Wash Park Area
Re: Landsharks 76er Refresh and Build
![]() by Moab Mike » Sun Feb 19, 2012 10:12 pm
by Moab Mike » Sun Feb 19, 2012 10:12 pm
-

Moab Mike - Official CCB Member
- Posts: 1940
- Joined: Mon Jan 03, 2011 1:59 pm
- Location: Witness Protection Program
Re: Landsharks 76er Refresh and Build
![]() by landshark » Sun Feb 19, 2012 10:19 pm
by landshark » Sun Feb 19, 2012 10:19 pm


i will be slowly tearing the engine down and cleaning and refreshing it when i get tired of doing other stuff.. the engine will probably be the last thing that goes in.
-
landshark - Official CCB Member
- Posts: 3942
- Joined: Thu Oct 13, 2011 11:16 pm
- Location: Denver, Wash Park Area
Re: Landsharks 76er Refresh and Build
![]() by landshark » Sun Feb 19, 2012 10:21 pm
by landshark » Sun Feb 19, 2012 10:21 pm
-
landshark - Official CCB Member
- Posts: 3942
- Joined: Thu Oct 13, 2011 11:16 pm
- Location: Denver, Wash Park Area
Re: Landsharks 76er Refresh and Build
![]() by landshark » Sun Feb 19, 2012 10:25 pm
by landshark » Sun Feb 19, 2012 10:25 pm
76fordbronco wrote:Nice work Chris, can't wait to see the end result.
thanks, feels good to have something together versus tearing something else apart!
now that i have the engine out of the way It will move a little faster as far as getting the frame finished up and the body sealed...
-
landshark - Official CCB Member
- Posts: 3942
- Joined: Thu Oct 13, 2011 11:16 pm
- Location: Denver, Wash Park Area
Re: Landsharks 76er Refresh and Build
![]() by Jesus_man » Mon Feb 20, 2012 7:28 am
by Jesus_man » Mon Feb 20, 2012 7:28 am
http://www.ucora.org
-
Jesus_man - Official CCB Member
- Posts: 5987
- Joined: Thu Nov 11, 2010 9:36 am
- Location: California
Re: Landsharks 76er Refresh and Build
![]() by Colorado75bronc » Mon Feb 20, 2012 7:00 pm
by Colorado75bronc » Mon Feb 20, 2012 7:00 pm
-

Colorado75bronc - Official CCB Member
- Posts: 996
- Joined: Fri Oct 22, 2010 6:13 pm
Landsharks 76er Refresh and Build
![]() by landshark » Tue Feb 21, 2012 11:31 pm
by landshark » Tue Feb 21, 2012 11:31 pm
A huge thanks to zillicon for taking the time to weld up a sketchy seam on the rear nine.
I think I'm going to seal the inside of the main tank. It looks pretty good but one end seems a bit iffy.
-
landshark - Official CCB Member
- Posts: 3942
- Joined: Thu Oct 13, 2011 11:16 pm
- Location: Denver, Wash Park Area
Re: Landsharks 76er Refresh and Build
![]() by landshark » Sun Mar 04, 2012 8:50 pm
by landshark » Sun Mar 04, 2012 8:50 pm
Cleaned up all the rear drum brake parts to get them ready to be installed, still need to see if I can save my rear drums or have to buy new ones.
Also took a few hours to finish prepping my frame, its ready to be painted finally!
Warm weather is here for the next few days so it will be a great time to get the painting done before it gets cold again...
anyway a few pics


-
landshark - Official CCB Member
- Posts: 3942
- Joined: Thu Oct 13, 2011 11:16 pm
- Location: Denver, Wash Park Area
Re: Landsharks 76er Refresh and Build
![]() by landshark » Wed Mar 07, 2012 10:37 am
by landshark » Wed Mar 07, 2012 10:37 am


Iam going to let the frame cure for the next few days then start to prep the underbody for seam sealer, primer and then some paint...
-
landshark - Official CCB Member
- Posts: 3942
- Joined: Thu Oct 13, 2011 11:16 pm
- Location: Denver, Wash Park Area
Re: Landsharks 76er Refresh and Build
![]() by landshark » Wed Mar 07, 2012 10:51 am
by landshark » Wed Mar 07, 2012 10:51 am
zillacon wrote:Lookin Sweet! Hurry up so we can get it dirty.
iam trying!
Honestly iam 2 months out.. and even then thats optimistic.
I have some big purchases that I will need in order to complete the build and i have to space them out over the next few months...
in no particular order...
TRE's / Steering
Engine refresh/rebuild parts
Radiator (non-aluminum)
Emissions 302 heads (going to look at the pick n pull)
Shocks (going with bilstien 5100's)
New Tires (Undecided)
New Carpet and sound deadening
Probably another $800 in misc parts
I will need to strip out the old seam sealer inside and reseal and then spray over that as well. Most of the interior can be fixed as I go and I can drive it in the mean time..
-
landshark - Official CCB Member
- Posts: 3942
- Joined: Thu Oct 13, 2011 11:16 pm
- Location: Denver, Wash Park Area
Re: Landsharks 76er Refresh and Build
![]() by HorseMan » Wed Mar 07, 2012 4:53 pm
by HorseMan » Wed Mar 07, 2012 4:53 pm
- HorseMan
- Official CCB Member
- Posts: 57
- Joined: Fri Jan 07, 2011 11:00 pm
Re: Landsharks 76er Refresh and Build
![]() by Gunnibronco » Wed Mar 07, 2012 7:02 pm
by Gunnibronco » Wed Mar 07, 2012 7:02 pm
74-AWB 98", ZF5, Atlas4, TGW HP1060 and HP1014 axles, ARBs, 37's, 3.5" lift-5.5" front coil springs, Tahoe rear springs, EFI 302, h-boost, York OBA, 4x4x2, custom dash & gauges
72 U15- Explorer Sport-Candyapple Red (1 of 141)
-
Gunnibronco - Official CCB Member
- Posts: 4074
- Joined: Mon Jan 03, 2011 5:07 pm
- Location: Gardnerville, NV
Re: Landsharks 76er Refresh and Build
![]() by landshark » Wed Mar 07, 2012 8:32 pm
by landshark » Wed Mar 07, 2012 8:32 pm
here is the por15
then after the chassis saver...
you can see its not as glossy but i kinda like it... I will do touch up after everything is together.. but i tried to get every knook and cranny.. was tough on the welds, went through 3 packs of sponge brushes.. but they were el cheapo ones..
-
landshark - Official CCB Member
- Posts: 3942
- Joined: Thu Oct 13, 2011 11:16 pm
- Location: Denver, Wash Park Area
Return to General 4x4 Technical
Who is online
Users browsing this forum: No registered users and 1 guest