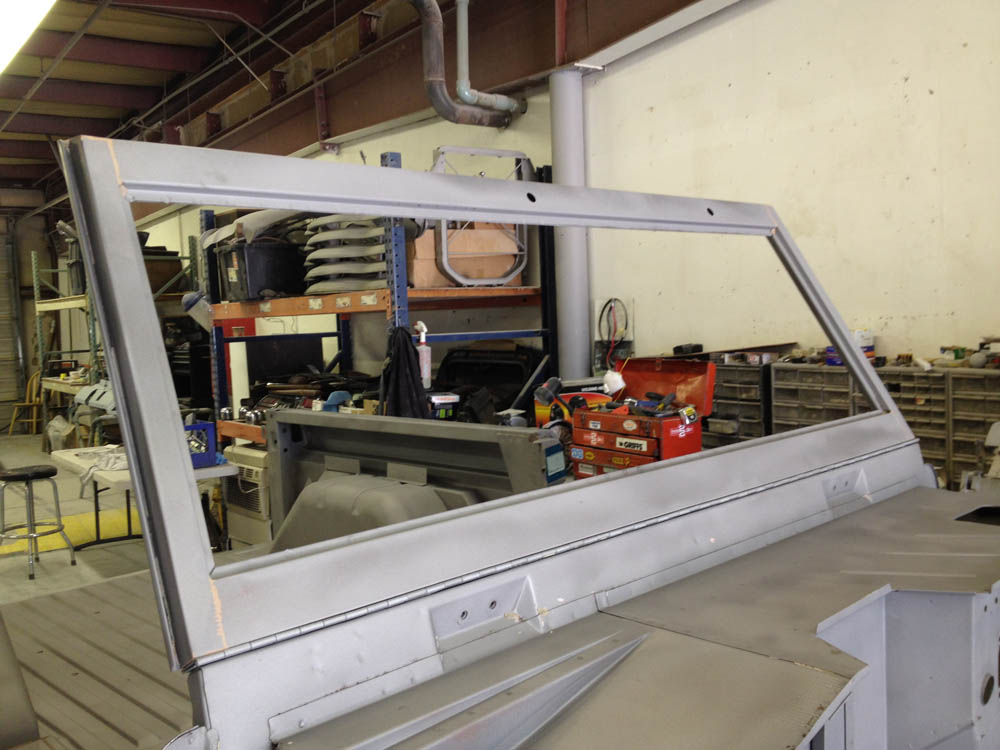
actually the glass and the rubber are all good.. Matter of fact i ran a screw driver under the edges and its very elastic still.. would love to save what i can so i can afford other parts down the road.
so do i pry the outside out first or the inside? sounds like the outside from what i can see as the black sealer is under the outside lip.
Should i just pry it up and peel it away? i was afraid of ripping the rubber so stopped. Would like to get it out before the move to save on time.. still have a few more hours of tear down and covering to do.
www.ColoradoClassicBroncos.com
A place for Coloradans to unite with our love of 66-77 Ford Broncos
Landsharks 76er Refresh and Build
Re: Landsharks 76er Refresh and Build
![]() by landshark » Wed May 09, 2012 7:53 am
by landshark » Wed May 09, 2012 7:53 am
1976 Bronco "Green, Yellow, whatever", 1969 Bronco "Red", 1972 Bronco Stocker "Kind of Blue/Grayish"
-
landshark - Official CCB Member

- Posts: 3942
- Joined: Thu Oct 13, 2011 11:16 pm
- Location: Denver, Wash Park Area
Re: Landsharks 76er Refresh and Build
![]() by hockeydad4-22 » Wed May 09, 2012 8:46 am
by hockeydad4-22 » Wed May 09, 2012 8:46 am
You need to keep everything well lubed with soapy water. Then from the inside, one corner (I generally prefer to work from the top) you can pry and work the rubber from the inside to the outside. Work equally down the side and across the top (easiest if you remove the rear view mirror first) until you have the whole side and top out. At that point it will be very easy to lift the whole thing, glass and gasket out of the hole at once.
Just remember - it is glass, do not pry against it directly - pry against the gasket, and do not force it. Take you time, work gently and slowly, you will be just fine. Once you have done one or two you will have a pretty good feel for the rest and they will go much faster.
Just remember - it is glass, do not pry against it directly - pry against the gasket, and do not force it. Take you time, work gently and slowly, you will be just fine. Once you have done one or two you will have a pretty good feel for the rest and they will go much faster.
[color=#BFFF40]Greg
If you are the smartest person in the room -
You are in the wrong room
If you are the smartest person in the room -
You are in the wrong room
-
hockeydad4-22 - Official CCB Member
- Posts: 2378
- Joined: Tue Nov 02, 2010 12:11 pm
- Location: Highlands Ranch Colorado
Re: Landsharks 76er Refresh and Build
![]() by landshark » Wed May 09, 2012 8:50 am
by landshark » Wed May 09, 2012 8:50 am
hockeydad4-22 wrote:You need to keep everything well lubed with soapy water. Then from the inside, one corner (I generally prefer to work from the top) you can pry and work the rubber from the inside to the outside. Work equally down the side and across the top (easiest if you remove the rear view mirror first) until you have the whole side and top out. At that point it will be very easy to lift the whole thing, glass and gasket out of the hole at once.
Just remember - it is glass, do not pry against it directly - pry against the gasket, and do not force it. Take you time, work gently and slowly, you will be just fine. Once you have done one or two you will have a pretty good feel for the rest and they will go much faster.
ok starting from the inside of the truck pry it from the outside of the rubber toward the glass and work the rubber through the frame across the top then sides... ok I think i understand i was lifting the edges looking at how the glass was sealed and can see the rubber is on a lip protecting the inside of the windshield against the frame and figured everything went one way.. out.
I will try working on it today thanks!
1976 Bronco "Green, Yellow, whatever", 1969 Bronco "Red", 1972 Bronco Stocker "Kind of Blue/Grayish"
-
landshark - Official CCB Member
- Posts: 3942
- Joined: Thu Oct 13, 2011 11:16 pm
- Location: Denver, Wash Park Area
Re: Landsharks 76er Refresh and Build
![]() by Jesus_man » Wed May 09, 2012 9:00 am
by Jesus_man » Wed May 09, 2012 9:00 am
Based on the video from WH looks like you are simply trying to push the rubber lip from the inside of the cab to the outside. That's the opposite they did with the rope in the video.
1973 Bronco, 351 SEFI, Locked, discs, 35's ZF-5spd and Atlas 4spd. 235:1 Crawl Ratio. It may be ugly, but it's slow.
http://www.ucora.org
http://www.ucora.org
-

Jesus_man - Official CCB Member
- Posts: 5987
- Joined: Thu Nov 11, 2010 9:36 am
- Location: California
Re: Landsharks 76er Refresh and Build
![]() by hockeydad4-22 » Wed May 09, 2012 12:05 pm
by hockeydad4-22 » Wed May 09, 2012 12:05 pm
Jesus_man wrote:Based on the video from WH looks like you are simply trying to push the rubber lip from the inside of the cab to the outside. That's the opposite they did with the rope in the video.
Exactly: the rubber gasket is essentially an "H" shape with the glass and windshield frame filling in the open top and bottom of the "H". You will want to pry and press from the inside with some help from your free hand reaching around to the outside to pull, being careful not to flex the glass, it will not bend very much but it will break if you flex it to much.
I suppose you could
 a rope under/around the gasket between the gasket and the steel windshield frame and use it to pull the soft rubber to the outside.... Kind of the opposite of installing the windshield. I will have to give that a shot next time I am replacing a windshield. I actually think it would work pretty well. I have never removed a windshield that I wanted to save both the glass and rubber- always I have replaced one or both.
[color=#BFFF40]Greg
If you are the smartest person in the room -
You are in the wrong room
If you are the smartest person in the room -
You are in the wrong room
-
hockeydad4-22 - Official CCB Member
- Posts: 2378
- Joined: Tue Nov 02, 2010 12:11 pm
- Location: Highlands Ranch Colorado
Re: Landsharks 76er Refresh and Build
![]() by landshark » Wed May 09, 2012 11:34 pm
by landshark » Wed May 09, 2012 11:34 pm
Good news!
I got the rubber out intact and in one piece!
Bad news
I broke the windshield.. oh well it happens.. i will just add it to my parts list..

Just have a few things left on the dash panel to pull off and I think its pretty much ready to roll..
I got the rubber out intact and in one piece!
Bad news
I broke the windshield.. oh well it happens.. i will just add it to my parts list..
Just have a few things left on the dash panel to pull off and I think its pretty much ready to roll..
1976 Bronco "Green, Yellow, whatever", 1969 Bronco "Red", 1972 Bronco Stocker "Kind of Blue/Grayish"
-
landshark - Official CCB Member
- Posts: 3942
- Joined: Thu Oct 13, 2011 11:16 pm
- Location: Denver, Wash Park Area
Re: Landsharks 76er Refresh and Build
![]() by landshark » Thu May 10, 2012 3:02 pm
by landshark » Thu May 10, 2012 3:02 pm
Dropped the top off at the resto shop and the rolling chassis with all the pieces off at the blasters...
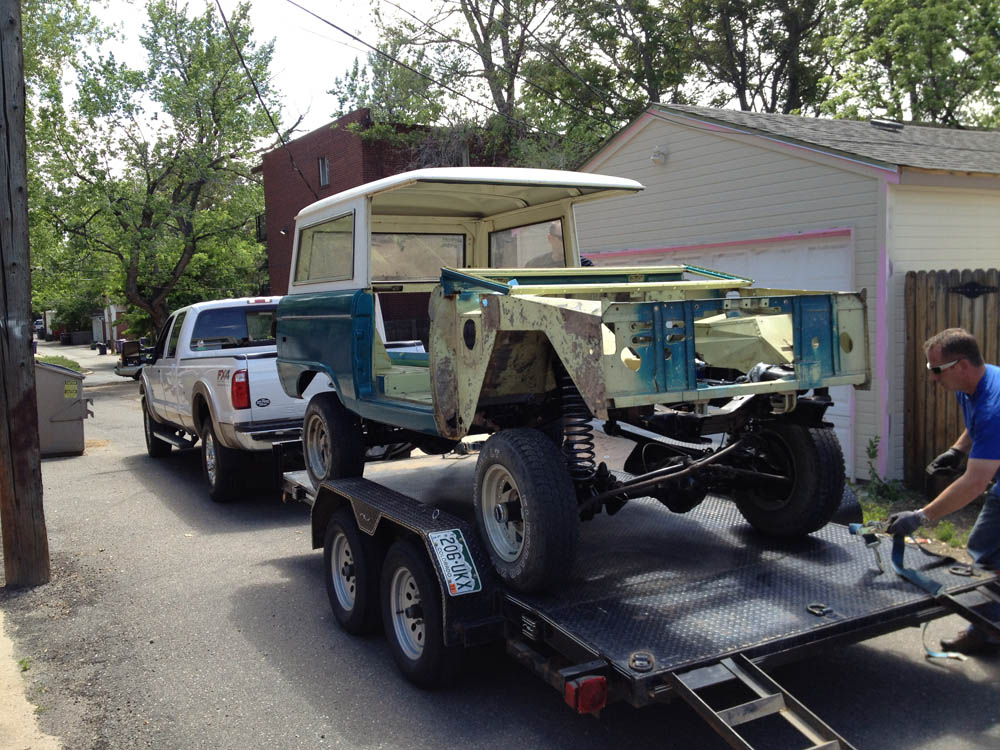

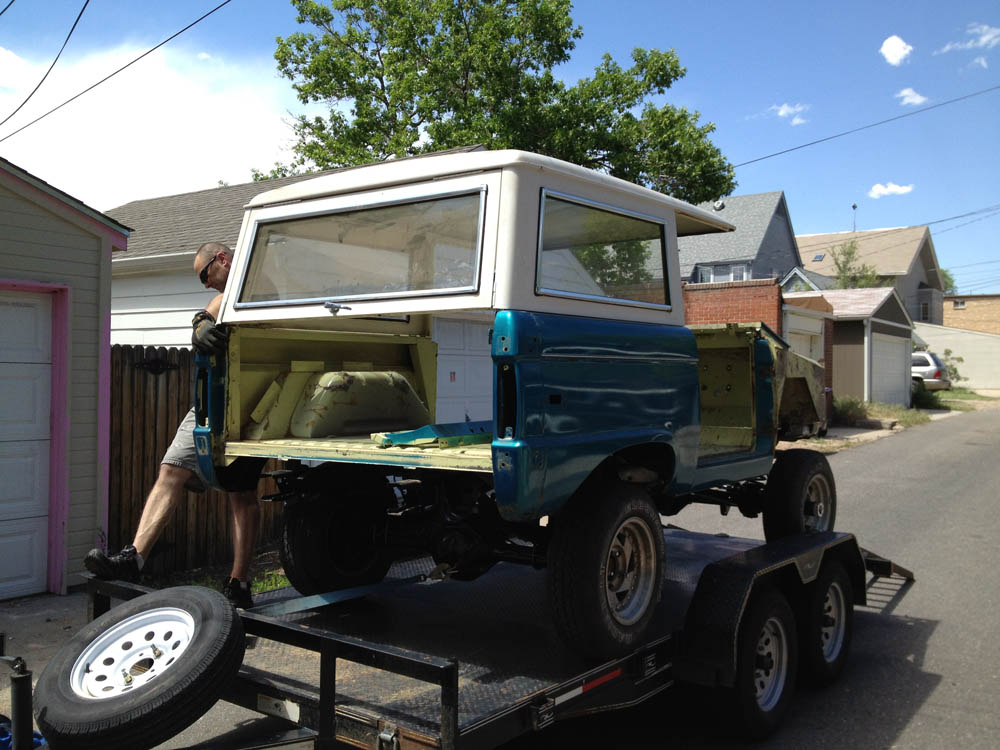
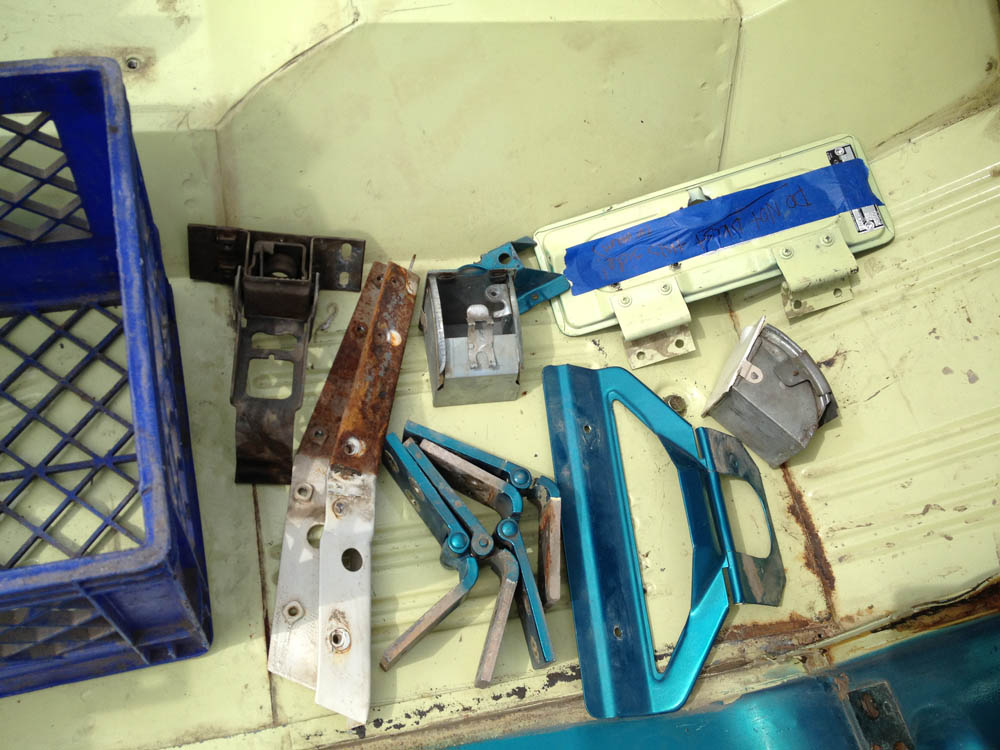
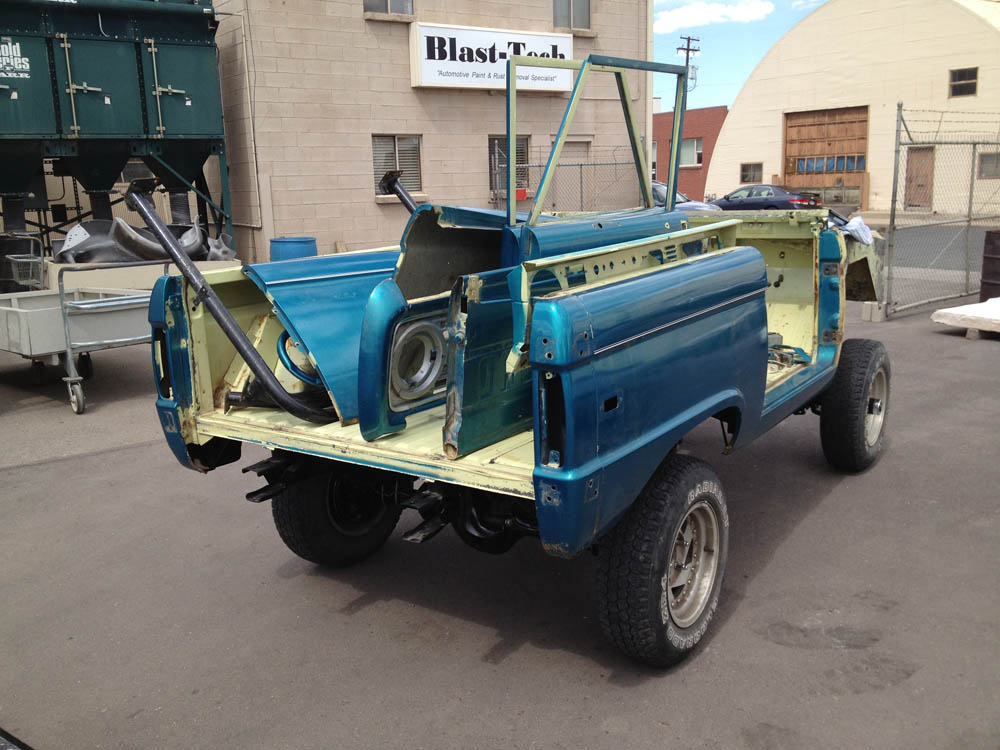
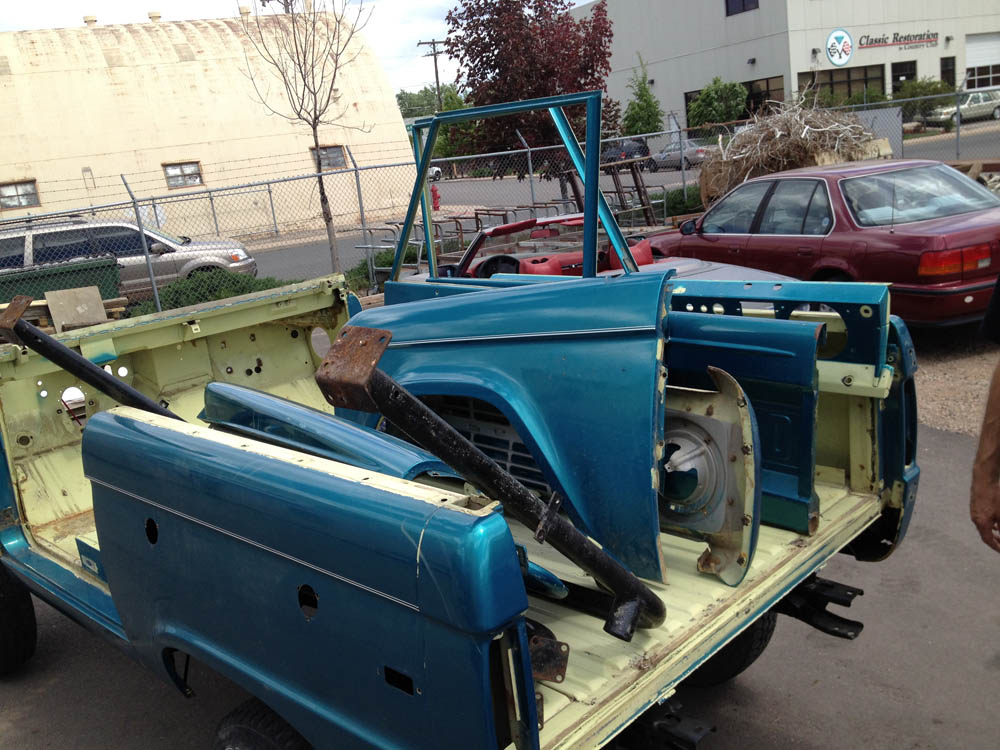
Next time i see it hopefully it will be bare metal!
I will be taking allot of pics along the way....
Next time i see it hopefully it will be bare metal!
I will be taking allot of pics along the way....
1976 Bronco "Green, Yellow, whatever", 1969 Bronco "Red", 1972 Bronco Stocker "Kind of Blue/Grayish"
-
landshark - Official CCB Member
- Posts: 3942
- Joined: Thu Oct 13, 2011 11:16 pm
- Location: Denver, Wash Park Area
Re: Landsharks 76er Refresh and Build
![]() by Rox Crusher » Thu May 10, 2012 8:08 pm
by Rox Crusher » Thu May 10, 2012 8:08 pm
wazzuuuuuupp ! ! ! ! !
I am really excited for you..... areal life frame off in the works !
You gonna stick with original color or change it up ?
I am really excited for you..... areal life frame off in the works !
You gonna stick with original color or change it up ?
1977 Sport, 351w OBDII EFI motor, 4R70W auto, 4:88 gears, ARB lockers, 3.5" suspension, 33" tires.
-

Rox Crusher - Official CCB Member
- Posts: 3980
- Joined: Sun Oct 10, 2010 4:36 pm
- Location: Roxborough Park, Colorado
Landsharks 76er Refresh and Build
![]() by landshark » Thu May 10, 2012 9:28 pm
by landshark » Thu May 10, 2012 9:28 pm
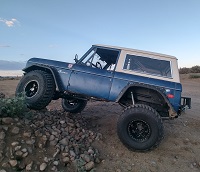
Going back to stock color of Glenn green which seems to be some debate on the exact color itself but I have a good idea. Don't see many green ones so a bit of a risk but will be fun.
1976 Bronco "Green, Yellow, whatever", 1969 Bronco "Red", 1972 Bronco Stocker "Kind of Blue/Grayish"
-
landshark - Official CCB Member
- Posts: 3942
- Joined: Thu Oct 13, 2011 11:16 pm
- Location: Denver, Wash Park Area
Re: Landsharks 76er Refresh and Build
![]() by Booger » Fri May 11, 2012 4:00 am
by Booger » Fri May 11, 2012 4:00 am
Ought to be real interesting to see what Glen Green looks like when put on the outside. Hope the painter can get it matched but then again if you have it blasted inside and out there won't be a problem. When my dad had to have his (my current) Bronco repaired, after flopping it on it's side on an icy road, the Ford dealer could not get the paint to match even even with the paint code. It took them a couple tries to get it, the blue came out lighter than what was on the Bronco originally. You would think the dealer could get the paint right but not always the case.
Bob - Turning hydrocarbons into noise since 1970
Spiritual owner of the now Zoso mobile (1974 Bronco Ranger - EFI 351W-4R70W-ARB front and rear-STC softtop- High Country hood-3 1/2" WH lift- Cross inboard rear shock mnt- Duffs bumpers- Warn 8274- 33's- Cheby disc conversion)
Spiritual owner of the now Zoso mobile (1974 Bronco Ranger - EFI 351W-4R70W-ARB front and rear-STC softtop- High Country hood-3 1/2" WH lift- Cross inboard rear shock mnt- Duffs bumpers- Warn 8274- 33's- Cheby disc conversion)
-

Booger - Official CCB Member
- Posts: 809
- Joined: Thu Dec 23, 2010 5:55 pm
- Location: Broomfield
Re: Landsharks 76er Refresh and Build
![]() by Gunnibronco » Fri May 11, 2012 6:46 am
by Gunnibronco » Fri May 11, 2012 6:46 am
Since you are painting the whole truck, an exact match is not as important as if you were just painting one or two panels, just make sure you are happy with the color. Even with a scanner, or paint code you still may not pull an "exact" match. That depends on the brand of paint and how well that brand matched your color. The shop I worked at has used a few different paint brands in the last 10 years and each had its good matches and its bad matches. My old shop and another shop in town just changed to a water based system, and both shops say this new brand (don't know the name) impressed them with the color matches. Normally, if a color doesn't match perfect, we'd blend the adjacent panels so the color difference couldn't be seen. If you can't or don't want to blend the other panels, that is when you can see the difference. A good painter should be able to custom tint a paint and come very close.
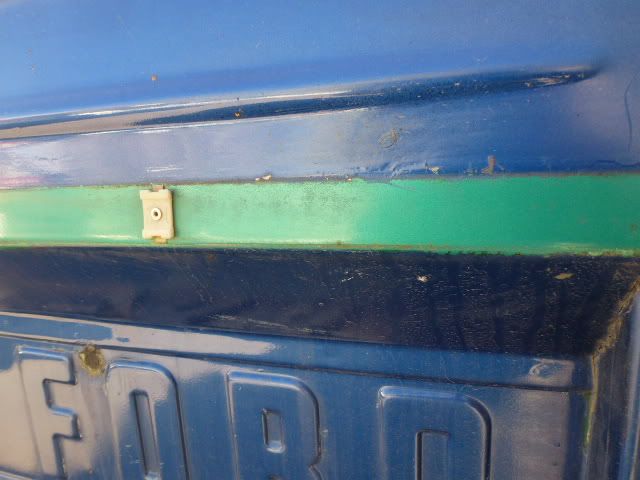
BTW, my truck was rolled before I bought it, and they used some j/y parts to fix it. The tail gate has the "Sport" chrome trim, and part of the chrome just broke and fell off, under my tire carrier. Under the chrome was the original (probably) paint, a very cool green. The paint looks pretty "new" because its been protected by the chrome molding. I thought of you when I saw it. If this is the color you end up with, I really like it. If you have problems matching, I could run my truck to my old shop and have them scan that part of my truck and get you a color code.

Chad
BTW, my truck was rolled before I bought it, and they used some j/y parts to fix it. The tail gate has the "Sport" chrome trim, and part of the chrome just broke and fell off, under my tire carrier. Under the chrome was the original (probably) paint, a very cool green. The paint looks pretty "new" because its been protected by the chrome molding. I thought of you when I saw it. If this is the color you end up with, I really like it. If you have problems matching, I could run my truck to my old shop and have them scan that part of my truck and get you a color code.
Chad
"America is at that awkward stage. It's too late to work within the system, but too early to shoot the bastards." – Claire Wolfe
74-AWB 98", ZF5, Atlas4, TGW HP1060 and HP1014 axles, ARBs, 37's, 3.5" lift-5.5" front coil springs, Tahoe rear springs, EFI 302, h-boost, York OBA, 4x4x2, custom dash & gauges
72 U15- Explorer Sport-Candyapple Red (1 of 141)
74-AWB 98", ZF5, Atlas4, TGW HP1060 and HP1014 axles, ARBs, 37's, 3.5" lift-5.5" front coil springs, Tahoe rear springs, EFI 302, h-boost, York OBA, 4x4x2, custom dash & gauges
72 U15- Explorer Sport-Candyapple Red (1 of 141)
-
Gunnibronco - Official CCB Member
- Posts: 4074
- Joined: Mon Jan 03, 2011 5:07 pm
- Location: Gardnerville, NV
Re: Landsharks 76er Refresh and Build
![]() by landshark » Fri May 11, 2012 7:49 am
by landshark » Fri May 11, 2012 7:49 am
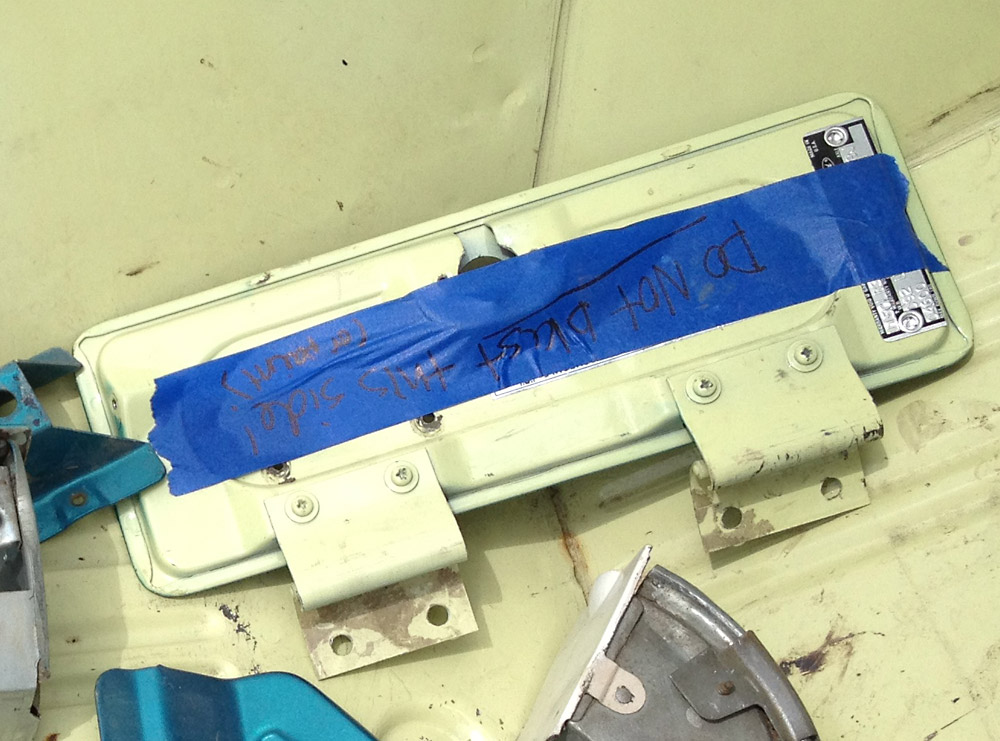
As they are going to blast the whole truck and iam going to repaint inside and out Iam trying to find the original color #'s to try and match (Color Code U). The only part of the truck iam not painting is the inside of the glove box door... something has to stay original ;)
I think the inside of the glovebox would be the most representative of the original color since its probably not fadded and hasn't really been scratched too much...
I think it will look nice...
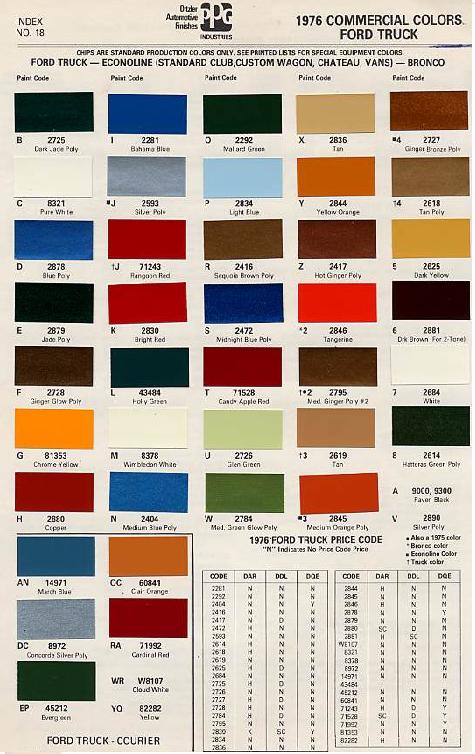
Crappy copy but here are the paint chips from my year...
I think the inside of the glovebox would be the most representative of the original color since its probably not fadded and hasn't really been scratched too much...
I think it will look nice...
Crappy copy but here are the paint chips from my year...
1976 Bronco "Green, Yellow, whatever", 1969 Bronco "Red", 1972 Bronco Stocker "Kind of Blue/Grayish"
-
landshark - Official CCB Member
- Posts: 3942
- Joined: Thu Oct 13, 2011 11:16 pm
- Location: Denver, Wash Park Area
Re: Landsharks 76er Refresh and Build
![]() by Entourage » Fri May 11, 2012 9:02 am
by Entourage » Fri May 11, 2012 9:02 am
I think one of the Broncos in Wild Horses ads is Glen Green:
http://www.wildhorses4x4.com/category/Early_Ford_Bronco
http://www.wildhorses4x4.com/category/Early_Ford_Bronco
"I truly believe that good will outweigh evil, but there won't be peace on earth until the power of love overcomes the love of power" - Jimi Hendrix
-
Entourage - Official CCB Member
- Posts: 3275
- Joined: Wed Sep 29, 2010 4:45 pm
- Location: Gilbert, Arizona
Re: Landsharks 76er Refresh and Build
![]() by landshark » Fri May 11, 2012 9:57 am
by landshark » Fri May 11, 2012 9:57 am
maybe so hard to tell, you saw how the color was different from one piece to the next.. i think it will be a nice stand out since there aren't many out there that color. With the white top and maybe tint the windows a little out back it will be a nice change.
I just ordered the marti report for it.. so interested to see what it comes back with. Also picking up the actual page for the 76 truck paint chip book.. so i can get the exact color.
I just ordered the marti report for it.. so interested to see what it comes back with. Also picking up the actual page for the 76 truck paint chip book.. so i can get the exact color.
1976 Bronco "Green, Yellow, whatever", 1969 Bronco "Red", 1972 Bronco Stocker "Kind of Blue/Grayish"
-
landshark - Official CCB Member
- Posts: 3942
- Joined: Thu Oct 13, 2011 11:16 pm
- Location: Denver, Wash Park Area
Re: Landsharks 76er Refresh and Build
![]() by Gunnibronco » Fri May 11, 2012 12:29 pm
by Gunnibronco » Fri May 11, 2012 12:29 pm
From your chips & glovebox I'd say my tailgate is NOT Glen Green. I don't know what year its from so who knows. Oh yeah, I'm slightly colorblind too.
Good Luck
Good Luck
"America is at that awkward stage. It's too late to work within the system, but too early to shoot the bastards." – Claire Wolfe
74-AWB 98", ZF5, Atlas4, TGW HP1060 and HP1014 axles, ARBs, 37's, 3.5" lift-5.5" front coil springs, Tahoe rear springs, EFI 302, h-boost, York OBA, 4x4x2, custom dash & gauges
72 U15- Explorer Sport-Candyapple Red (1 of 141)
74-AWB 98", ZF5, Atlas4, TGW HP1060 and HP1014 axles, ARBs, 37's, 3.5" lift-5.5" front coil springs, Tahoe rear springs, EFI 302, h-boost, York OBA, 4x4x2, custom dash & gauges
72 U15- Explorer Sport-Candyapple Red (1 of 141)
-
Gunnibronco - Official CCB Member
- Posts: 4074
- Joined: Mon Jan 03, 2011 5:07 pm
- Location: Gardnerville, NV
Re: Landsharks 76er Refresh and Build
![]() by landshark » Sun May 13, 2012 11:16 am
by landshark » Sun May 13, 2012 11:16 am
now that i have some room in the garage i was able to reorganize things a bit better and start tearing down the engine...
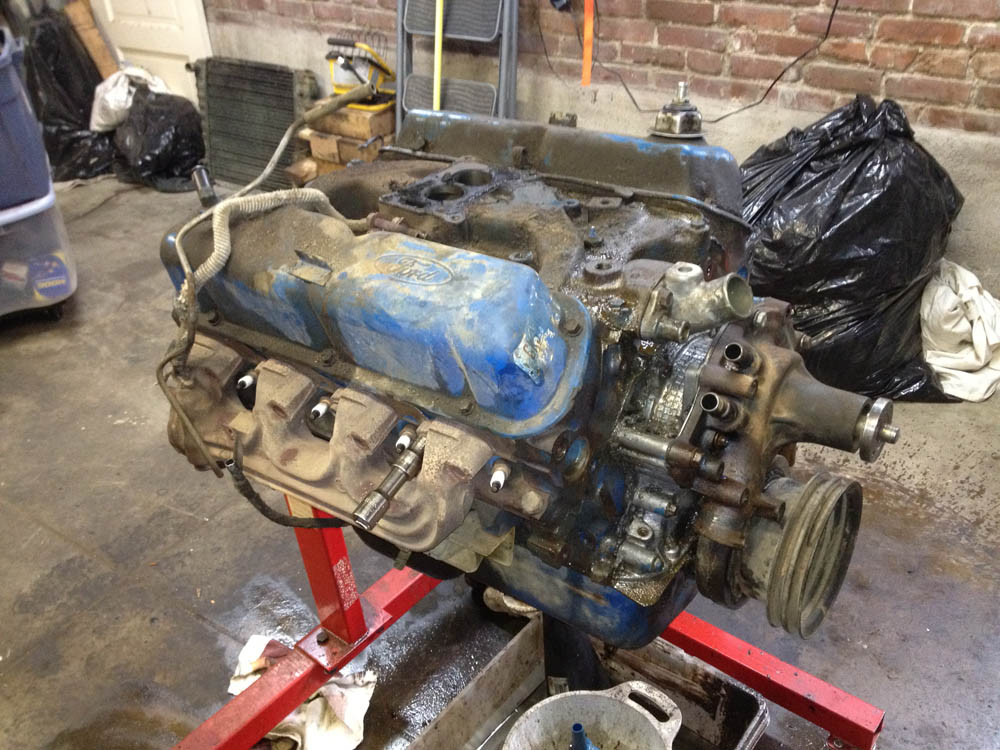

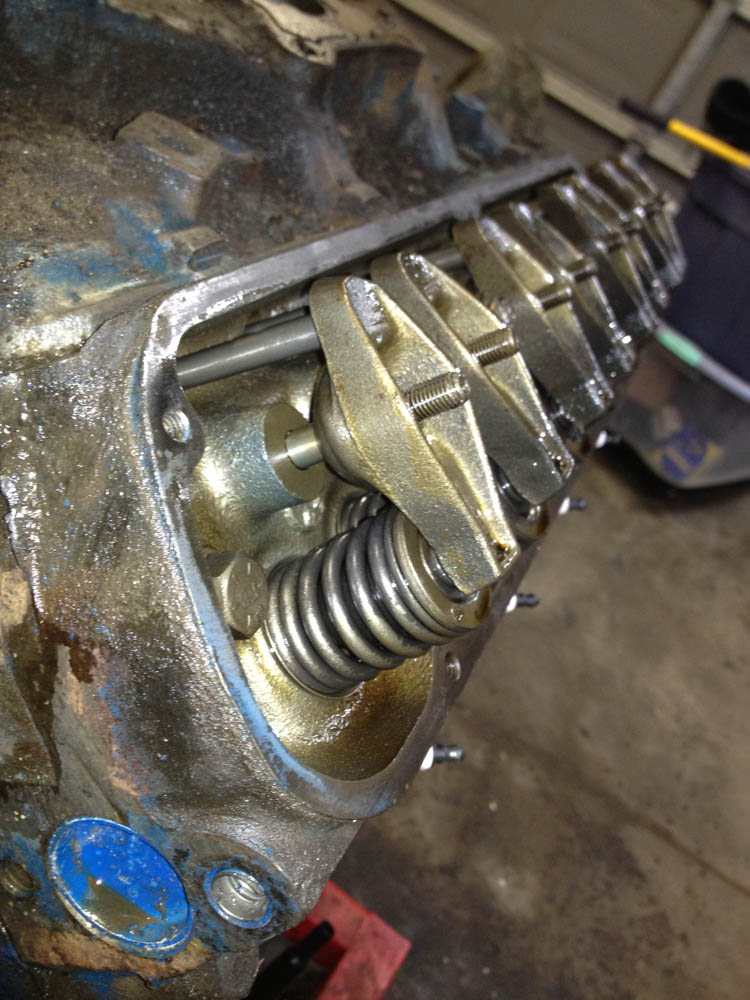
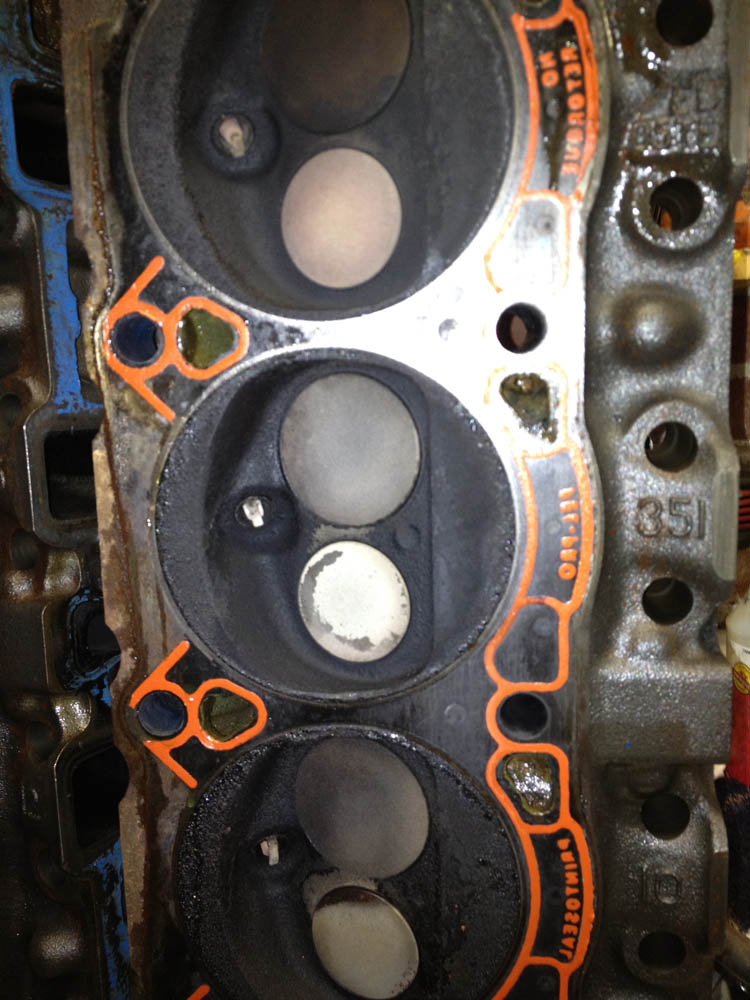
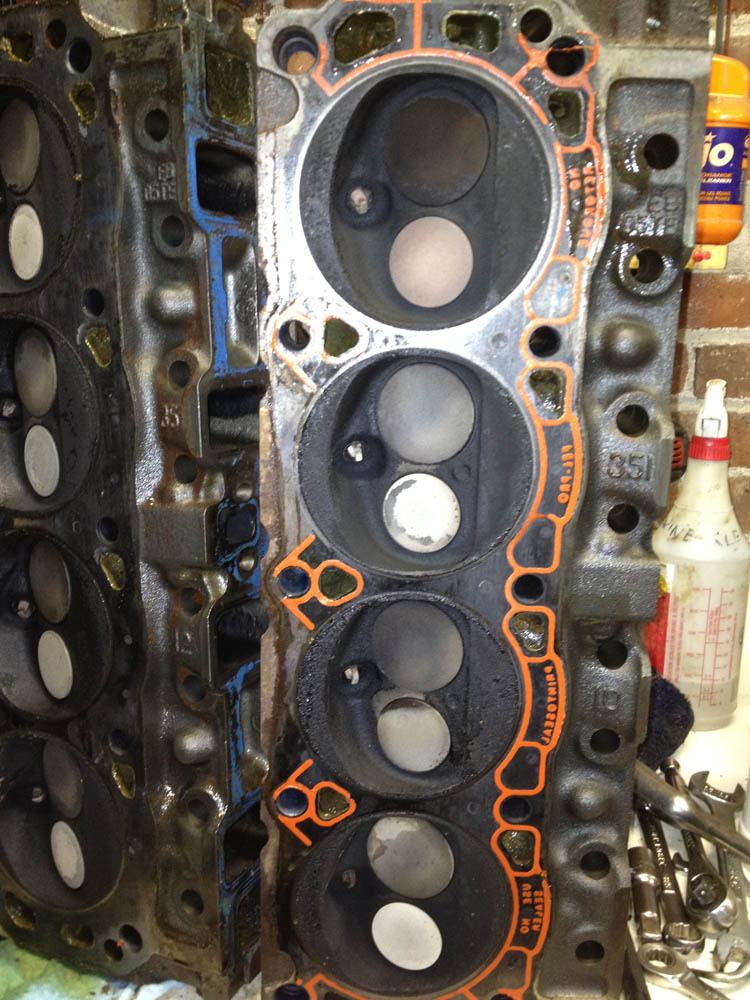
Took the valve covers off.. and
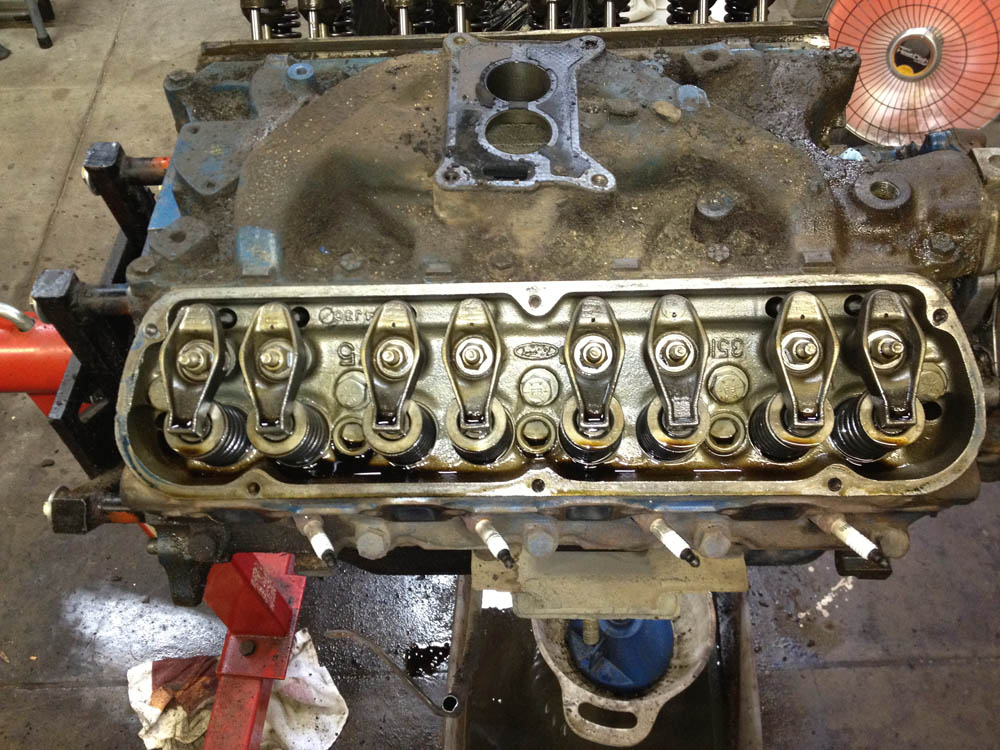
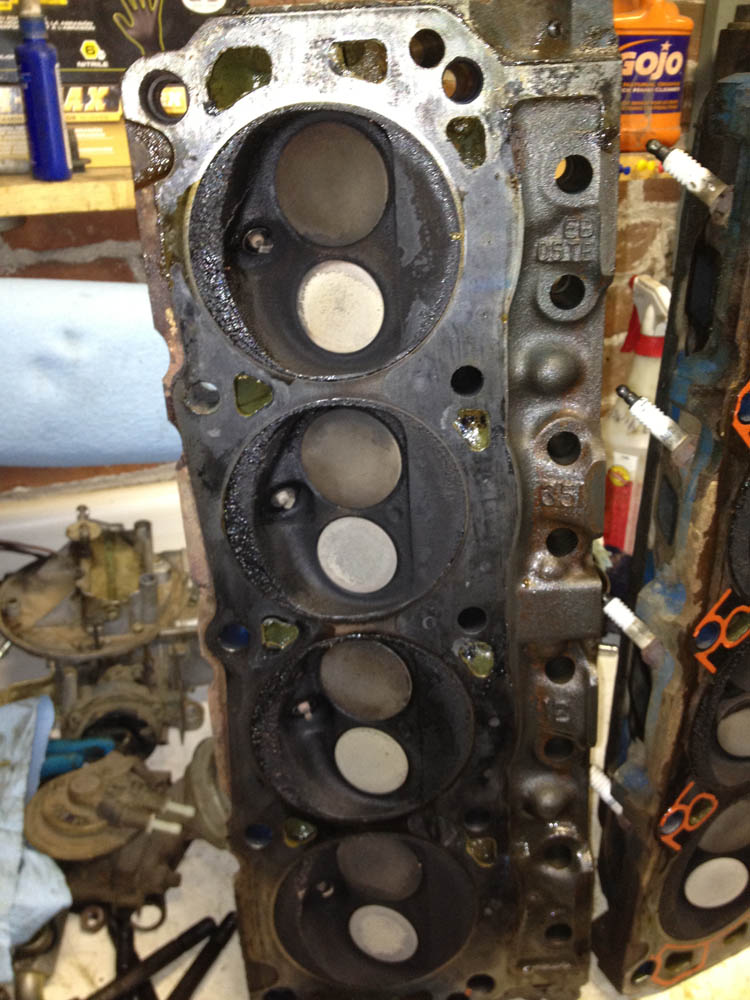
351 heads...
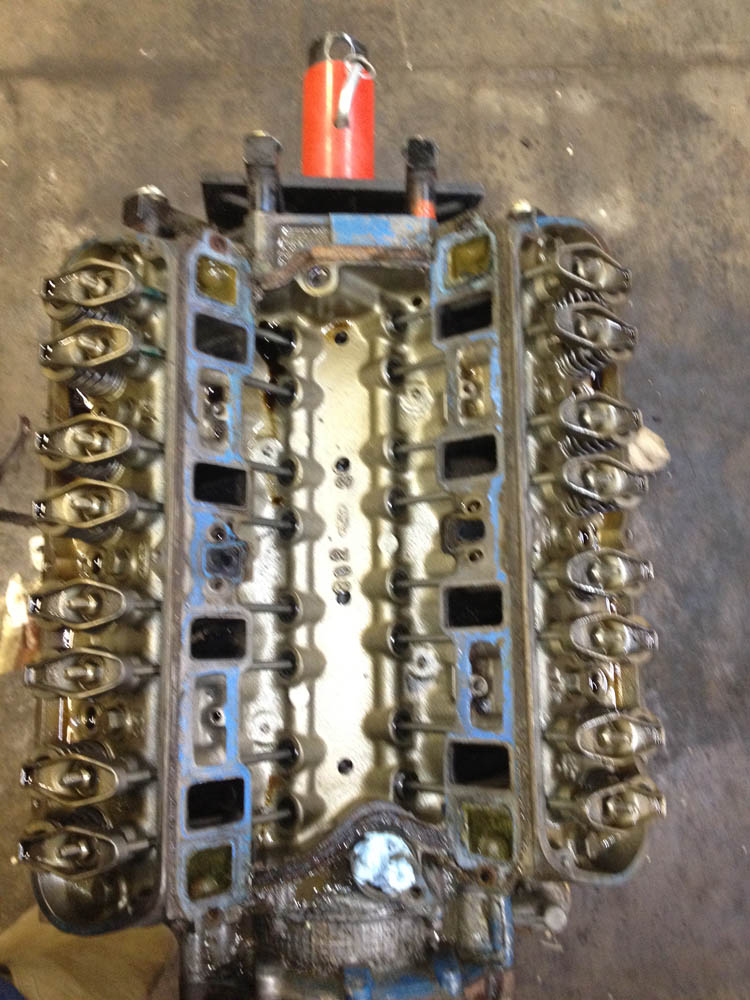
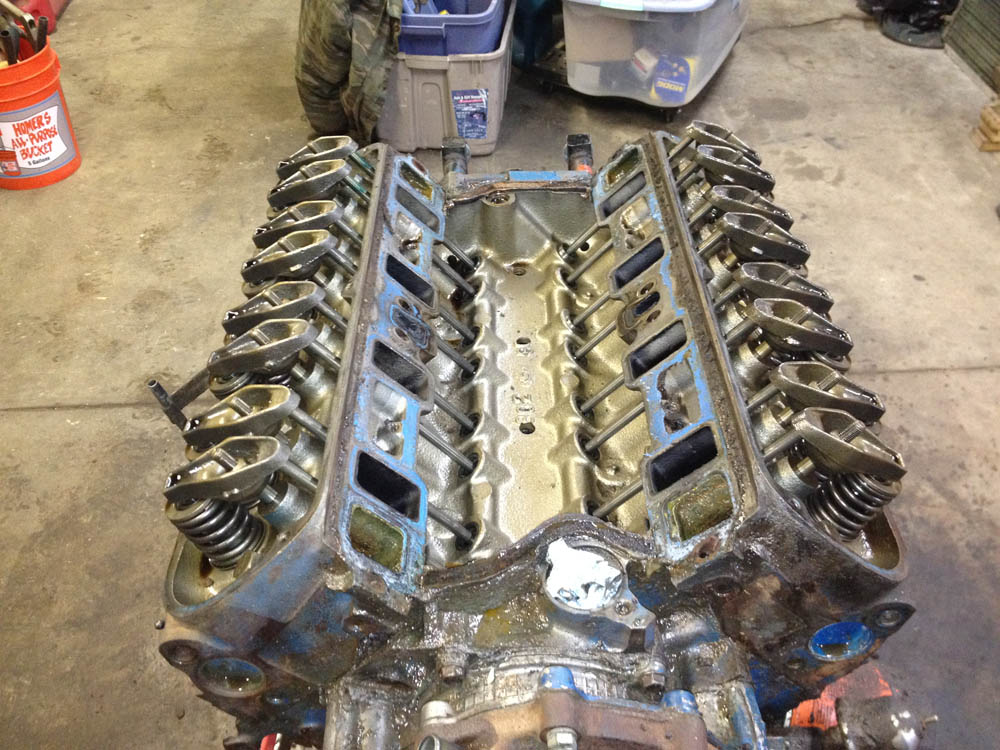
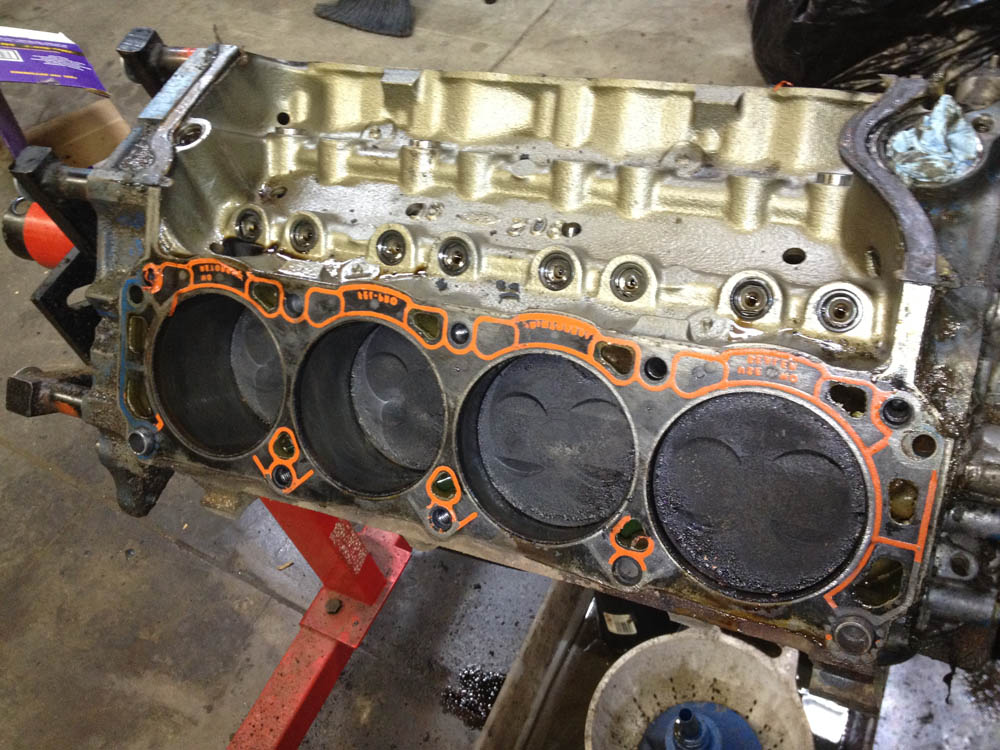
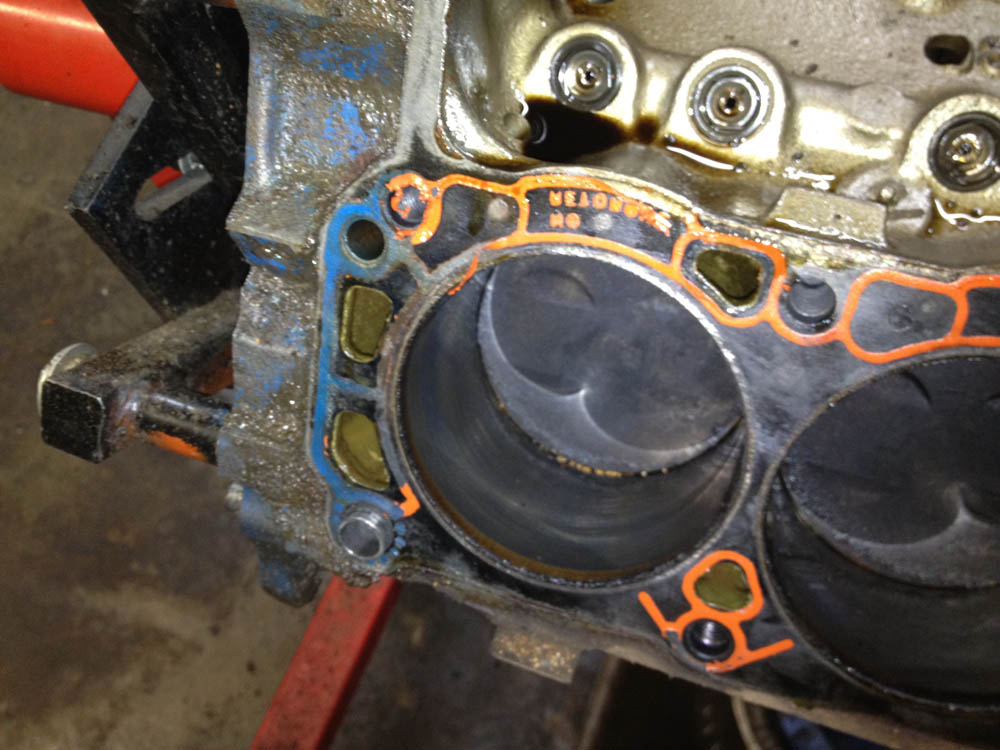
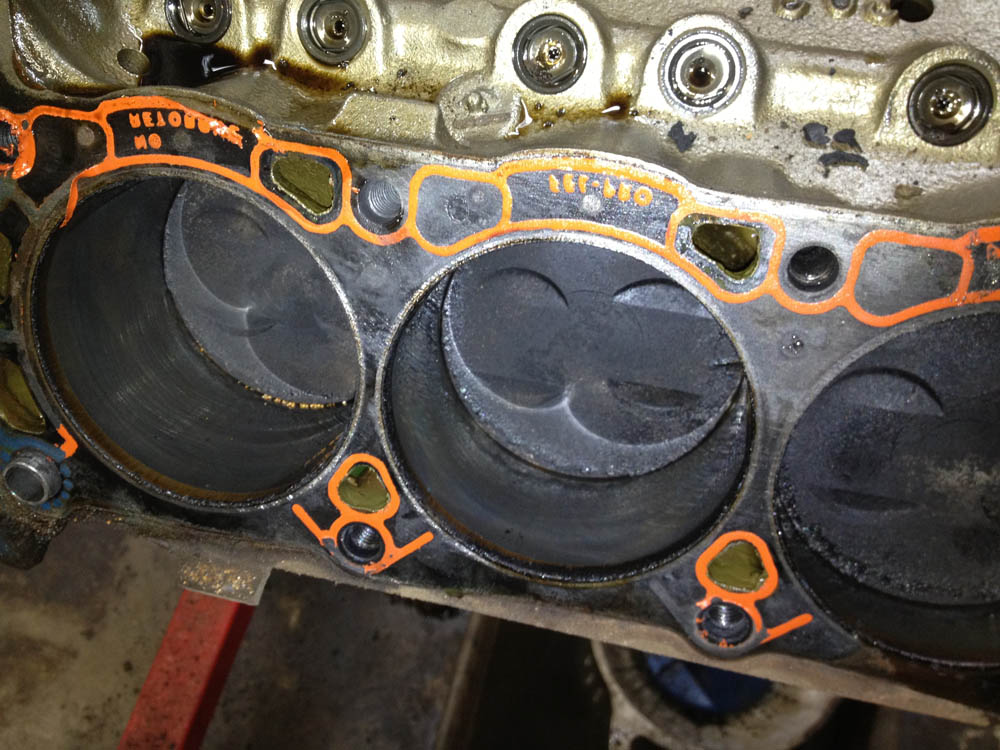
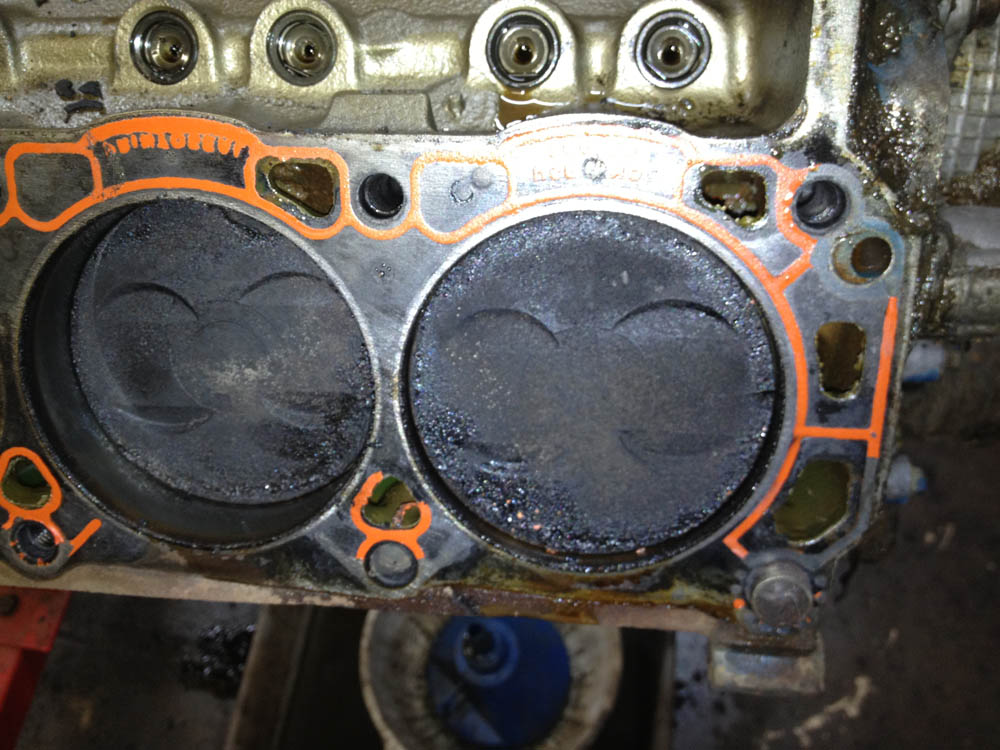
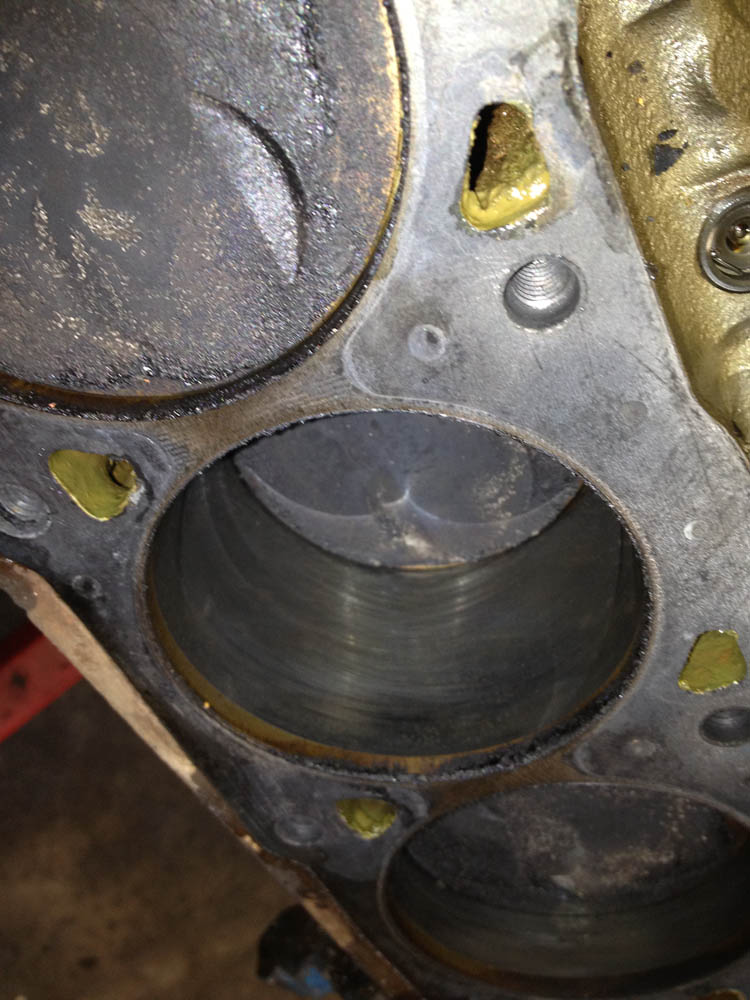
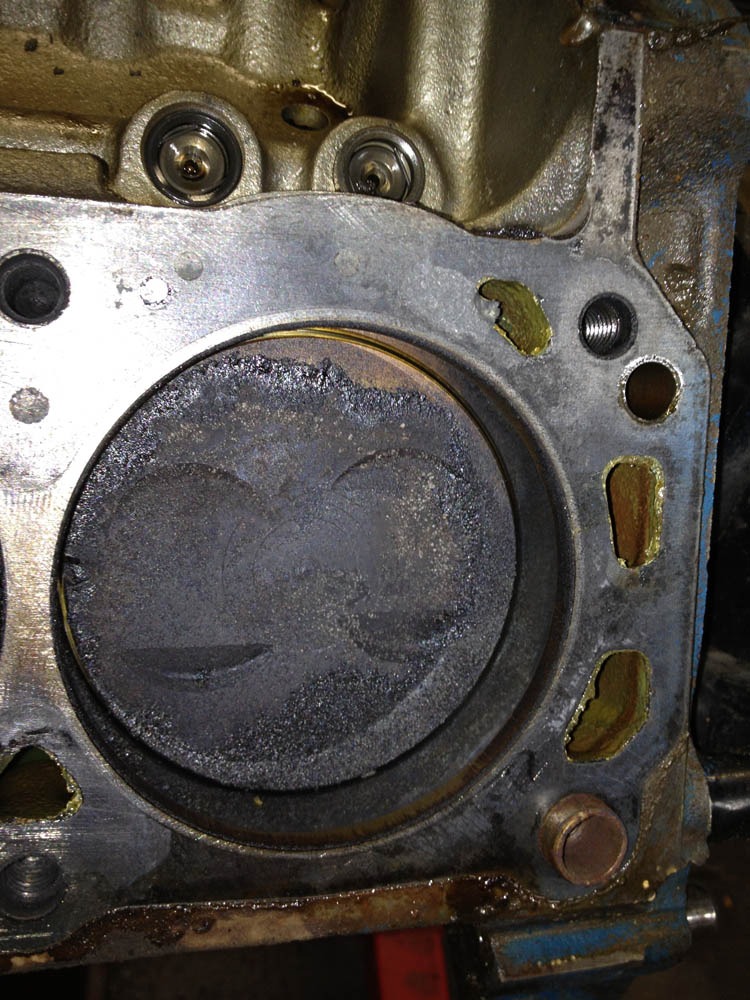
All eight cylinders... i guess they look ok? a little build up on the pistons is this normal? This is my first engine tear down..
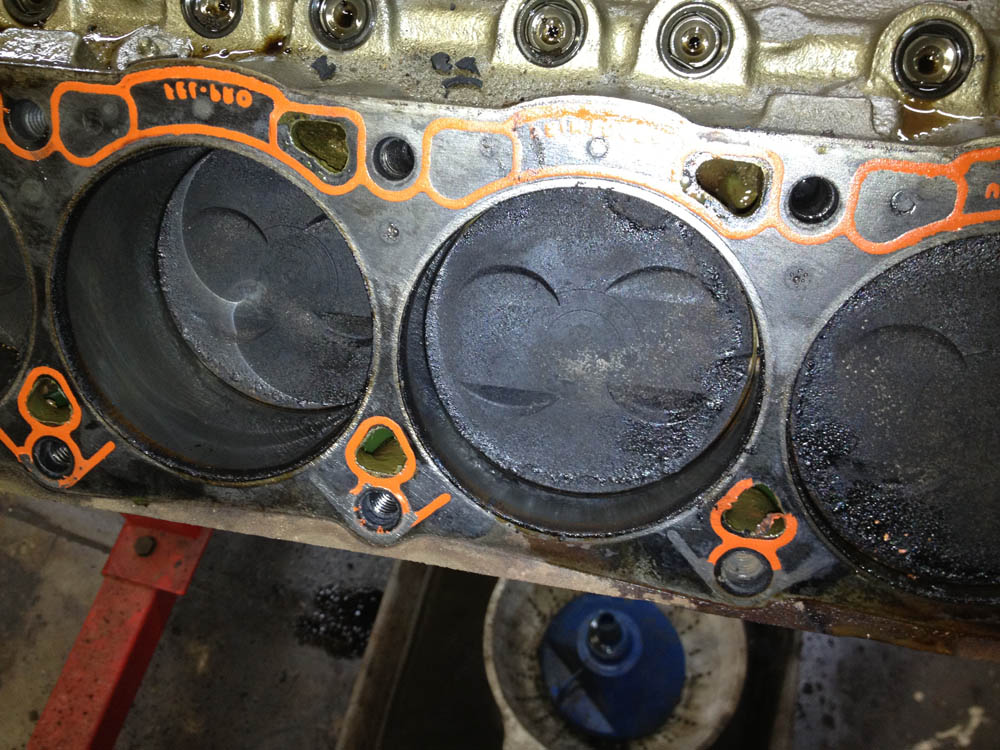
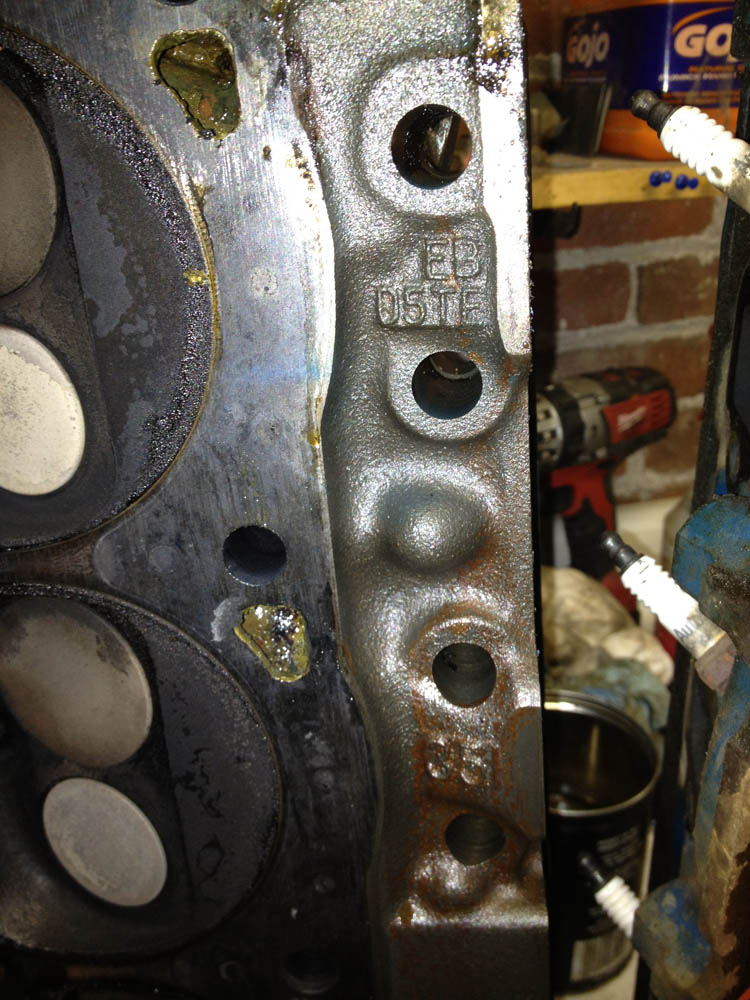
The heads.. D5TE - EB which i guess are pretty good heads from what my limited research has told me...
Continuing with the engine...
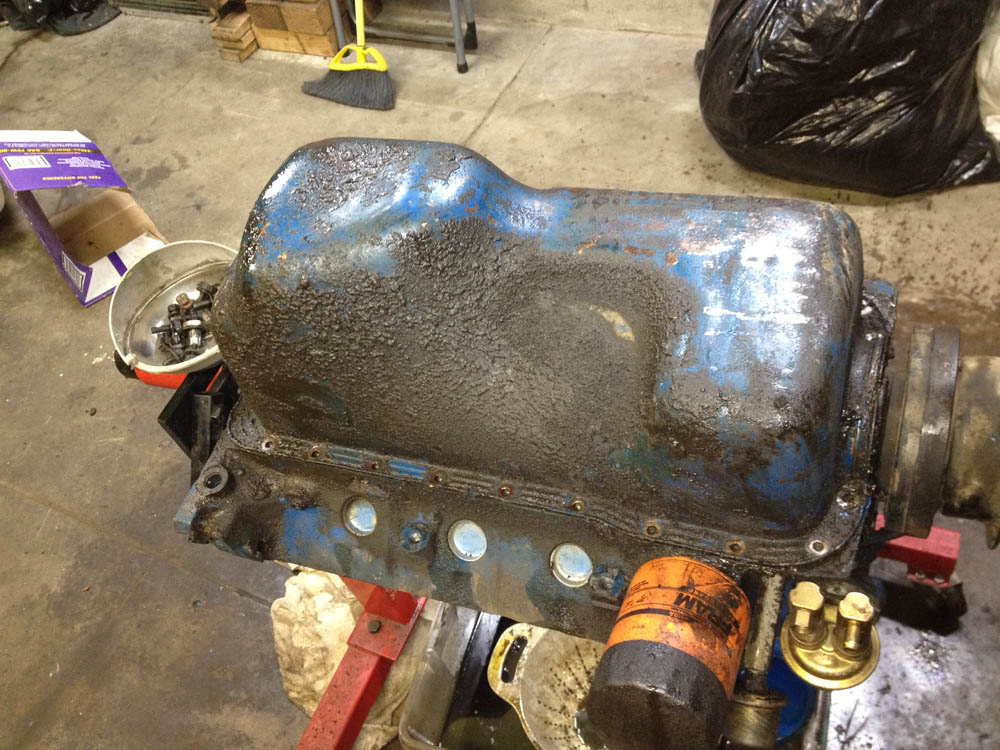
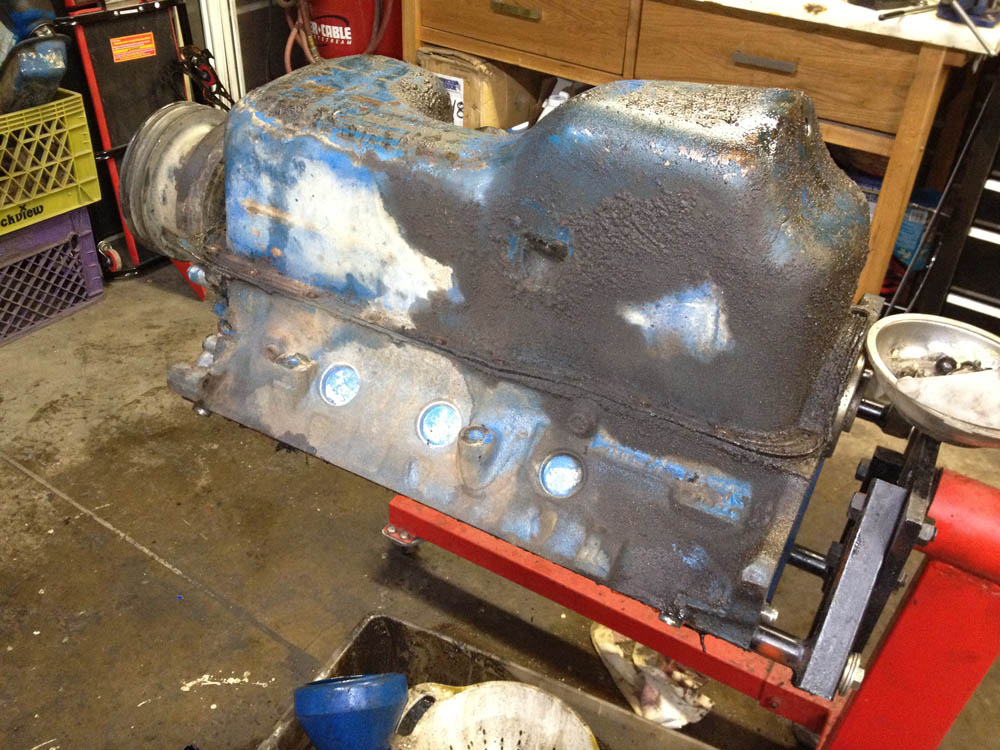
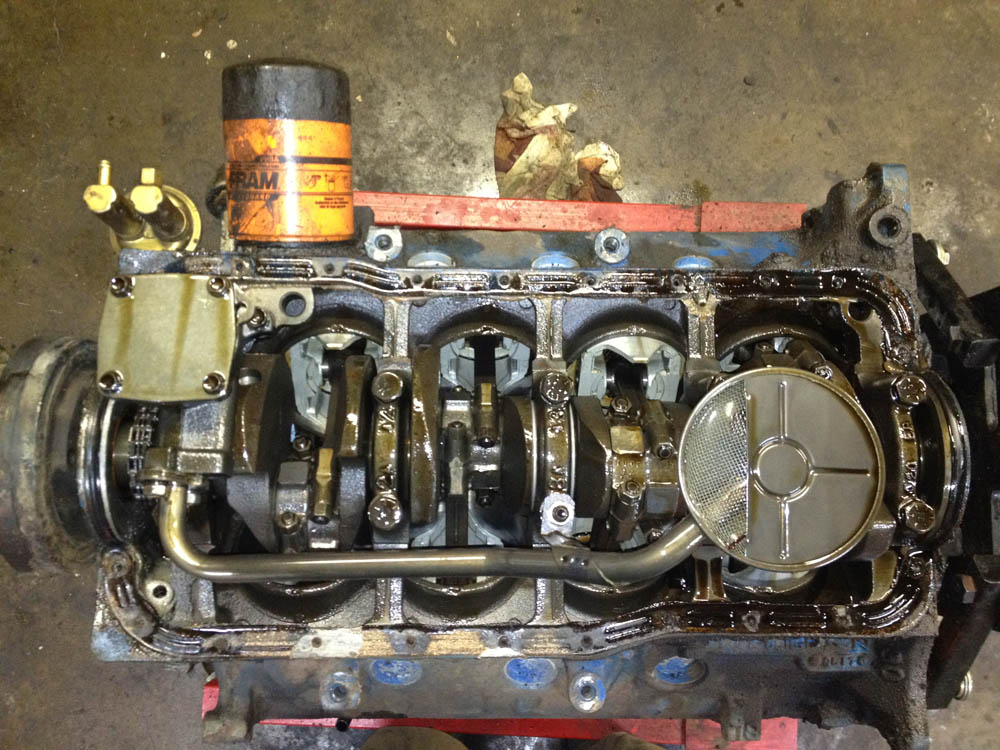
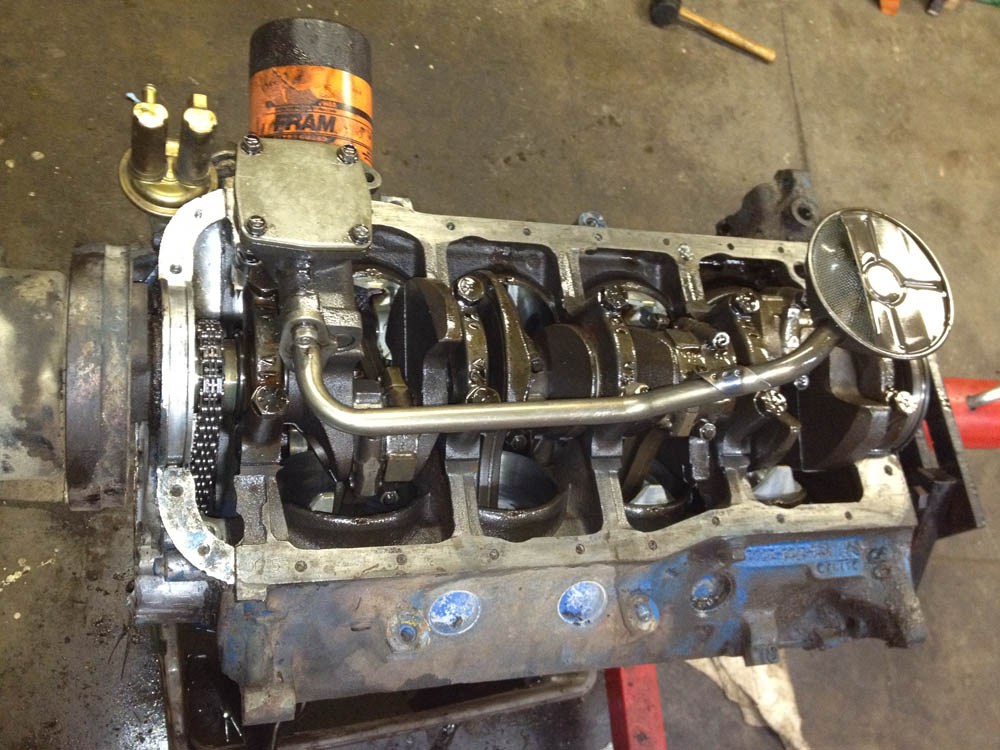
and the engine block number which I believe is D90E-6015-E3A which would make it 1979 engine.. i had misread the numbers and thought it was a 76 initially...
D9OE-6015-E3A
D9 = 1979
O = Fairlane, Torino or Tbird

So now my delima, the heads.... what to do.. what to do...
Took the valve covers off.. and
351 heads...
All eight cylinders... i guess they look ok? a little build up on the pistons is this normal? This is my first engine tear down..
The heads.. D5TE - EB which i guess are pretty good heads from what my limited research has told me...
Continuing with the engine...
and the engine block number which I believe is D90E-6015-E3A which would make it 1979 engine.. i had misread the numbers and thought it was a 76 initially...
D9OE-6015-E3A
D9 = 1979
O = Fairlane, Torino or Tbird
So now my delima, the heads.... what to do.. what to do...
1976 Bronco "Green, Yellow, whatever", 1969 Bronco "Red", 1972 Bronco Stocker "Kind of Blue/Grayish"
-
landshark - Official CCB Member
- Posts: 3942
- Joined: Thu Oct 13, 2011 11:16 pm
- Location: Denver, Wash Park Area
Re: Landsharks 76er Refresh and Build
![]() by Gunnibronco » Sun May 13, 2012 12:47 pm
by Gunnibronco » Sun May 13, 2012 12:47 pm
Buy a block that matches the heads!
"America is at that awkward stage. It's too late to work within the system, but too early to shoot the bastards." – Claire Wolfe
74-AWB 98", ZF5, Atlas4, TGW HP1060 and HP1014 axles, ARBs, 37's, 3.5" lift-5.5" front coil springs, Tahoe rear springs, EFI 302, h-boost, York OBA, 4x4x2, custom dash & gauges
72 U15- Explorer Sport-Candyapple Red (1 of 141)
74-AWB 98", ZF5, Atlas4, TGW HP1060 and HP1014 axles, ARBs, 37's, 3.5" lift-5.5" front coil springs, Tahoe rear springs, EFI 302, h-boost, York OBA, 4x4x2, custom dash & gauges
72 U15- Explorer Sport-Candyapple Red (1 of 141)
-
Gunnibronco - Official CCB Member
- Posts: 4074
- Joined: Mon Jan 03, 2011 5:07 pm
- Location: Gardnerville, NV
Re: Landsharks 76er Refresh and Build
![]() by ZOSO » Sun May 13, 2012 1:28 pm
by ZOSO » Sun May 13, 2012 1:28 pm
Gunnibronco wrote:Buy a block that matches the heads!
I. Agree. Even tho if you bought a 351 you put it in the full size.
Rob
74 Ranger EFI351w, 4r70w, ARB 5.13 9in, ARB 5.13D44, and a bunch of other goodies. Best of all the family memories.
04 Mustang Cobra, KenneBell 2.2 feeding a lot of boost on E85. Tire shredding machine
New project: 77 Bronco Ranger, body work and more body work.
Very little left of a 72 durango tan explorer sport
-

ZOSO - Moderator

- Posts: 3908
- Joined: Mon Nov 15, 2010 4:58 pm
- Location: Henderson, Co
Landsharks 76er Refresh and Build
![]() by landshark » Sun May 13, 2012 1:34 pm
by landshark » Sun May 13, 2012 1:34 pm
Ya so far opinion is get the e7's refreshed and run those. And your right I would rather put a 351 in the full size ;)
1976 Bronco "Green, Yellow, whatever", 1969 Bronco "Red", 1972 Bronco Stocker "Kind of Blue/Grayish"
-
landshark - Official CCB Member
- Posts: 3942
- Joined: Thu Oct 13, 2011 11:16 pm
- Location: Denver, Wash Park Area
Re: Landsharks 76er Refresh and Build
![]() by Viperwolf1 » Sun May 13, 2012 9:23 pm
by Viperwolf1 » Sun May 13, 2012 9:23 pm
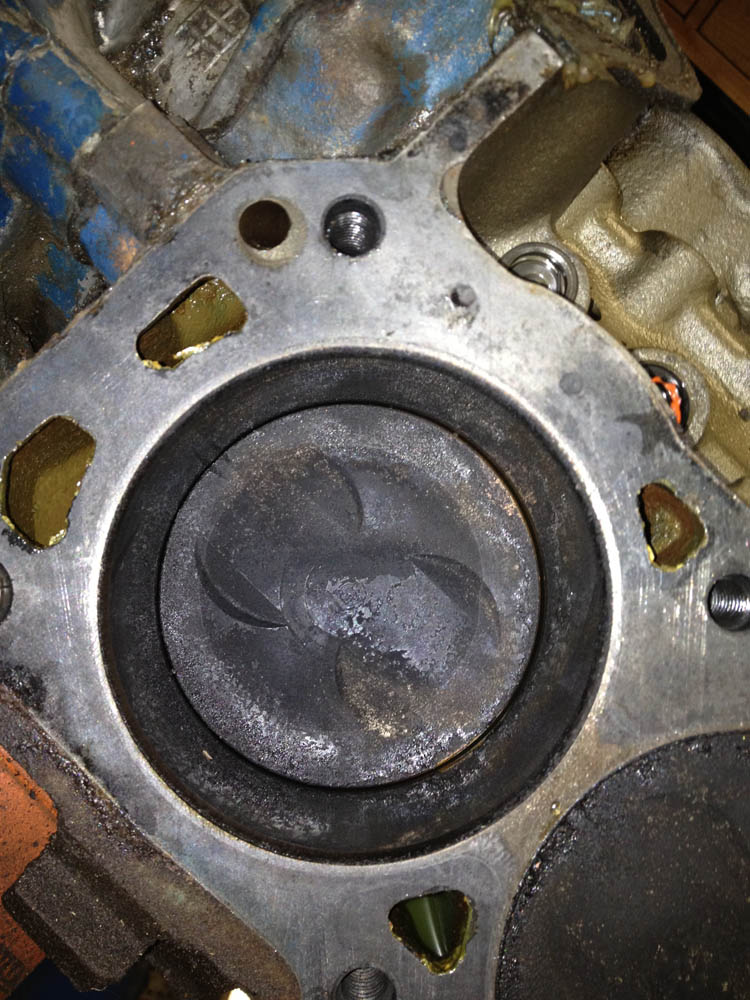
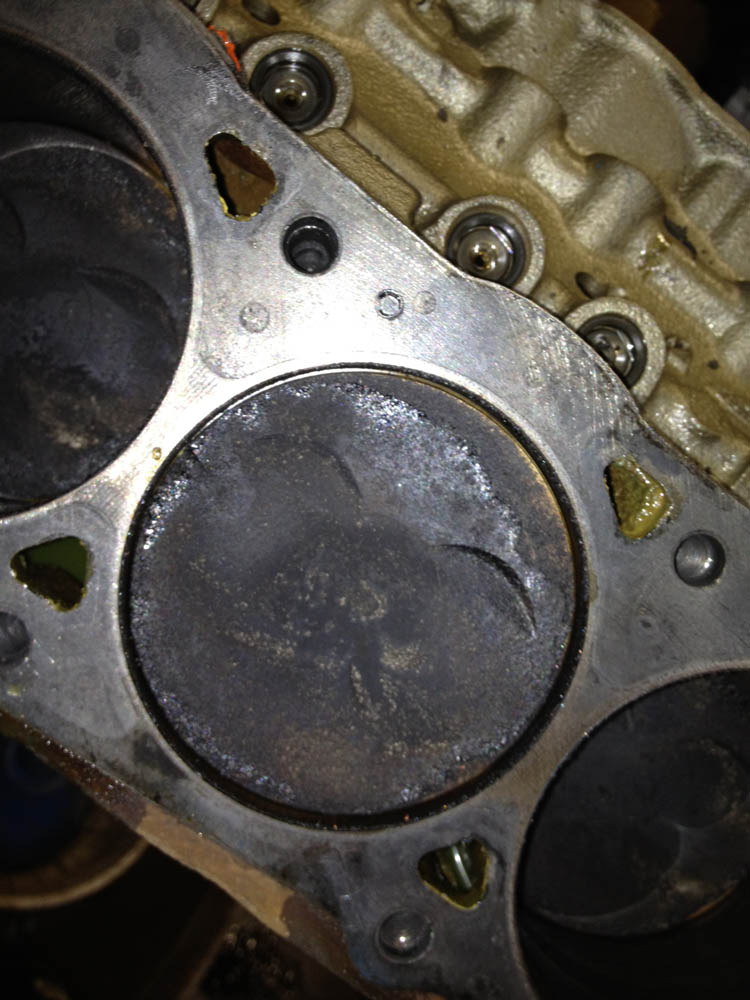
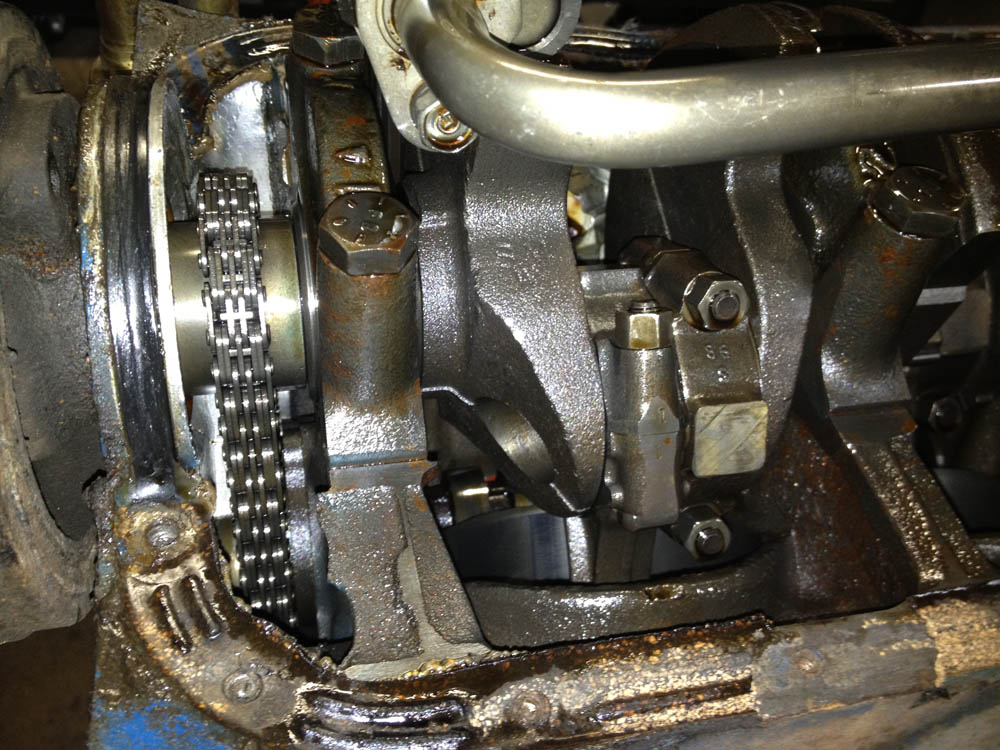
17Nov78 is the casting date on the block. Heads look pretty normal. Some carbon on the pistons is normal. They look a little oilier than usual around the rings.
- Viperwolf1
Re: Landsharks 76er Refresh and Build
![]() by landshark » Mon May 14, 2012 5:43 am
by landshark » Mon May 14, 2012 5:43 am
Viperwolf1 wrote:17Nov78 is the casting date on the block. Heads look pretty normal. Some carbon on the pistons is normal. They look a little oilier than usual around the rings.
I cleaned up the pistons, going to get the 351 heads that I pulled off cleaned up and put back on unless the E7's will fit, but will have to check the head bolts that came with this as I have been told a few times the head bolts are different.
Didn't see any scoring or definable ridges at the top of the piston bore which i guess is a good sign.
1976 Bronco "Green, Yellow, whatever", 1969 Bronco "Red", 1972 Bronco Stocker "Kind of Blue/Grayish"
-
landshark - Official CCB Member
- Posts: 3942
- Joined: Thu Oct 13, 2011 11:16 pm
- Location: Denver, Wash Park Area
Landsharks 76er Refresh and Build
![]() by landshark » Mon May 21, 2012 9:39 pm
by landshark » Mon May 21, 2012 9:39 pm
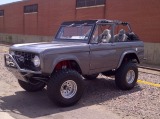
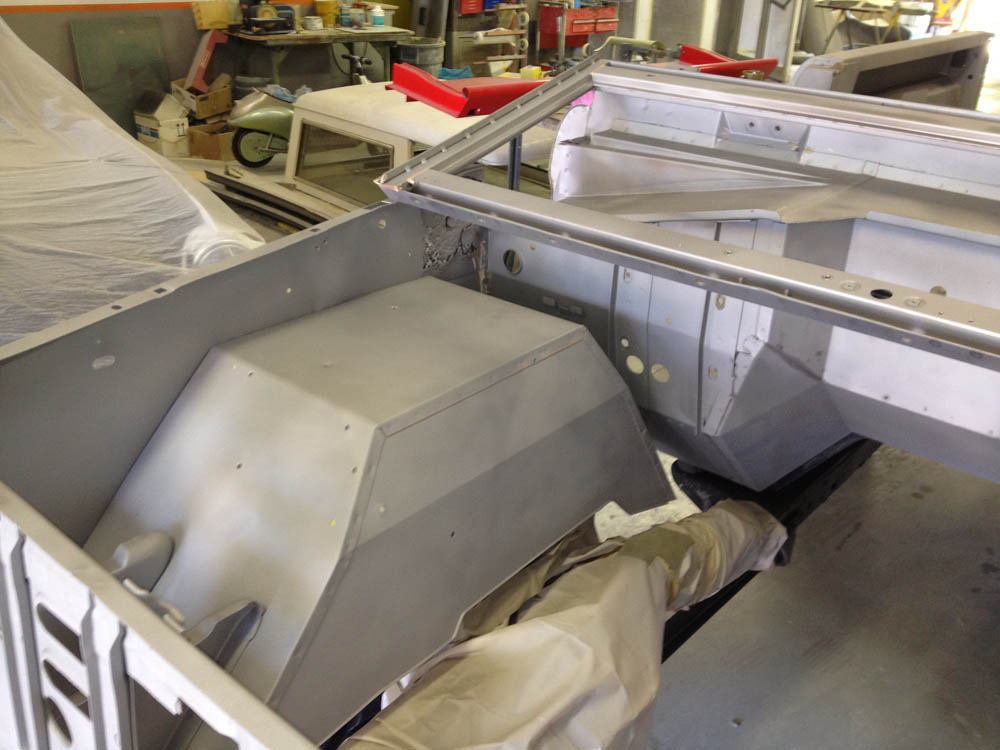
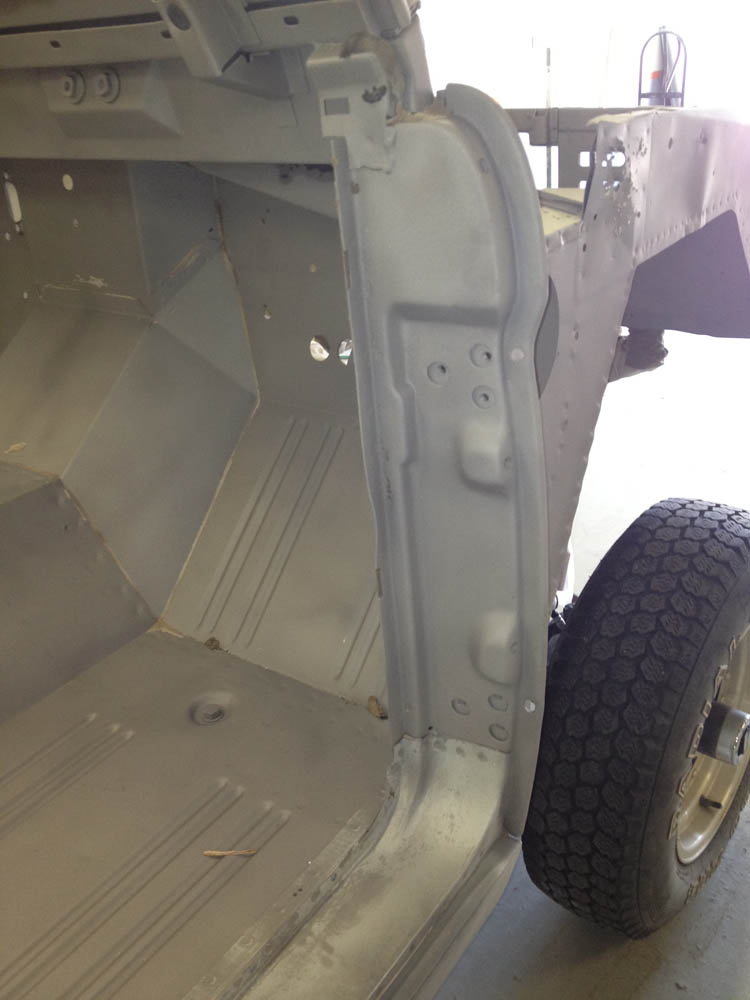
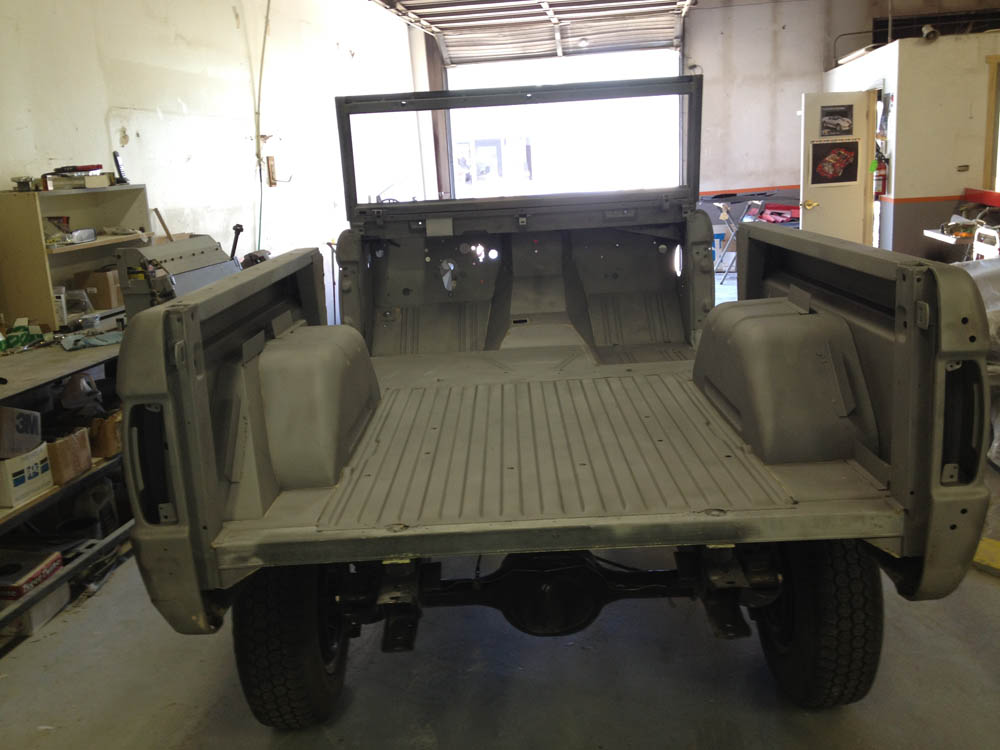
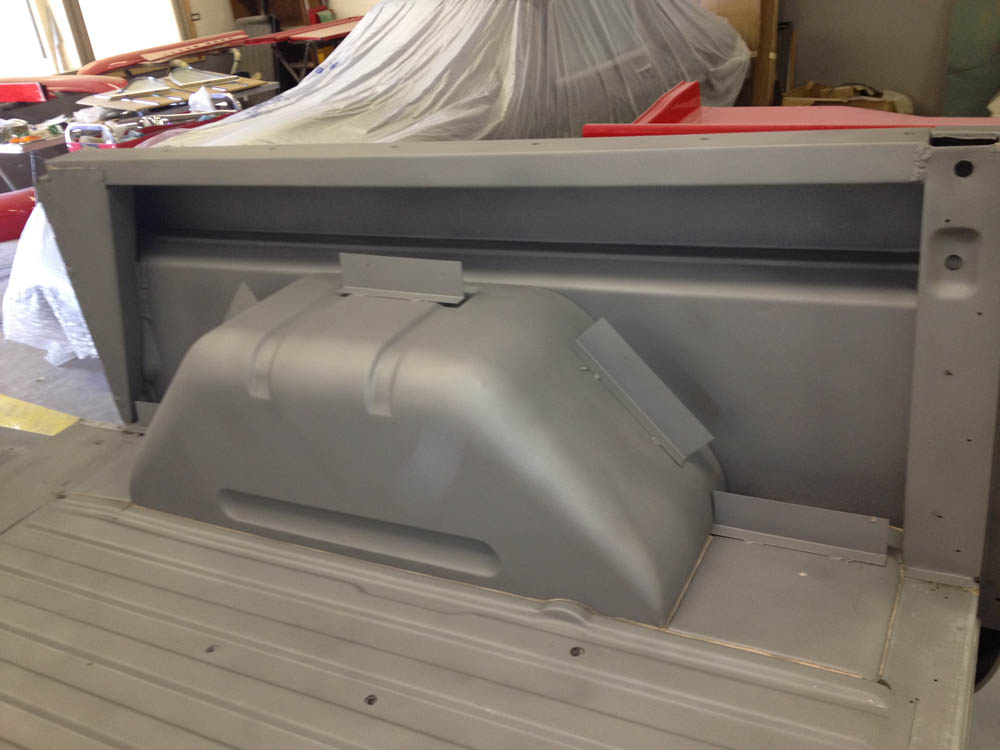
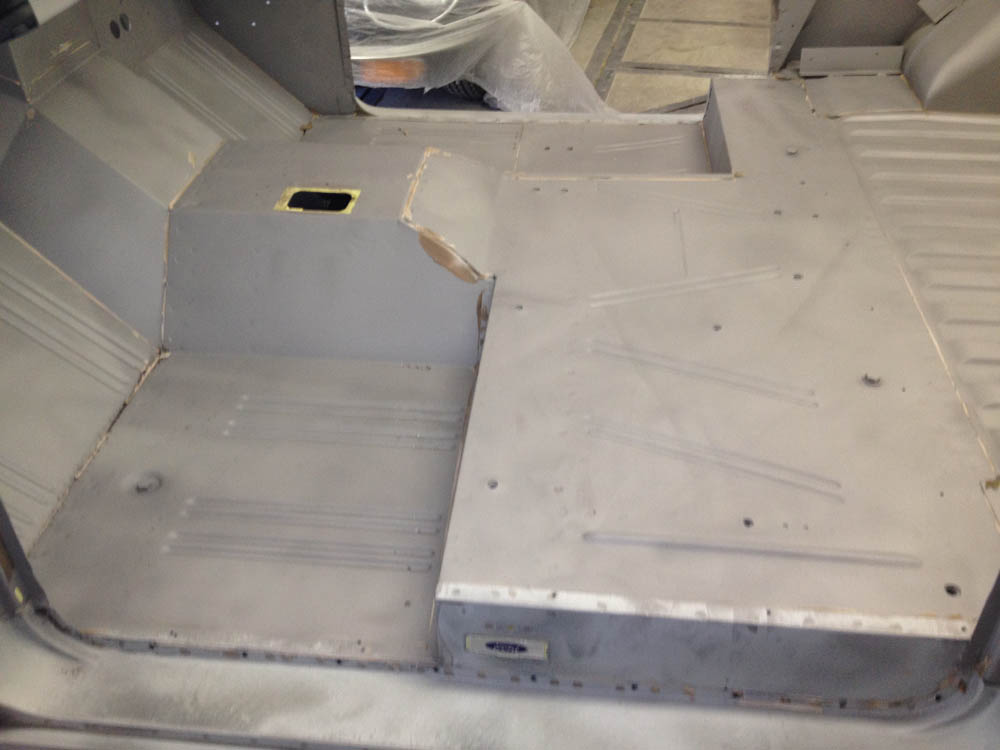
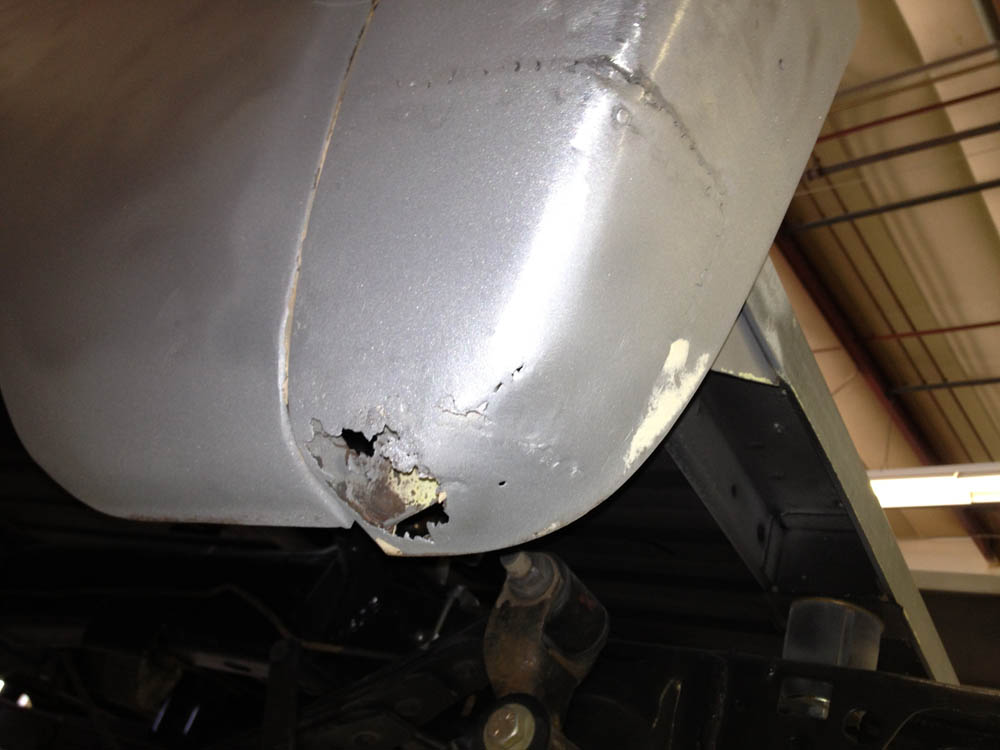
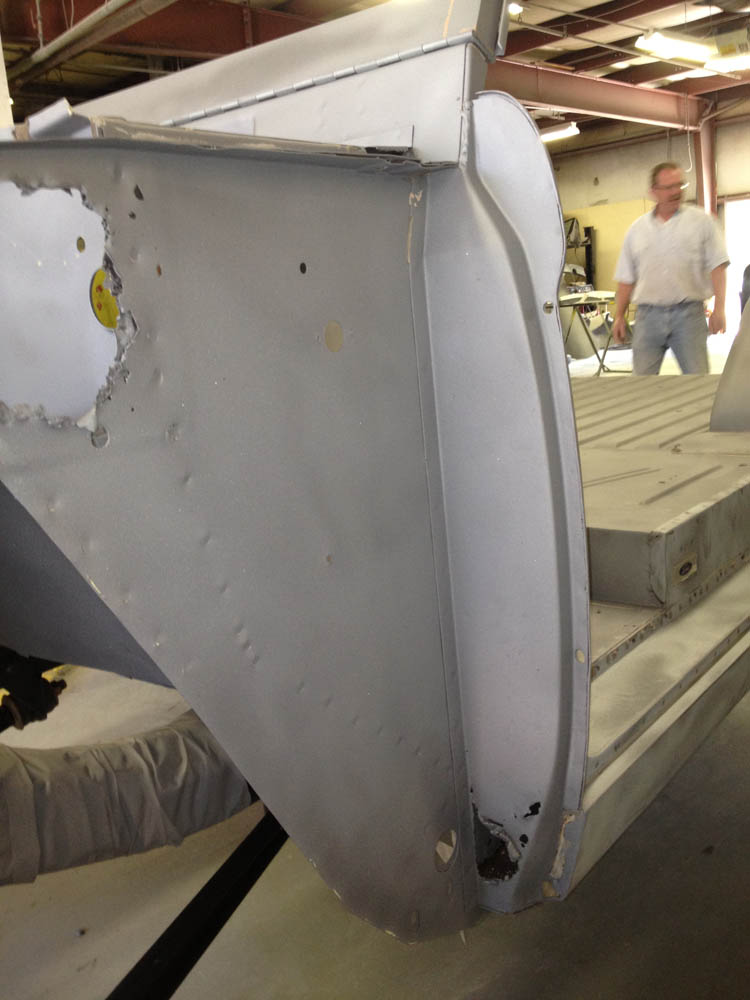
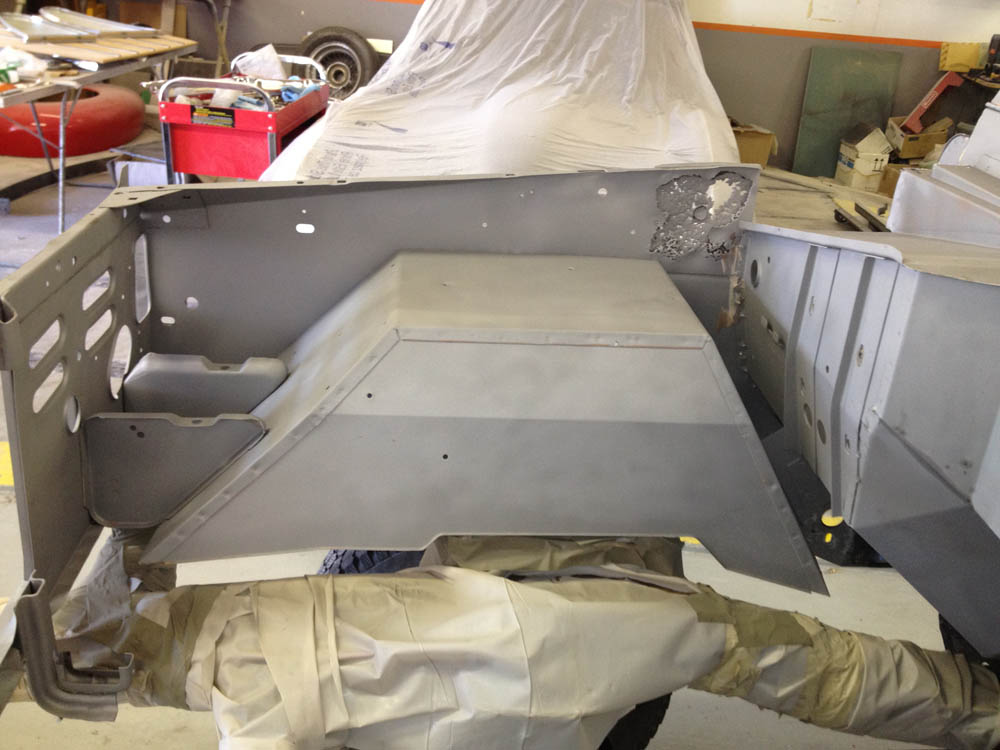
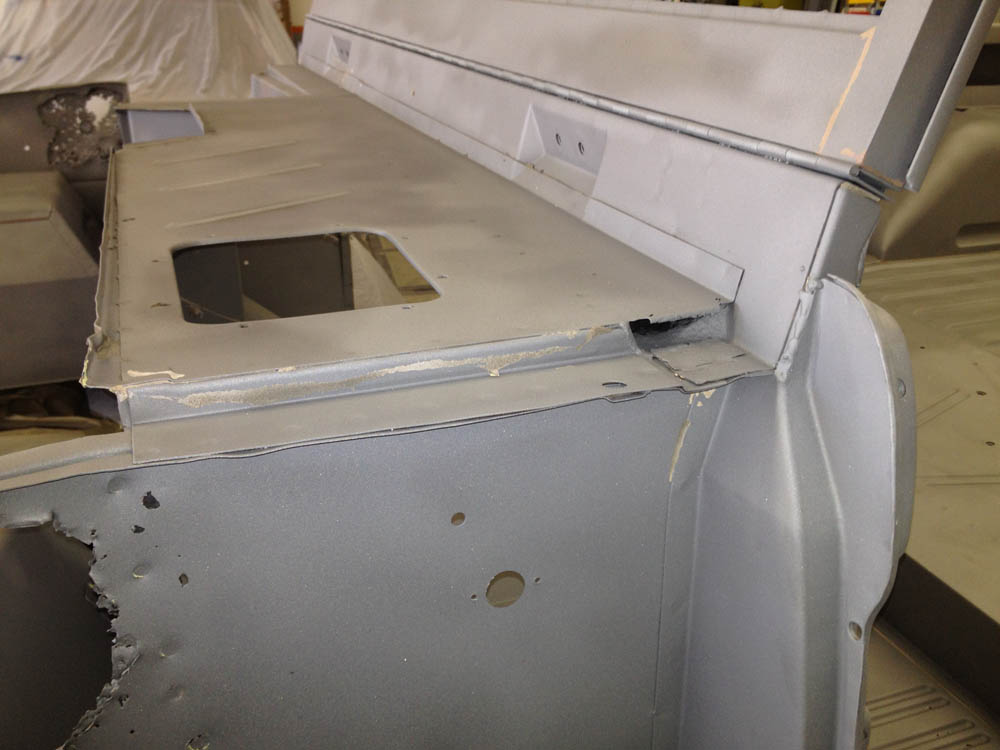
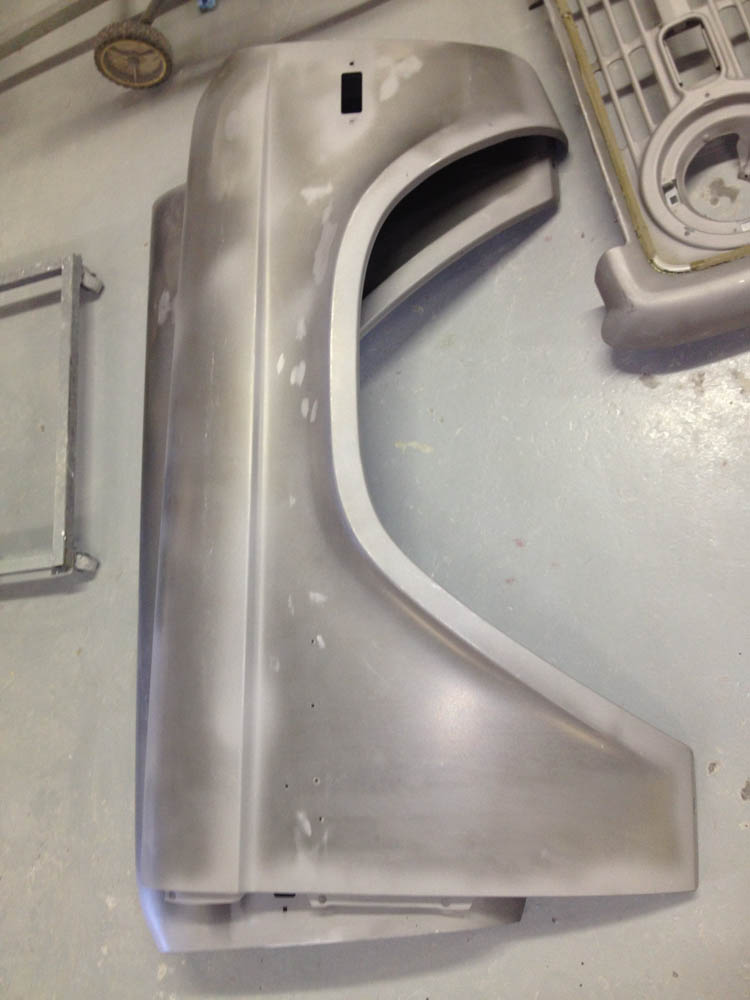
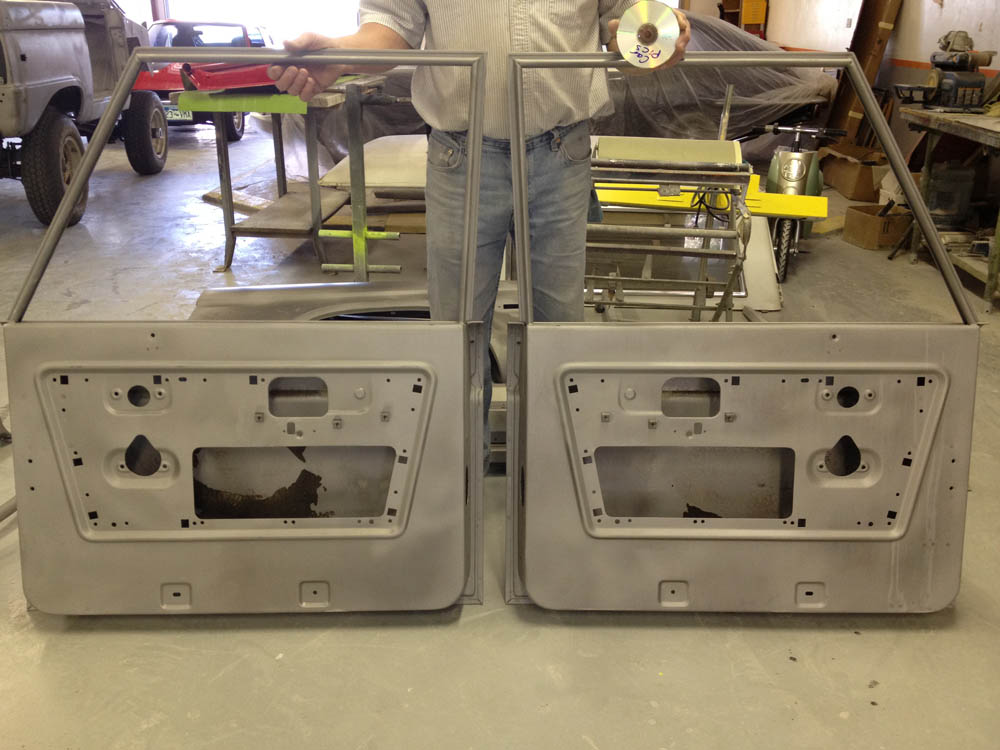
Well visited the blaster on Thursday and they started blasting. Should be done tomorrow. So far no surprises. A little hole in the drivers side rocker.
Will have lots of pics this week but here's a couple before they were done


Will have lots of pics this week but here's a couple before they were done
1976 Bronco "Green, Yellow, whatever", 1969 Bronco "Red", 1972 Bronco Stocker "Kind of Blue/Grayish"
-
landshark - Official CCB Member
- Posts: 3942
- Joined: Thu Oct 13, 2011 11:16 pm
- Location: Denver, Wash Park Area
Re: Landsharks 76er Refresh and Build
![]() by landshark » Tue May 29, 2012 1:53 pm
by landshark » Tue May 29, 2012 1:53 pm
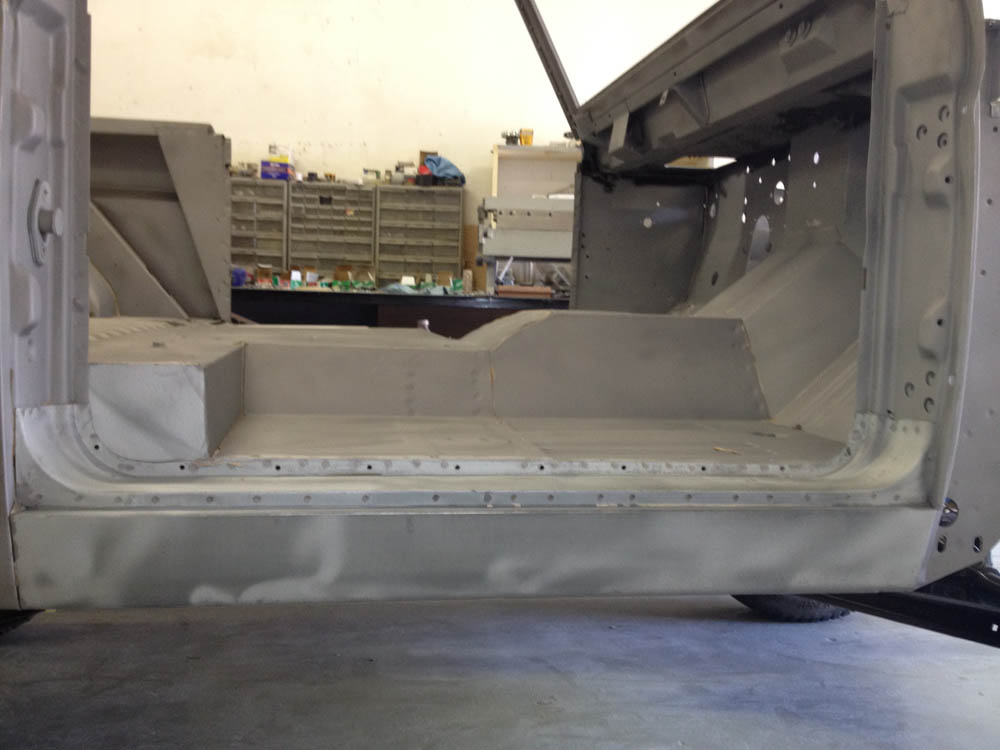
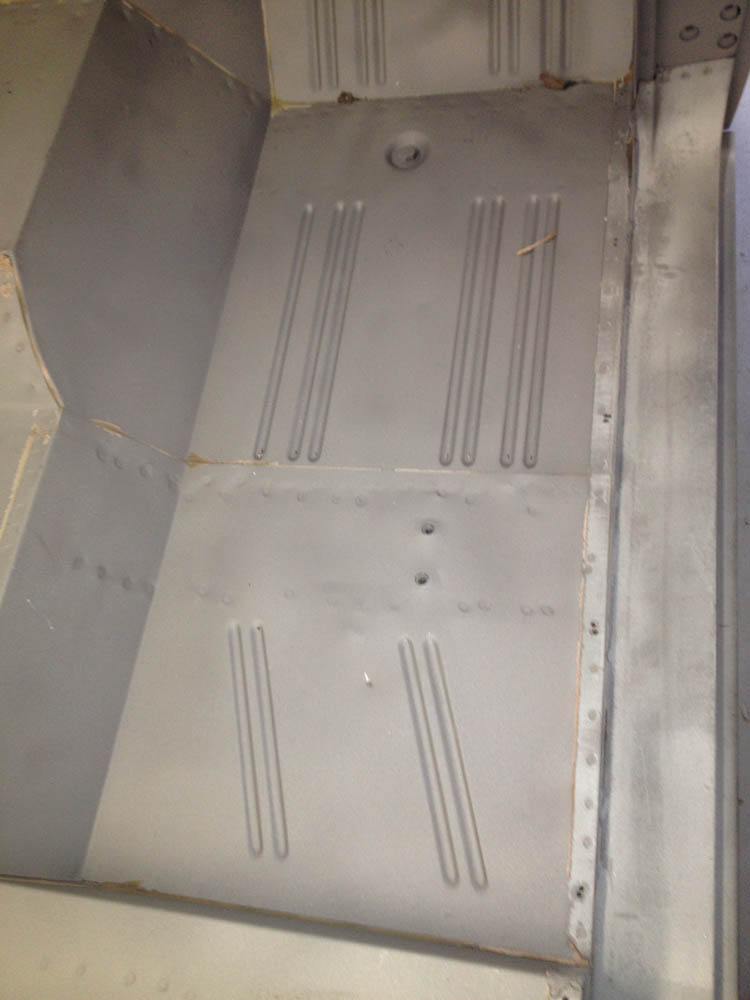
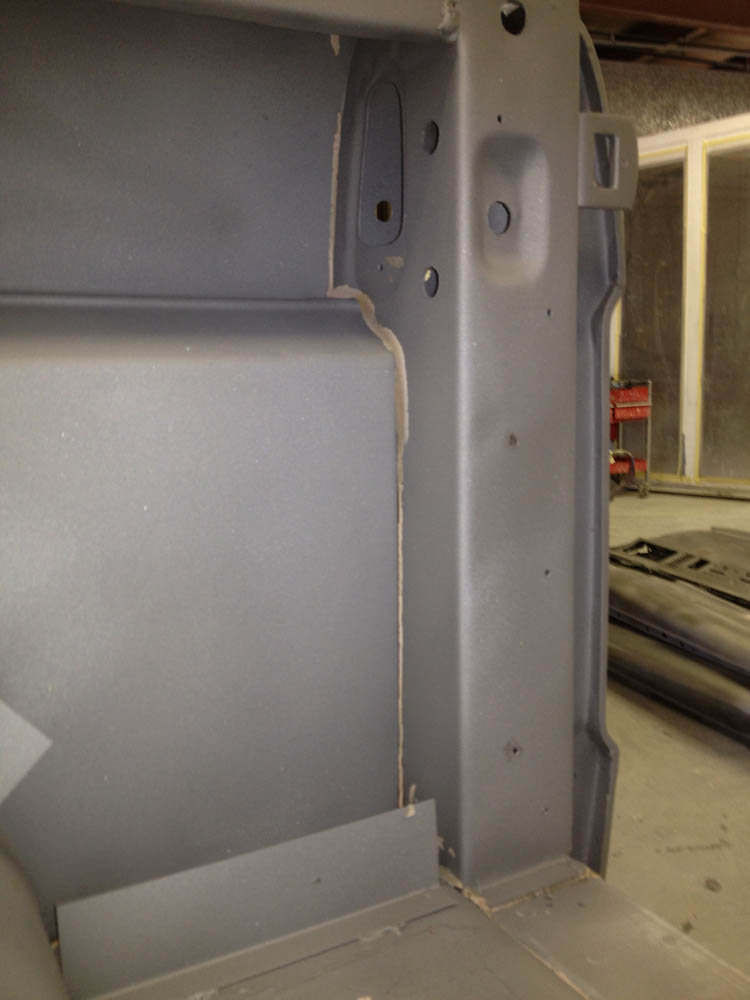
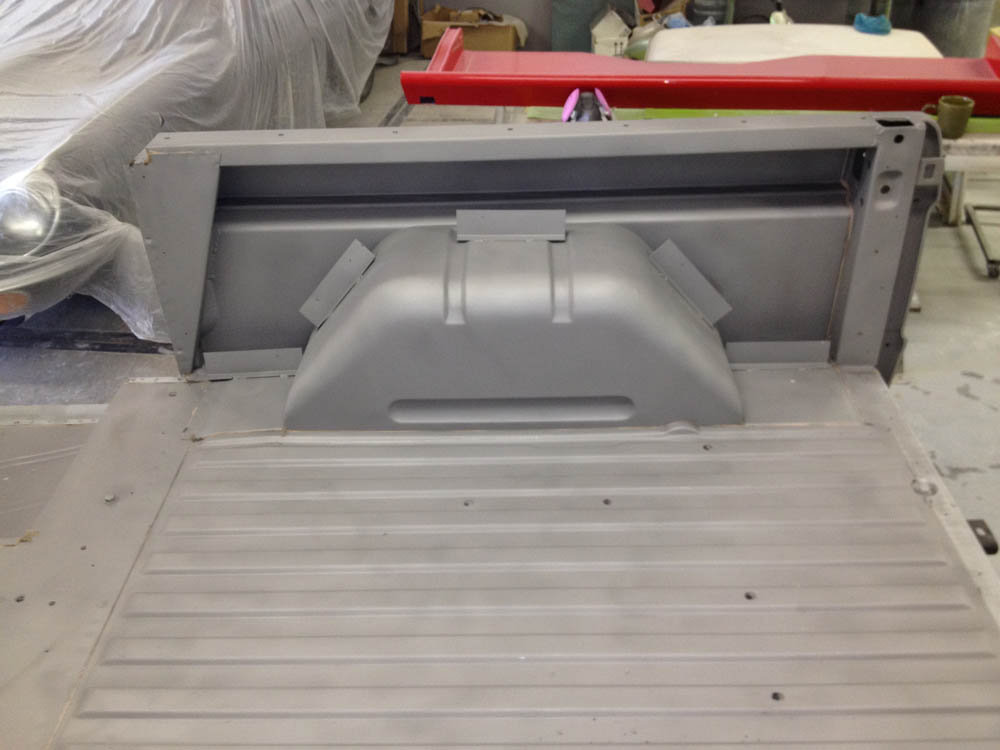
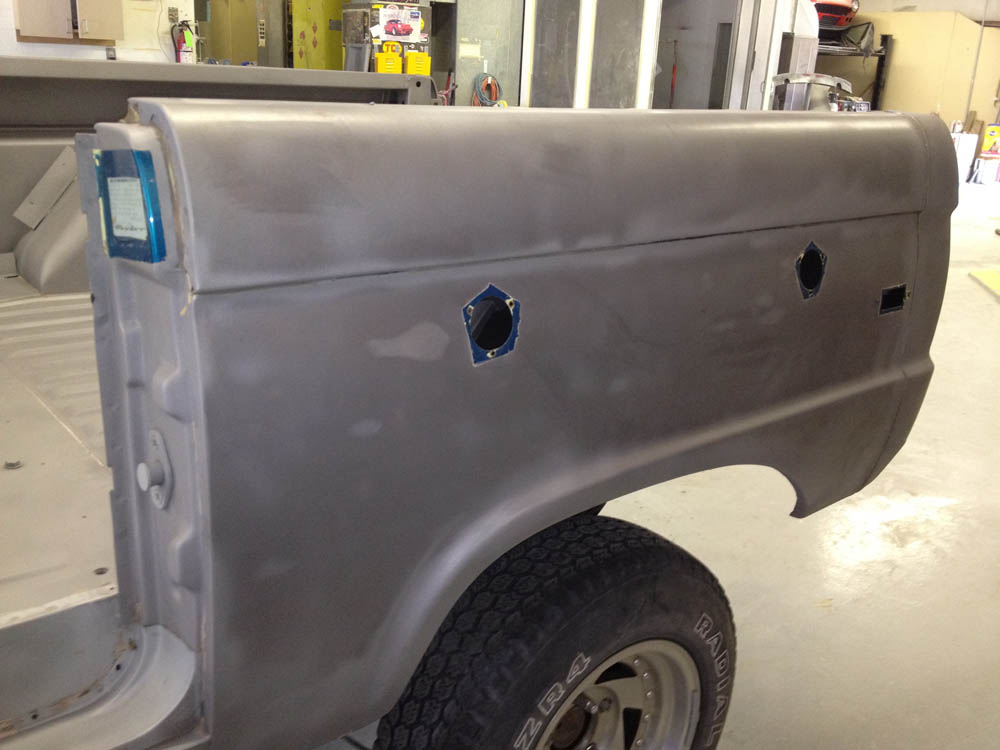
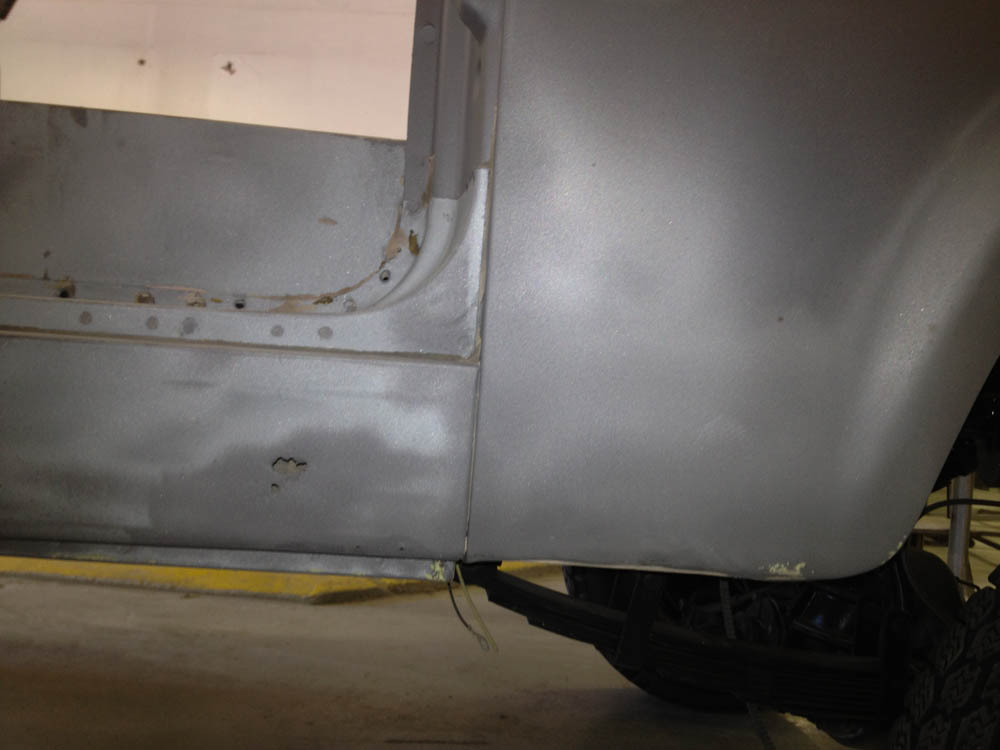
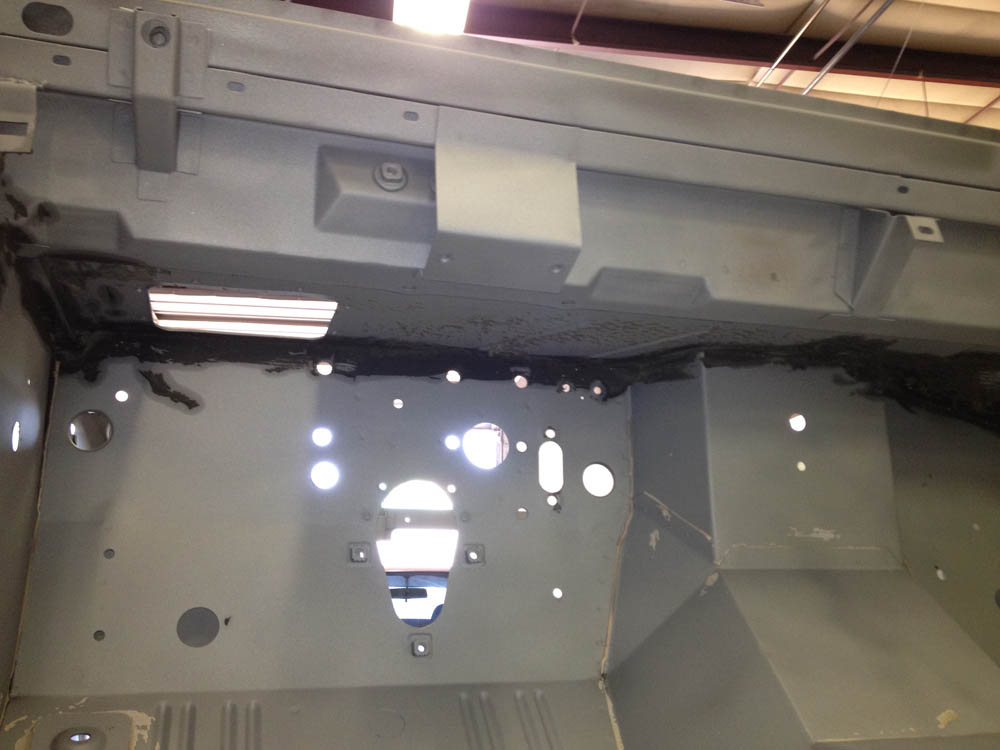
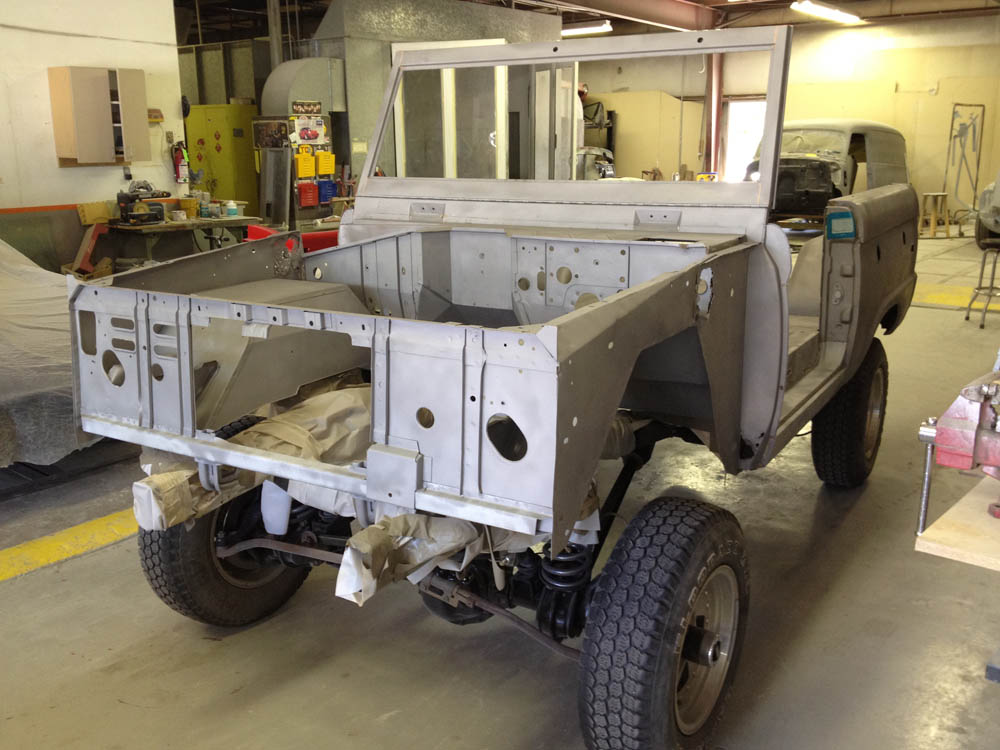
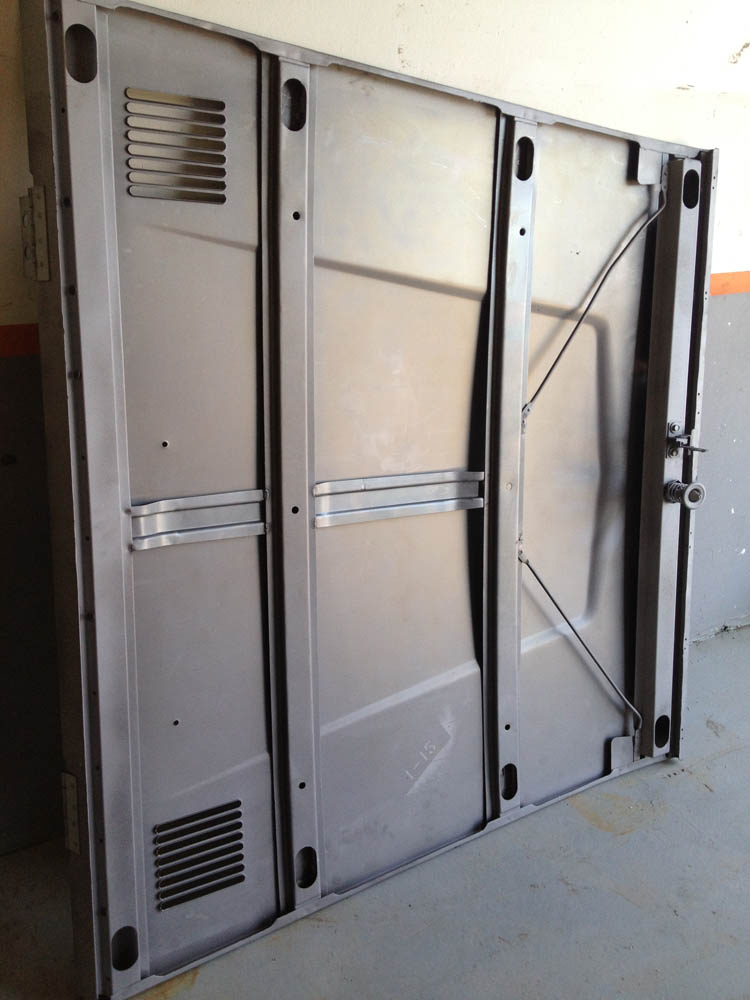
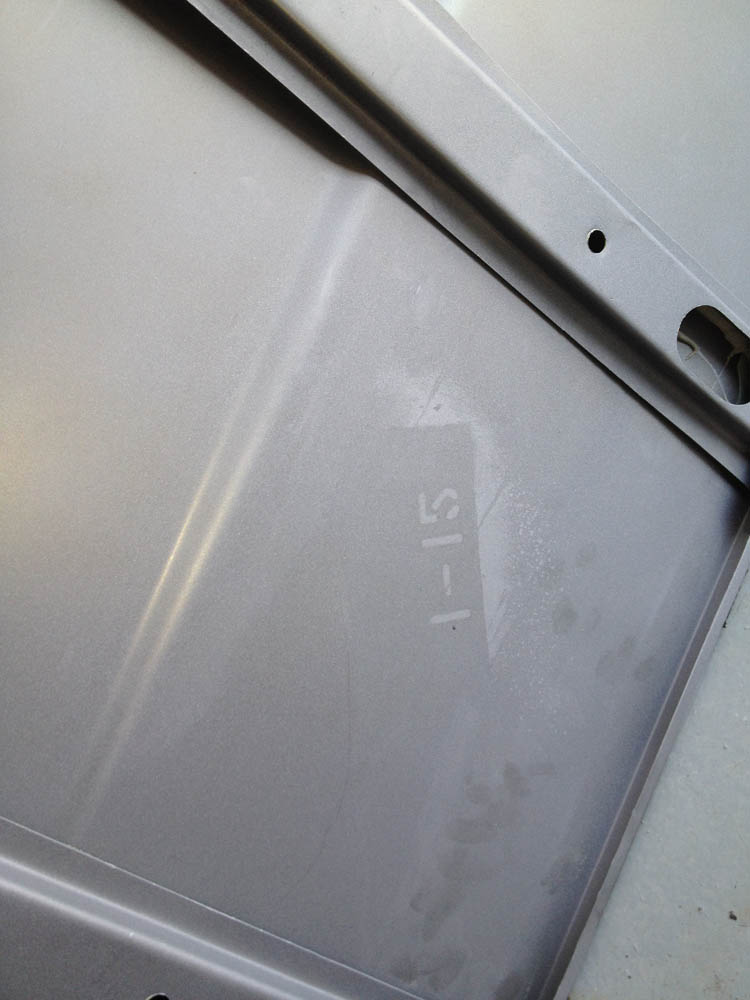
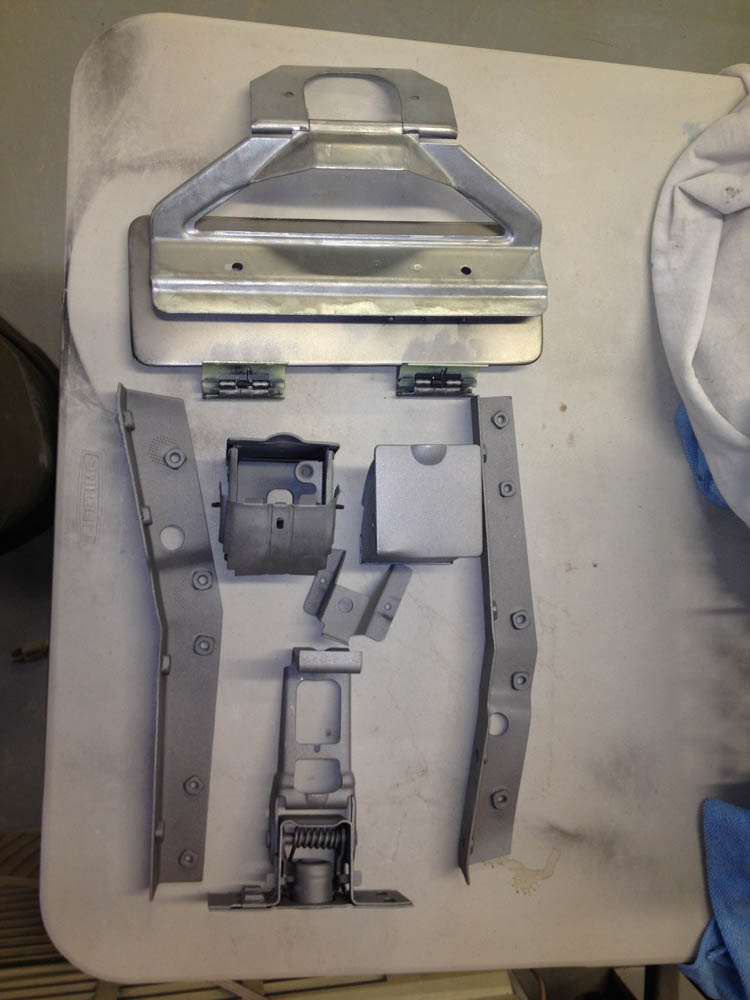
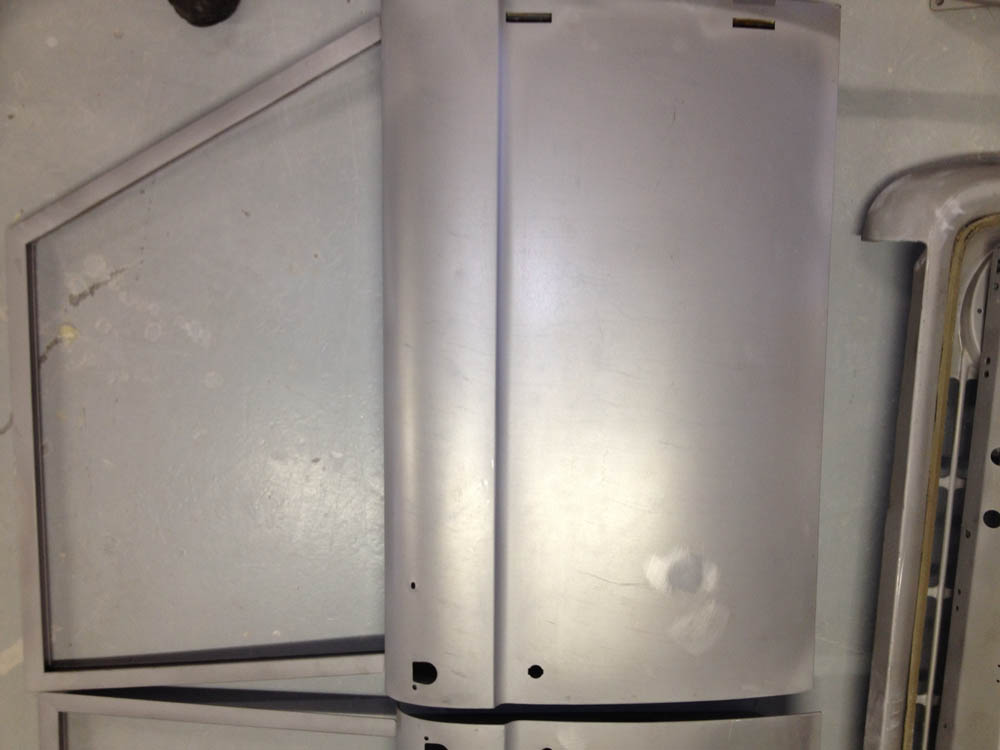
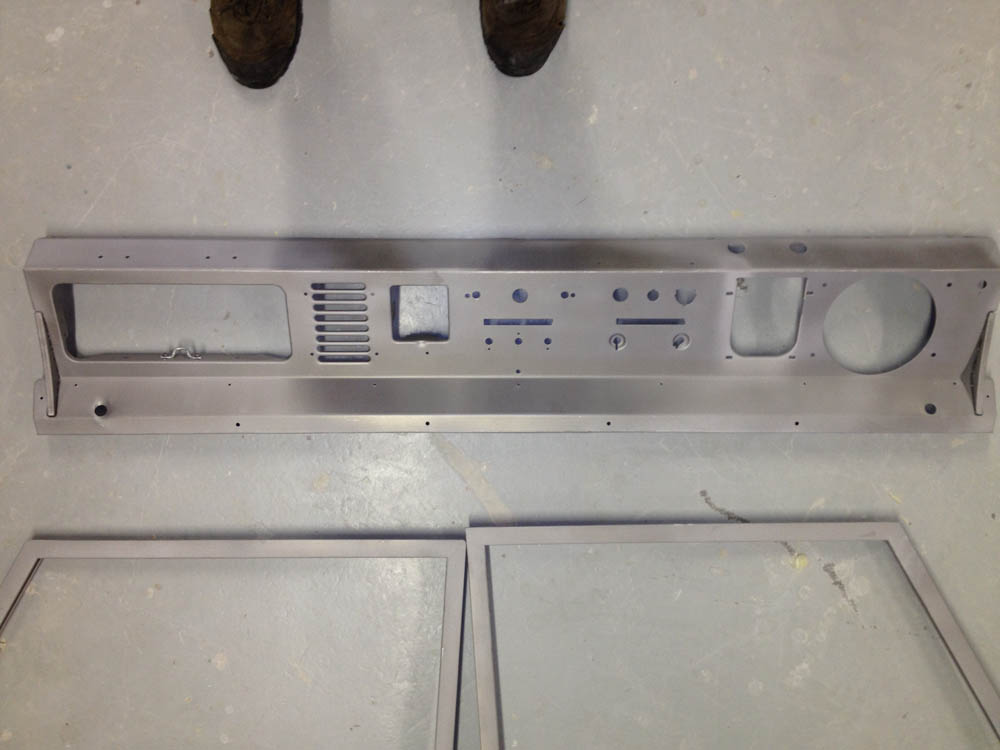
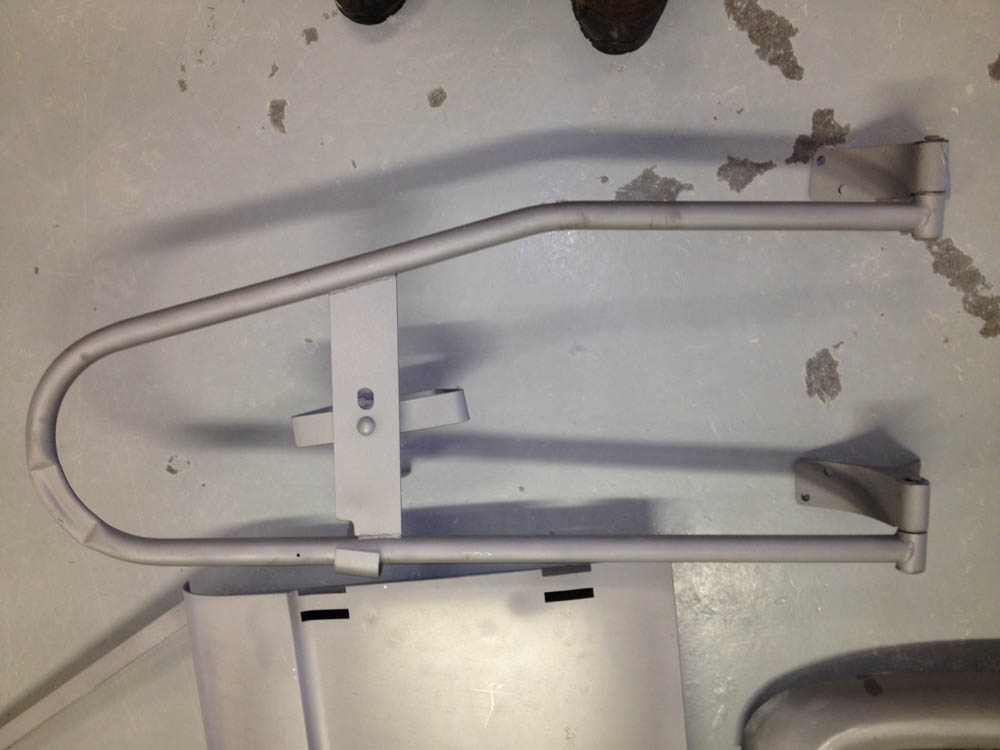
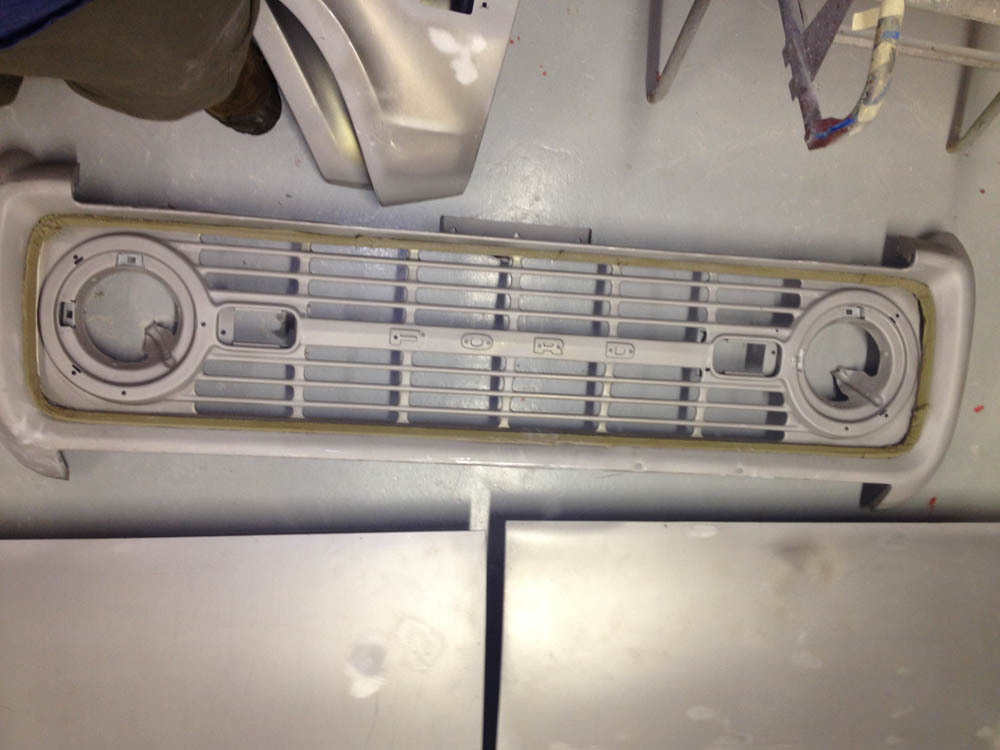
well bronco and all its parts are blasted..


1976 Bronco "Green, Yellow, whatever", 1969 Bronco "Red", 1972 Bronco Stocker "Kind of Blue/Grayish"
-
landshark - Official CCB Member
- Posts: 3942
- Joined: Thu Oct 13, 2011 11:16 pm
- Location: Denver, Wash Park Area
Re: Landsharks 76er Refresh and Build
![]() by Jesus_man » Tue May 29, 2012 2:02 pm
by Jesus_man » Tue May 29, 2012 2:02 pm
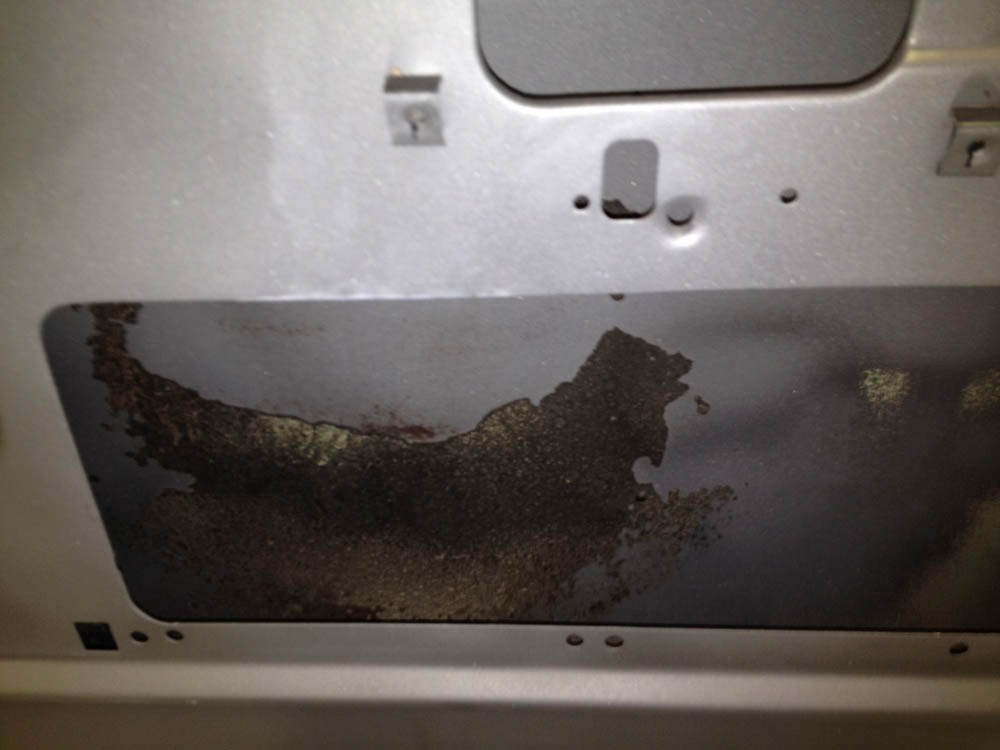
Got some patchwork to do, but it sure is nice to be able to see it all and know that you repaired everything, then sealed it so in 40 years it'll still be solid!
J.D.
J.D.
1973 Bronco, 351 SEFI, Locked, discs, 35's ZF-5spd and Atlas 4spd. 235:1 Crawl Ratio. It may be ugly, but it's slow.
http://www.ucora.org
http://www.ucora.org
-
Jesus_man - Official CCB Member
- Posts: 5987
- Joined: Thu Nov 11, 2010 9:36 am
- Location: California
Re: Landsharks 76er Refresh and Build
![]() by Entourage » Tue May 29, 2012 3:31 pm
by Entourage » Tue May 29, 2012 3:31 pm
How nice to have the blasting done savining hundreds of hours of sanding and stripping. Can't think of a better present than having the body be that solid and rust-free.
"I truly believe that good will outweigh evil, but there won't be peace on earth until the power of love overcomes the love of power" - Jimi Hendrix
-
Entourage - Official CCB Member
- Posts: 3275
- Joined: Wed Sep 29, 2010 4:45 pm
- Location: Gilbert, Arizona
Re: Landsharks 76er Refresh and Build
![]() by ZOSO » Tue May 29, 2012 4:33 pm
by ZOSO » Tue May 29, 2012 4:33 pm
I'm jealous. That thing is clean! I can't wait to get mine to that spot.
Rob
74 Ranger EFI351w, 4r70w, ARB 5.13 9in, ARB 5.13D44, and a bunch of other goodies. Best of all the family memories.
04 Mustang Cobra, KenneBell 2.2 feeding a lot of boost on E85. Tire shredding machine
New project: 77 Bronco Ranger, body work and more body work.
Very little left of a 72 durango tan explorer sport
74 Ranger EFI351w, 4r70w, ARB 5.13 9in, ARB 5.13D44, and a bunch of other goodies. Best of all the family memories.
04 Mustang Cobra, KenneBell 2.2 feeding a lot of boost on E85. Tire shredding machine
New project: 77 Bronco Ranger, body work and more body work.
Very little left of a 72 durango tan explorer sport
-
ZOSO - Moderator
- Posts: 3908
- Joined: Mon Nov 15, 2010 4:58 pm
- Location: Henderson, Co
Re: Landsharks 76er Refresh and Build
![]() by Rox Crusher » Tue May 29, 2012 9:25 pm
by Rox Crusher » Tue May 29, 2012 9:25 pm
WOW !
That is a great survivor worthy of what you are doing.
Can't wait to see it progress into a real jewel.
PS..........keep the cost down so the sale price isn't out of my reach.

That is a great survivor worthy of what you are doing.
Can't wait to see it progress into a real jewel.
PS..........keep the cost down so the sale price isn't out of my reach.
1977 Sport, 351w OBDII EFI motor, 4R70W auto, 4:88 gears, ARB lockers, 3.5" suspension, 33" tires.
-
Rox Crusher - Official CCB Member
- Posts: 3980
- Joined: Sun Oct 10, 2010 4:36 pm
- Location: Roxborough Park, Colorado
Re: Landsharks 76er Refresh and Build
![]() by landshark » Tue May 29, 2012 9:42 pm
by landshark » Tue May 29, 2012 9:42 pm
thanks guys, ya was nice to have it back from the blaster.. not too many surprises... now onto body patching and building up the engine ;)
1976 Bronco "Green, Yellow, whatever", 1969 Bronco "Red", 1972 Bronco Stocker "Kind of Blue/Grayish"
-
landshark - Official CCB Member
- Posts: 3942
- Joined: Thu Oct 13, 2011 11:16 pm
- Location: Denver, Wash Park Area
Re: Landsharks 76er Refresh and Build
![]() by landshark » Wed May 30, 2012 12:08 pm
by landshark » Wed May 30, 2012 12:08 pm
got my marti report...
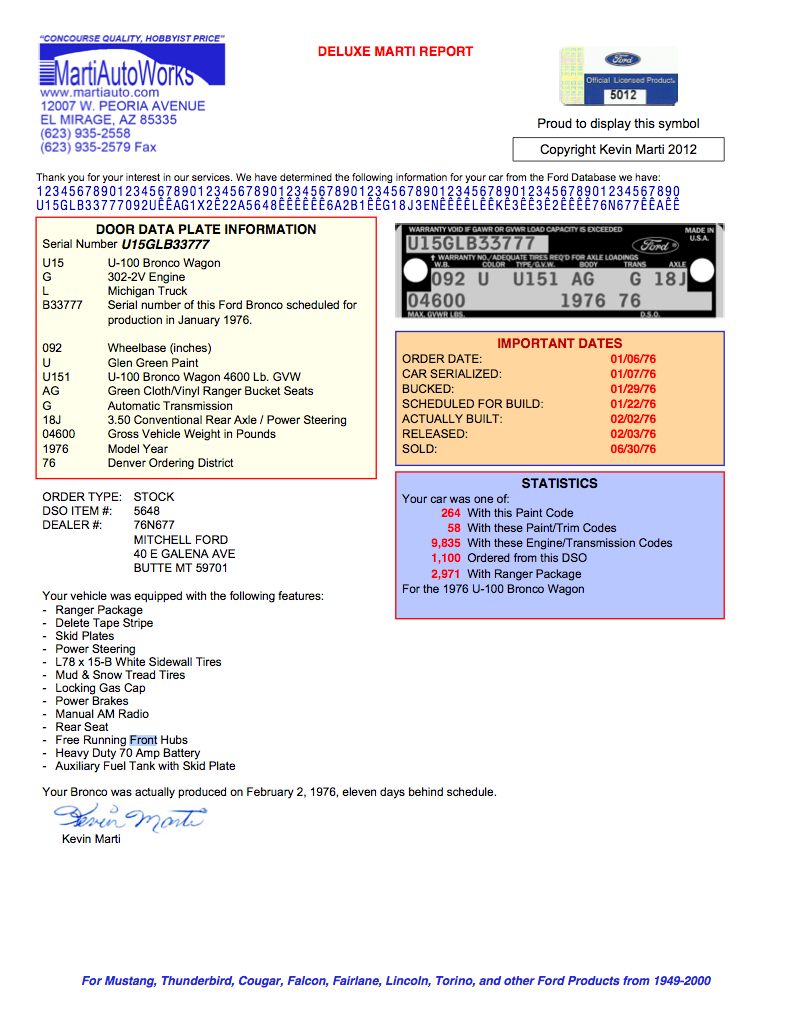
i figured i had the stripe delete so thats swell. i dont like the stripes anyway ;)
i figured i had the stripe delete so thats swell. i dont like the stripes anyway ;)
1976 Bronco "Green, Yellow, whatever", 1969 Bronco "Red", 1972 Bronco Stocker "Kind of Blue/Grayish"
-
landshark - Official CCB Member
- Posts: 3942
- Joined: Thu Oct 13, 2011 11:16 pm
- Location: Denver, Wash Park Area
Re: Landsharks 76er Refresh and Build
![]() by airbur » Wed May 30, 2012 12:10 pm
by airbur » Wed May 30, 2012 12:10 pm
That is sweet!!
Sold: 1970 w/427W Injected Stroker
-
airbur - Official CCB Member
- Posts: 1721
- Images: 0
- Joined: Wed Sep 29, 2010 7:39 am
- Location: Castle Pines, CO
Return to General 4x4 Technical
Who is online
Users browsing this forum: No registered users and 11 guests