For the fuel system, I'm upgrading everything to prepare for going to fuel injection. Starting with the tank, I ordered it with the high pressure internal pump. For the lines to/from the engine, I wanted as much hard line as possible and decided to use OEM style nylon lines and push-to-connect fittings. This will allow me to use factory fuel filters. A big objective of this project is to make the truck as serviceable as possible. You don't want to be in Moab and over-nighting parts from Summit or JEGS instead of hitting up the local O'Relly's. 317 by J W, on Flickr
I also purchased the Dorman installation tool to make life easier. 319 by J W, on Flickr
But the end result looks pro. 318 by J W, on Flickr
Getting the nylon lines pushed over the barbs of the AN elbows at the tank was hard and took several nights and some thinking, but I got it. 331 by J W, on Flickr
Another piece of the fuel system puzzle was the regulator. Keeping with the serviceable theme, I wanted to use a Ford OE style regulator, but needed the mating housing for it to bolt up to. A few nights of CAD and I came up with a fuel manifold / regulator base. 332 by J W, on Flickr
The manifold will mount to the firewall. The brass fittings are Send and Return to the tank and will point down and have nylon lines running to the frame. The ports in the milled box are Send and Return to the fuel rail. The holes in the corners are mounting holes and the remaining holes are cross ports and pressure taps if I want to monitor fuel pressure down the road.
Re: New Member 69
Posted: Thu Apr 30, 2015 12:32 am
by Jesus_man
You have some amazing tech and a knack for making this a piece of art. I'm baffled (don't take this in a negative way) that you still have drum brakes on a rig with all this high tech stuff! Personally, I prefer drums for their holding power, but not at the cost of their unevenly distributed stopping.
I really hope to see your rig in person someday.
Re: New Member 69
Posted: Thu Apr 30, 2015 8:41 am
by phyler
After seeing those fuel lines I know anything I do will look like crud but at least I'll have something to aspire towards.
Adam
Re: New Member 69
Posted: Thu Apr 30, 2015 11:20 am
by Digger
Jesus_man wrote:You have some amazing tech and a knack for making this a piece of art. I'm baffled (don't take this in a negative way) that you still have drum brakes on a rig with all this high tech stuff! Personally, I prefer drums for their holding power, but not at the cost of their unevenly distributed stopping.
I really hope to see your rig in person someday.
The drums are laughable. While rebuilding them, I wished I had committed to disc, but I've been wrenching on this thing for a year+ now and I want to drive it again. My experience with rear drums has been pretty good. The current ones are more than adequate, to the point I had to restrict the rear pressure quite a bit on the last truck. BUT after seeing the costs of drums going up, the next rebuild will be disc and a modern MC.
Re: New Member 69
Posted: Thu Apr 30, 2015 7:00 pm
by Digger
Forgot to add this last night, but I started playing around with the family cage layout. I've spent some hours researching crashed data and technical papers on roll over dynamics. I'm baking that knowledge into this design.
Looks like a nice design. A few things I incorporated into my cage that a really like.
1. Overhead CB mount. 2. Hi-lift mount 3. Small Shovel mount
It's nice to have 2&3 accessible but not bouncing around in the back of your truck.
Re: New Member 69
Posted: Fri May 01, 2015 3:39 pm
by mickphatmac
A M A Z I N G ! ! ! Thank you for YOU and your build section
Re: New Member 69
Posted: Fri May 15, 2015 9:16 am
by Digger
mickphatmac wrote:A M A Z I N G ! ! ! Thank you for YOU and your build section
Thanks!
I have been finishing the brake line plumbing, running lines from the rear to the MC and laying the lines on the front axles and back to the MC. It's been a slow process, but the lines are neatly bent and bracketed. 338 by J W, on Flickr
Part of the work was mounting up the proportioning valve. I wanted it near the MC like it was on my last rig. I made up a little bracket with some aluminum and rivnuts. 342 by J W, on Flickr
Then I could finish plumbing the MC 344 by J W, on Flickr
I also made this breather bolt for the front axle out of a stainless shoulder bolt. 339 by J W, on Flickr
Re: New Member 69
Posted: Fri May 15, 2015 9:23 am
by Digger
FINALLY, my front shock tubes made it to my house. This has been a calamity of e-mails, phone calls, back orders and waiting, but the parts finally made it and it was time to assemble some shocks.
Finished product with bushing conversion: 349 by J W, on Flickr
Getting ahead of myself a little, the builder bracket set for my roll cage showed up! 345 by J W, on Flickr
Re: New Member 69
Posted: Fri May 15, 2015 9:39 am
by Digger
With the shocks done, I needed to build the mounts for the front shocks and JounceShocks. The Bilsteins were to be mounted in the stock-ish position using F-250 mounts I stole from my last build. (They proved to be too short, but more on that later) The Jounceshocks only had one logical mounting position given the packaging restrictions, which was inside the front coils. To start with, I modified a std FlexMount to bolt to the upper coil bucket and replace the spring retainer. 353 by J W, on Flickr
Then I needed to modify a lower dome target to sit in the lower coil cup. It seemed straight forward at first until I remembered that the lower coil cup is not flat on the inside. It resulted in me having to carefully cut a roof-shaped peak in the underside and carefully counterboring the mounting bolts and switching to socket-head cap screws to reduce the size of the hole I was making. 352 by J W, on Flickr
With those two parts in place, I lowered the truck until the trackbar almost hits the coil bucket and measured the distance between mounts. I needed to add an inch to the assembly to guarantee no impact of the links to the frame. Luckily SPC carries such an extension for this purpose. I just needed to cut and weld it to the right length. 355 by J W, on Flickr
Then some paint and assembly with anti-seize 356 by J W, on Flickr
Re: New Member 69
Posted: Fri May 15, 2015 9:57 am
by Digger
To mount the main shocks, I came up with a bracket that will weld to the frame, then the F-250 mounts will bolt to those. This also allowed me to push the shock mounts an inch outboard for clearance. I also gusseted the coil buckets to handle the extra forces from the JounceShocks. 357 by J W, on Flickr
Even after jacking up the body to align the passenger door better, the right side shock mount was barely touching the inner fender. For some reason that fender was 1/2" closer to the frame than the driver's side and I needed all the space I could get. My solution was to form a dome in the sheet metal for clearance using my hydraulic hole puncher kit and some scrap metal laying around. 362 by J W, on Flickr
The JounceShocks look off-center, but the truck is at full droop which swings the axle to the driver's side. The important part is that they square up at impact. 360 by J W, on Flickr
Re: New Member 69
Posted: Fri May 15, 2015 10:09 am
by crawlercreations
I love the attention to detail and the patience to make things right the first time. It will pay off quickly when you don't have to go back and rework something. Great job!
Re: New Member 69
Posted: Fri May 15, 2015 10:29 am
by toddz69
X2. This is really an awesome build. I like the extensions for the F250 mounts. In retrospect, I should have tried something Iike that on mine instead of going with custom mounts.
Jounce shocks inside the coils - nice packaging and very XJ-like! :)
Todd Z.
Re: New Member 69
Posted: Fri May 15, 2015 9:09 pm
by Justin
I really dig the way you did the jounce shocks. The packaging is really clean.
New Member 69
Posted: Mon May 18, 2015 7:29 am
by toddz69
Digger wrote:After installing the 23 gallon "Sherman Tank", I didn't feel like following the instructions to weld the tank to the mounting brackets, so I made these safety retainer brackets instead. [url=http://s316.photobucket.com/user/Rock_Ranger/media/Trucks/Bronco%20Restomod/IMG_20150429_211206_580_zpswqebffhz.jpg.html][img]
Those safety retainers look like a great item! Consider making/selling some? I'd bet they'd sell!
Todd Z.
Re: New Member 69
Posted: Sun Jun 14, 2015 10:24 pm
by Digger
SHE RUNS!
I got a little screwed up with 3 wks of travel for work, but I squeezed in the final wrenching Memorial Day weekend. It seemed fitting to be working on an old American classic reflecting on our freedoms that weekend.
The last bit of fuel system went together quickly. I had to make a temporary adapter to mate the high pressure portion of the fuel system to the carb portion until I go EFI. Right now the 40 psi regulator feeds the 3 psi regulator for the carb. 365 by J W, on Flickr
Building out the exhaust took the better part of the weekend. My 2.5" builder kit from Columbia Mandrel Bending 379 by J W, on Flickr
The Y-pipe had some seriously tight clearances with all the uptravel this truck has. I tucked it in as tight as possible, but still needed to squash it into an oval shape in two spots. 380 by J W, on Flickr
I bought some OE-style rubber doughnut hangers and made some hooks to mount the exhaust. 382 by J W, on Flickr
Since I was re-using the 3" Dyna-Max muffler, BC it was in good shape and I liked the sound, I had to flare the ends of the pipe to mate up for welding. 383 by J W, on Flickr
Snaking around the 3-link and gas tank was no picnic, but careful measuring and a little more squashing got it in. 386 by J W, on Flickr
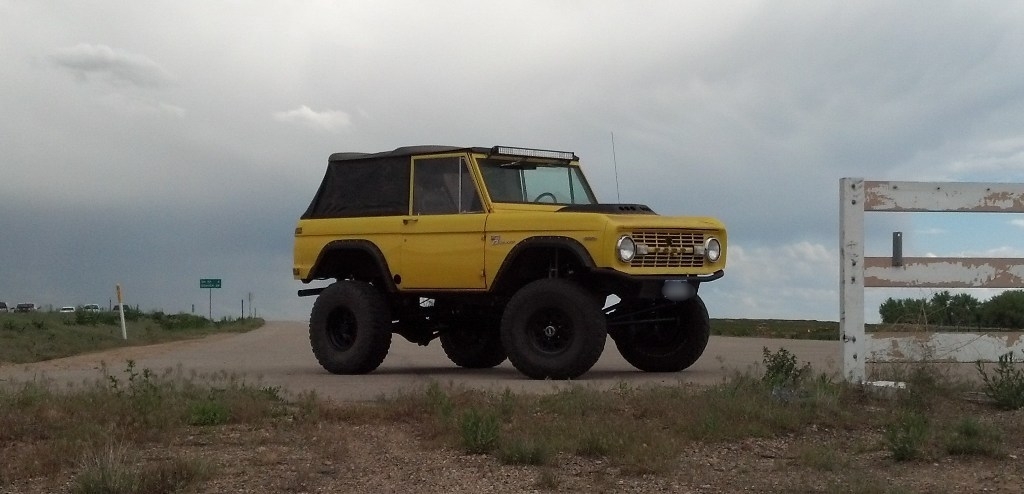
I drives pretty well. I need to add a sway bar for street driving. Not surprised, but wanted to try it without first. Also need to pull the front shocks apart and add some low speed rebound damping, but that will wait until I'm done done with the build. Overall you can hit bumps with some speed and the truck s it off well. I'm anxious to see how she does.
Re: New Member 69
Posted: Sun Jun 14, 2015 10:57 pm
by Justin
I would tell you how awesome your truck is, but it's too awesome for words. Nicely done!
Re: New Member 69
Posted: Mon Jun 15, 2015 6:15 am
by TOOLMAN
Niiice...
Re: New Member 69
Posted: Mon Jun 15, 2015 6:17 am
by phyler
I think I saw you driving on the frontage road of I25 last Tuesday just south of 119. I didn't get a pic for the sightings thread. Definitely awesome. Love the fuel runs and exhaust.
Re: New Member 69
Posted: Mon Jun 15, 2015 6:37 am
by Gunnibronco
Awesome! Such a clean build.
Re: New Member 69
Posted: Mon Jun 15, 2015 8:32 am
by Digger
phyler wrote:I think I saw you driving on the frontage road of I25 last Tuesday just south of 119. I didn't get a pic for the sightings thread. Definitely awesome. Love the fuel runs and exhaust.
That would have been me.
Thanks for all the feedback. It feels so good to be driving this beast again.
Re: New Member 69
Posted: Mon Jun 15, 2015 12:49 pm
by Jesus_man
I love the stance and it's a work of art!! I am interested in what you do for sway bar. Mine needs something as well.
Re: New Member 69
Posted: Mon Jun 15, 2015 5:58 pm
by Kinder
Front or rear sway bar or both? How about a Explorer sway bar for the rear, just add some quick disconnects?
Re: New Member 69
Posted: Mon Jun 15, 2015 6:04 pm
by ZOSO
Looks good. Looks like some 37's would fit nicely on there.
Re: New Member 69
Posted: Mon Jun 15, 2015 6:12 pm
by Eck
All that custom fabrication and you used a ratchet strap to hold down the batteries?! Just Kidding!
Looking good Jesse. Can't wait to take ride and see how smooth it is.
 317 by J W, on Flickr
 319 by J W, on Flickr
 318 by J W, on Flickr
 320 by J W, on Flickr
 321 by J W, on Flickr
 316 by J W, on Flickr
 326 by J W, on Flickr
 325 by J W, on Flickr


 s it off well. I'm anxious to see how she does.