Page 14 of 17
Re: Digger's '69 Build Thread
Posted: Mon Aug 03, 2020 10:51 pm
by Digger
Re: Digger's '69 Build Thread
Posted: Mon Aug 03, 2020 11:03 pm
by Digger
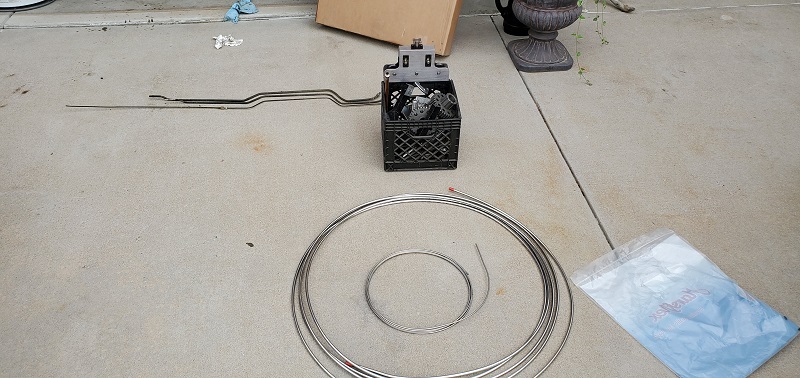
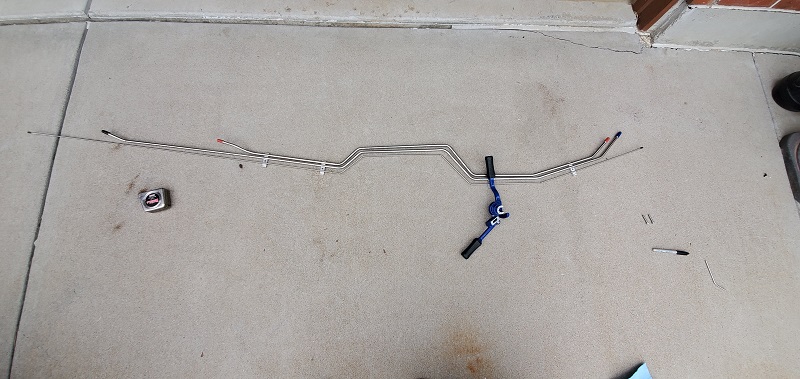
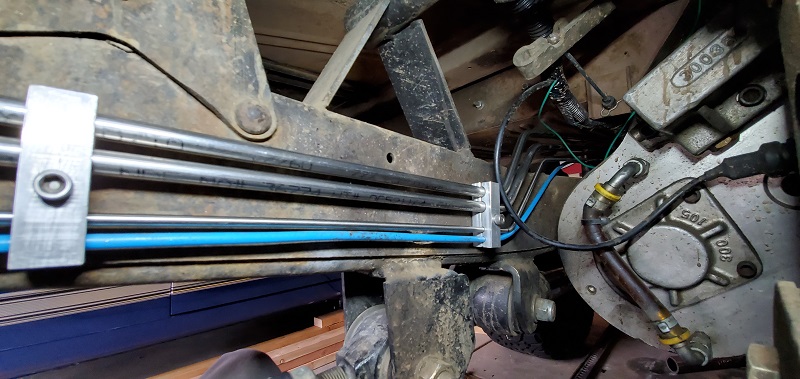
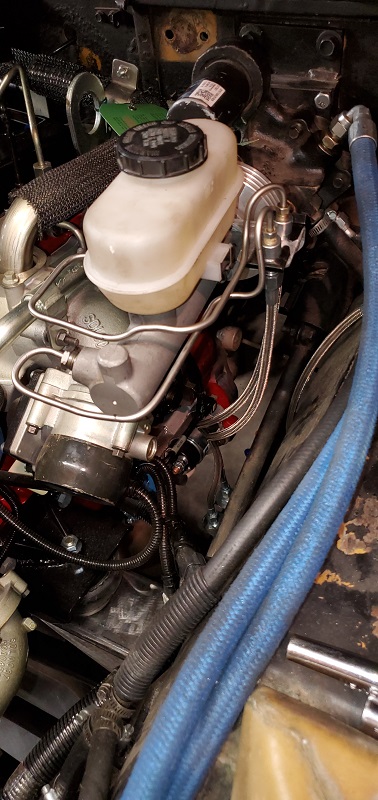
Another picture after final button-up
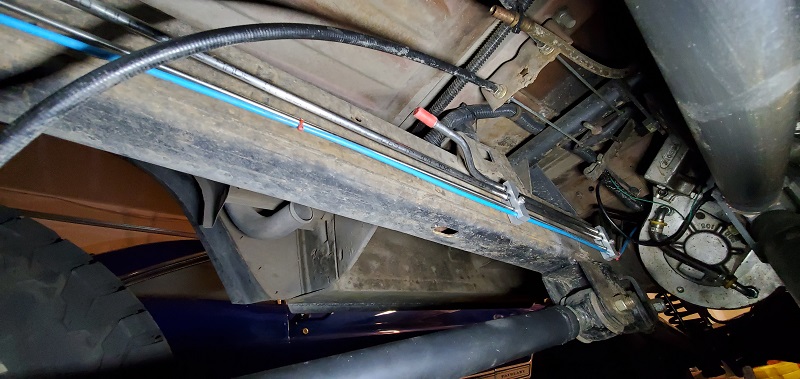
For the soft lines, I again used the semi-rigid poly lines like before. One lesson I learn from the EFI install was the need to leave loops in the lines for easier removal. This required 45┬░ fittings. I bought a handful of these and realized the installation tool could not accommodate 45's. In fact, I wasn't able to find a tool with a 45┬░ adapter. So I made my own...
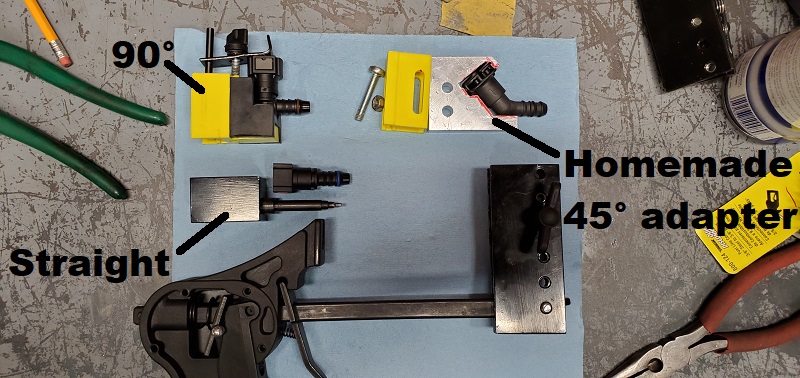
...and it works better than the other two adapters.

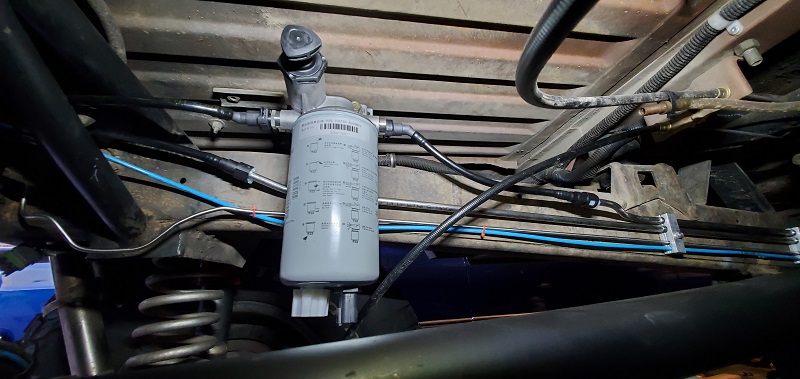
One problem I ran into was clearance issues with the standard DORMAN fittings and the fuel line stubs on the Cummins pump and filter assembly. I had a similar issue with a stock Ford EFI fuel filter, but I was able to trim off a little from the release tab and move on. This time I needed a better solution in the form of a different style fuel connector. (I found they are commonly referred to as "Bundy" connectors, but DORMAN also supplies these)
Once that was sorted out, I finished all the soft lines. About 40 hrs total for all fuel plumbing.
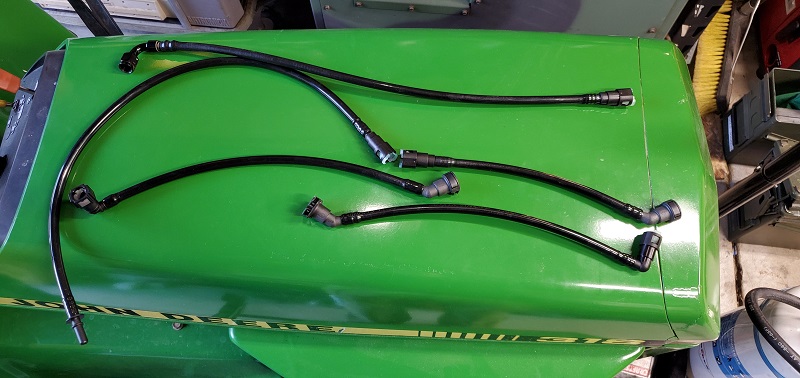
To me, this was well worth the time investment when I look at how clean and serviceable this truck is.
Re: Digger's '69 Build Thread
Posted: Mon Aug 03, 2020 11:16 pm
by Digger
With fuel and brakes done, I turned to the intercooler plumbing. Parts showed up quicker than expected and I was able to get to work right away.

This was my first time working with turbo plumbing, so I took my time measuring and cutting.
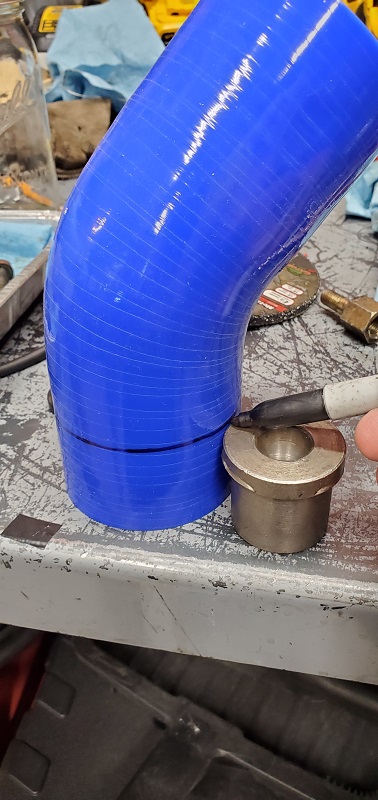
I mapped the system out and ordered a few extra couplers in case things didn't work out, but it all went together smoothly. I bought a bead roller to help make proper attachments of the hard plumbing.
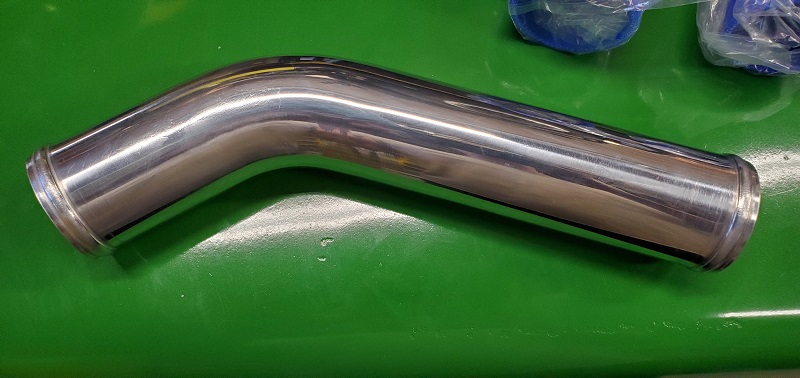
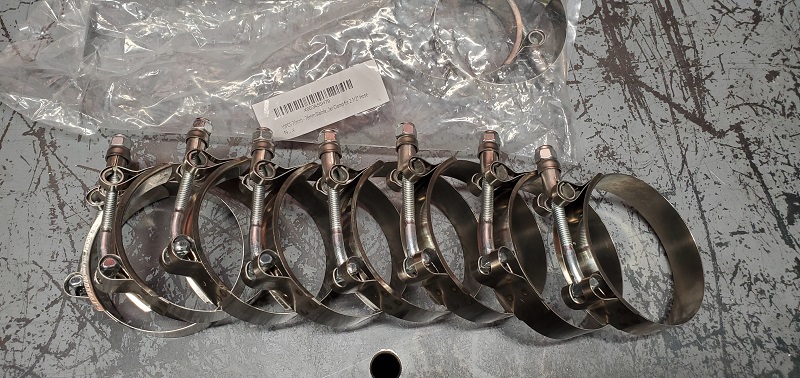
Things went together quickly. The blue silicone connectors match the blue soft lines on the engine. (#Broncofashion) The only hangup was my turbo clamps got lost for a week at the USPS facility and when the finally showed up, they were mis-packaged and the wrong size.
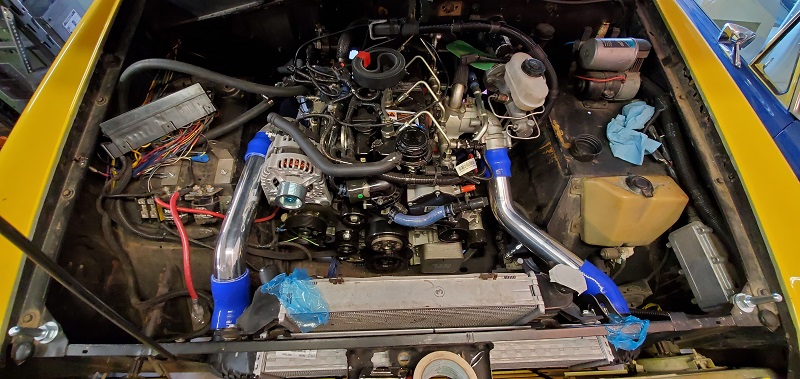
The new ones arrived a few days later and no time was lost.
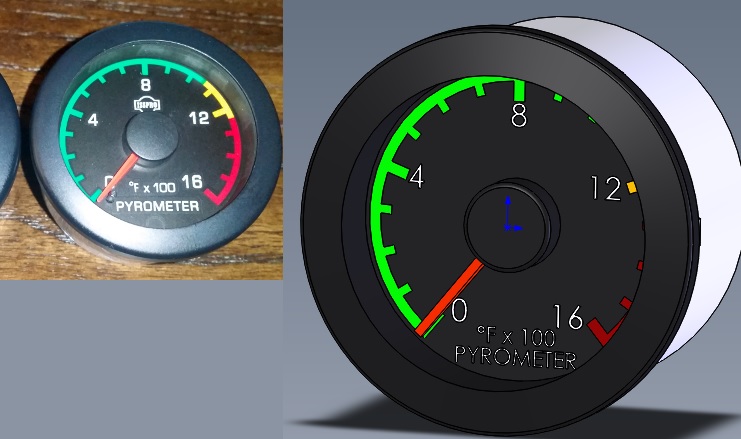
While waiting for more parts to show, I started modeling the gauges in order to design a column-mounted gauge pod for pyro, boost and Murphy gauges + a few warning lights.
Re: Digger's '69 Build Thread
Posted: Tue Aug 04, 2020 12:47 pm
by Jesus_man
This is how I envision my projects, but I simply lack the skill to make it happen. Very, very well done!
Re: Digger's '69 Build Thread
Posted: Mon Aug 17, 2020 9:24 am
by Kinder
I meant to comment on this days ago. I really like your forward planning for maintenance, I tried to think 1-2 steps ahead on my conversion, but you are 5-10 steps ahead. ItΓÇÖs looking great!
Re: Digger's '69 Build Thread
Posted: Mon Aug 17, 2020 11:10 pm
by Digger
Jesus_man wrote:This is how I envision my projects, but I simply lack the skill to make it happen. Very, very well done!
Kinder wrote:I meant to comment on this days ago. I really like your forward planning for maintenance, I tried to think 1-2 steps ahead on my conversion, but you are 5-10 steps ahead. ItΓÇÖs looking great!
Thank you both!
The last 1.5 weeks have been spent figuring out the air box and radiator hose situation. I went with the 1st gen Explorer AT radiator because it was the only option I've found that has the correct form factor for the EB's. Many people know that the tank inlet/outlet are not ideally positioned. The upper hose needed to make a hard 90┬░ turn coming off the radiator and the lower was even worse, having to make a near 180┬░ tight enough to miss the engine crossmember.
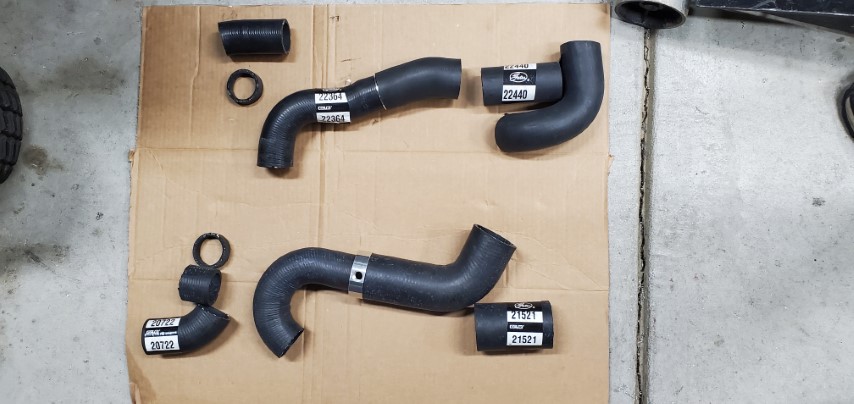
I spent a morning cruising vehicles at the U-Pull-and-Pay, ironically the first vehicle I walked up to, a Ford Ranger, gave me a near perfect match for the upper hose application. I found the upper radiator hose for a 1991 Lincoln Continental with the 3.8 V6 had a nice tight near 180┬░ in it. Afterwards, I spent a few days cruising car part websites and looked through over 1000 hoses for the right shape. I called the local parts house with 5 hose numbers and got to work.


Cummins uses 42mm outlet on the thermostat housing, which translates to roughly 1-5/8" hose. This proved to be difficult to source, as most of the applications are old Mercedes. My hose came off an old 9000 series Ford truck with a big diesel The Ranger hose didn't quite stretch the whole way, which was okay since I needed to transition from 1.5" to 1-5/8". (the radiator neck it technically 1-7/16, but the hose fits snug anyhow)
To mate the hoses and make the transition, I bought a 1.5" - 1.75" hose coupler off Amazon and modified it to 1-5/8". I also smoothed the sawtooth pattern on the smaller side to ease servicing.


Re: Digger's '69 Build Thread
Posted: Mon Aug 17, 2020 11:18 pm
by Digger
The lower radiator hose needed to transition from 2" at the engine to 1.5" at the radiator. I knew this would require 2 hoses, but it was okay since I needed to insert an adapter with a tapped port for the deaeration tank return, per Cummins spec.
The best hose I found (also ironically) came off an EB with a 289 and remote expansion tank. The 2" hose was some application that had a 90┬░ bend. Nothing special there. I sketched up an adapter and got to work.
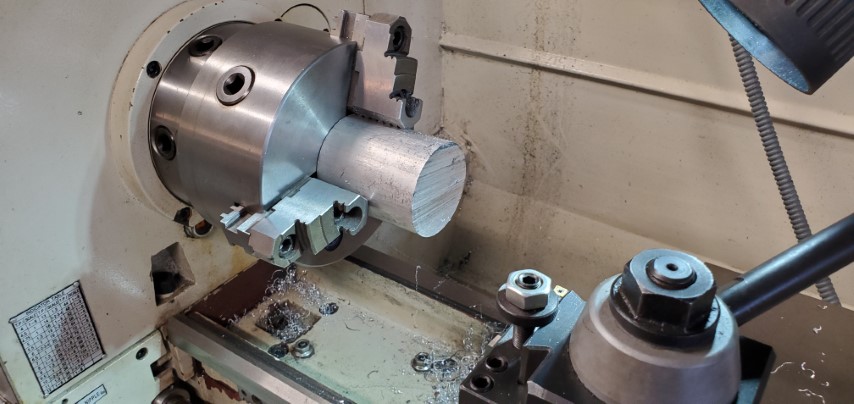
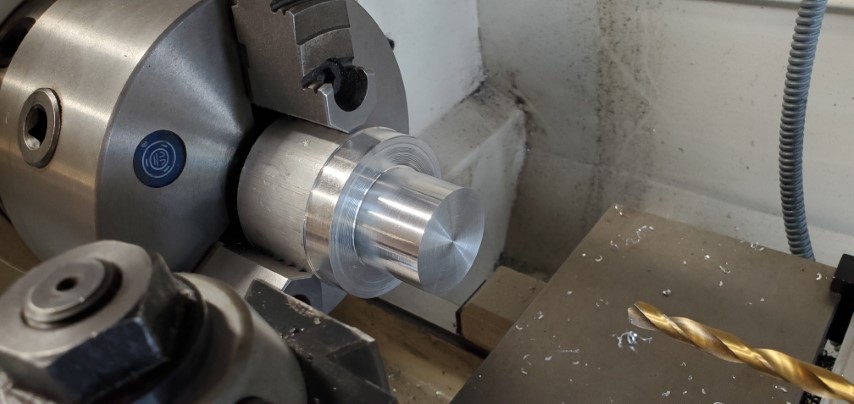
Finished up. 2" to 1.5" adapter with return port
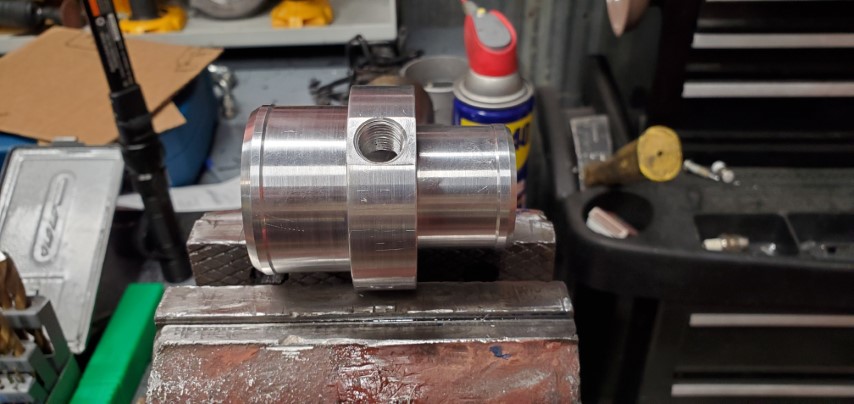
I added a transition to the inside to help with fluid flow.

A quick test fit before cutting hoses

Re: Digger's '69 Build Thread
Posted: Mon Aug 17, 2020 11:23 pm
by Digger
Slowly, I trimmed to the hoses to get just the right fit and took notes regarding my cuts for service later.
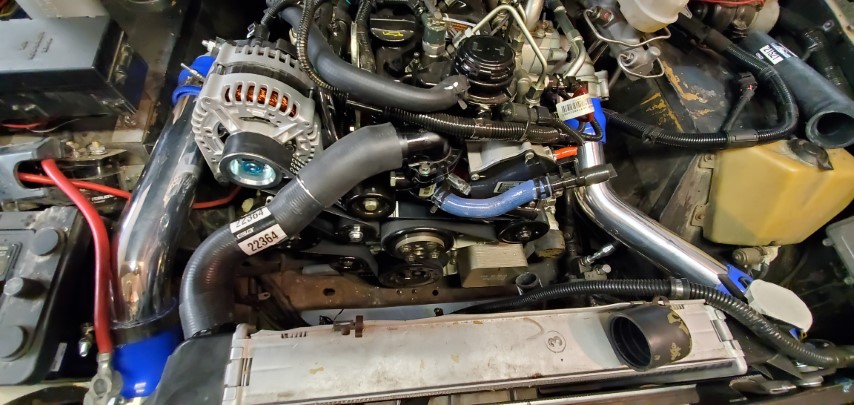
And repeated the process with the lower.

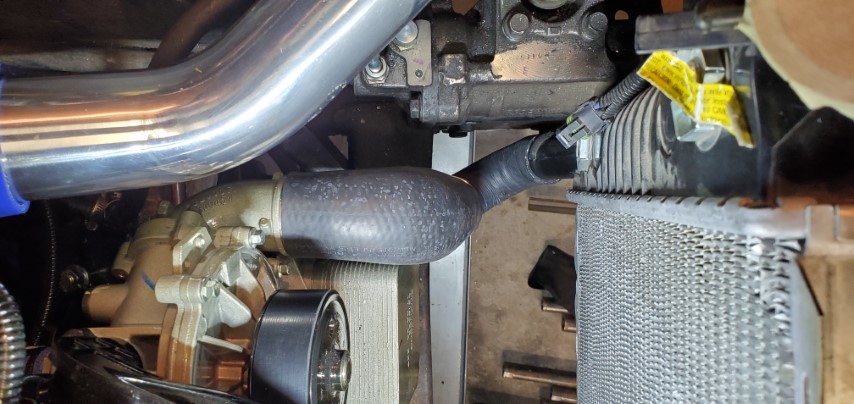
Pulled it all apart and rechecked everything
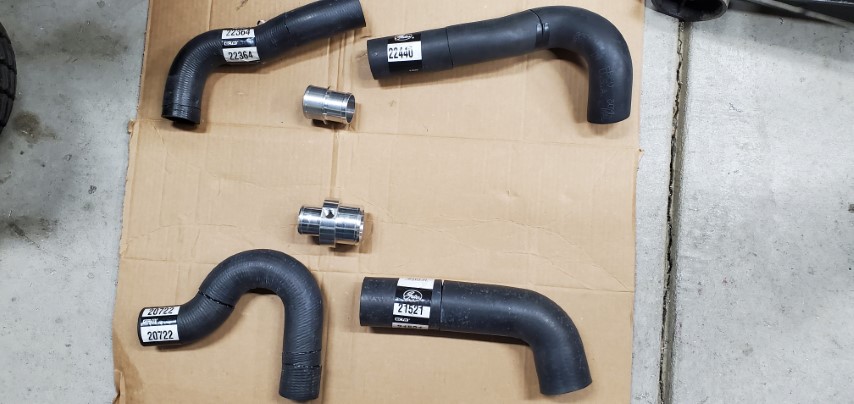
And assembled it all back onto the engine.

Re: Digger's '69 Build Thread
Posted: Mon Aug 17, 2020 11:37 pm
by Digger
Sadly I had to give up on the Donaldson filter. I looked at it 100 different ways, from various location under the hood, to behind the bumper, under the passenger floorboard, and even considered mounting it in the rear or in the passenger compartment. No amount of reasonable cutting and fabbing was going to make that thing fit. I rescanned their entire catalog and even looked at Parker and a few other brands and found nothing that checked all the boxes. It seems like there is not much middle ground between OEM street-oriented filters and real off-road / heavy use filters.
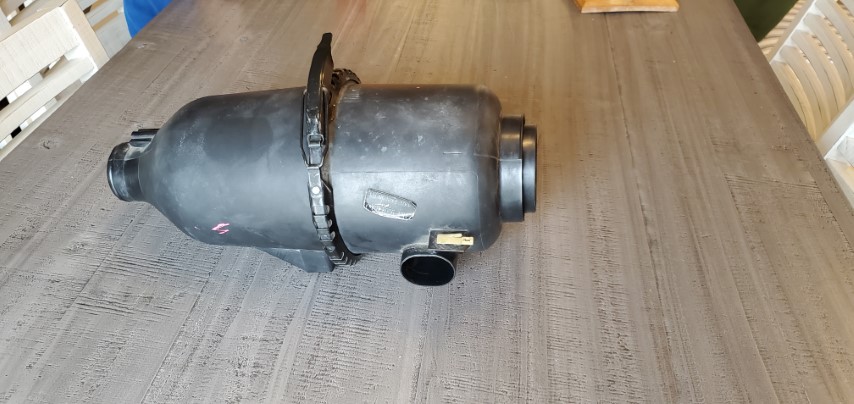
So while I was at the boneyard, I picked up the conical filter assembly from a 1996 Explorer. It doesn't hold near the dirt or filter as great as the Donaldson, but with the right filter, it will meet flow and filtration requirements. One thing it can't do is meet the 900 gram dirt holding requirement. But its half the size of the Donaldson and a better assembly than I see on similar builds.
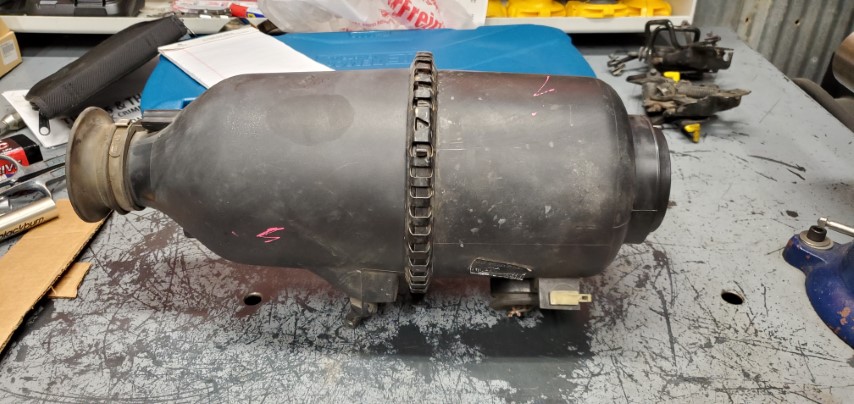
It's still large in the engine compartment, but as I discovered at the junkyard...
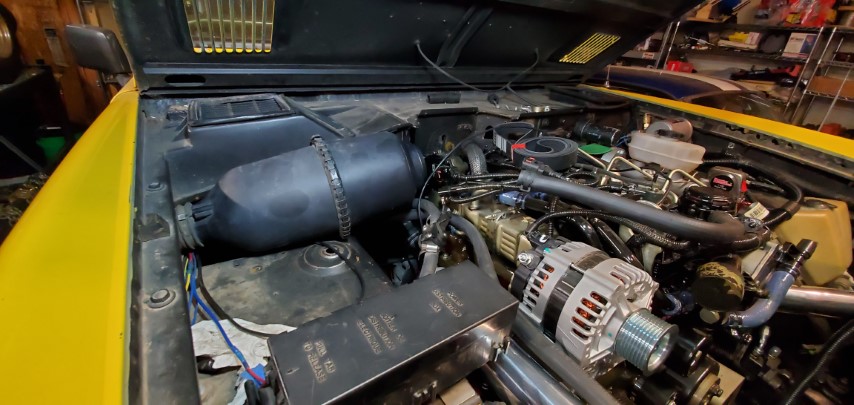
...half of this assembly is MAF sensor and wasted space
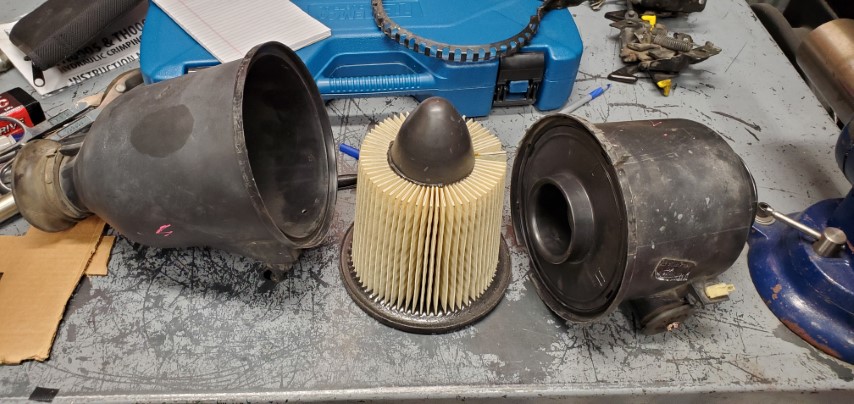
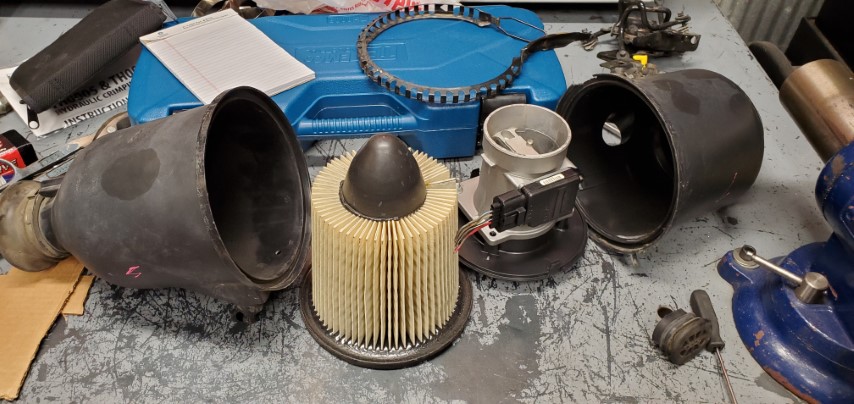
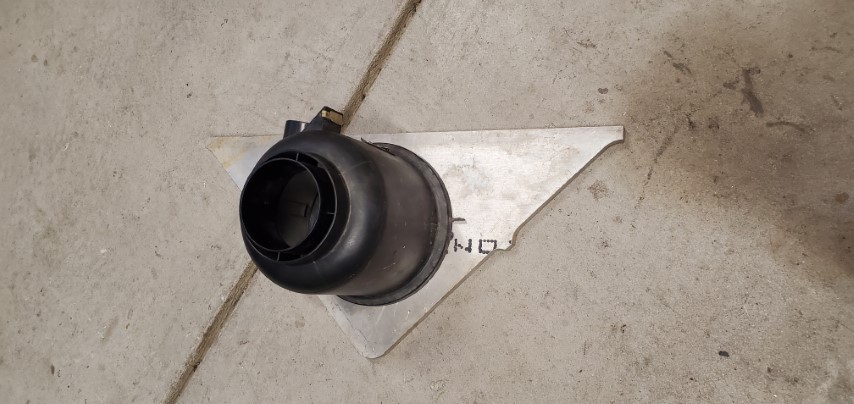
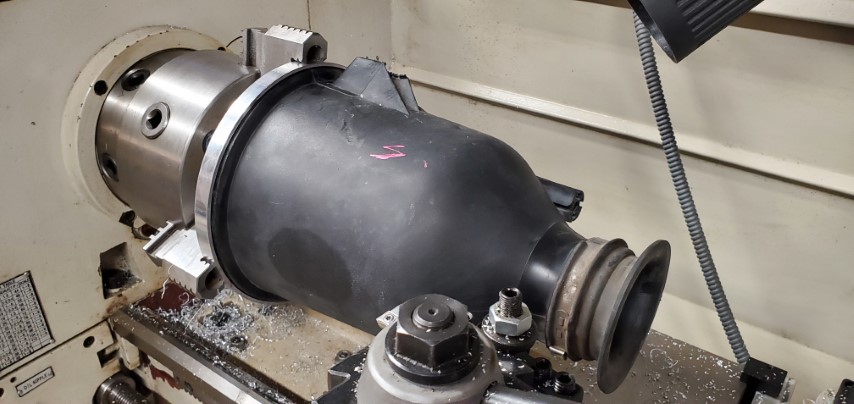
With that half remove, the assembly takes up far less room. I will make an adapter that mates to the air filter housing and plugs into the filter itself
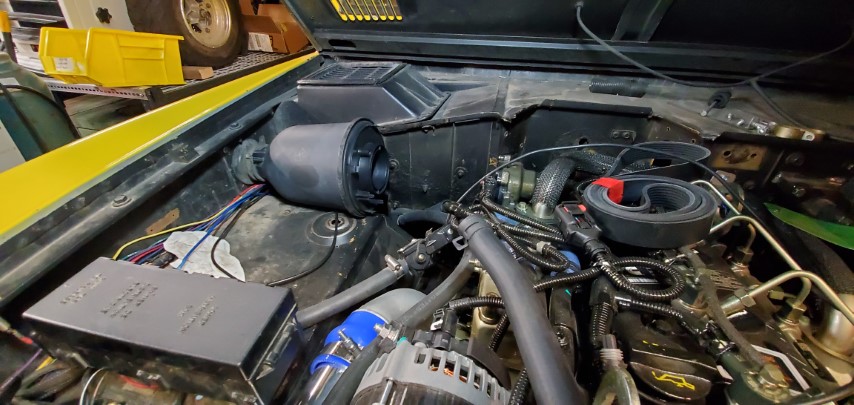
I've decided to route fresh air through the fender, but need to decide if I want to pull from the cowl air box to plumb to the front like the factory plastic duct did. Does anyone have pictures of the factory duct routing on the later EBs?
Re: Digger's '69 Build Thread
Posted: Tue Aug 18, 2020 5:17 am
by Jesus_man
Digger wrote:Slowly, I trimmed to the hoses to get just the right fit and took notes regarding my cuts for service later.
And to make a kit for those of us who want to swap in a cummins and can't do what you do...?!?!?
Everything is coming together. Glad to see you back at this! Hope you get to enjoy it a bit before the snow flies!
Re: Digger's '69 Build Thread
Posted: Tue Aug 18, 2020 8:06 am
by Strike2
Everything is looking great! Brake lines look awesome and clean as to be expected in your build.
With the back end of the filter removed it looks WAY better in the back location, IMO it looked "out of place" in the first location.
will your rig be attending Supercell ??
Re: Digger's '69 Build Thread
Posted: Tue Aug 18, 2020 8:34 am
by landshark
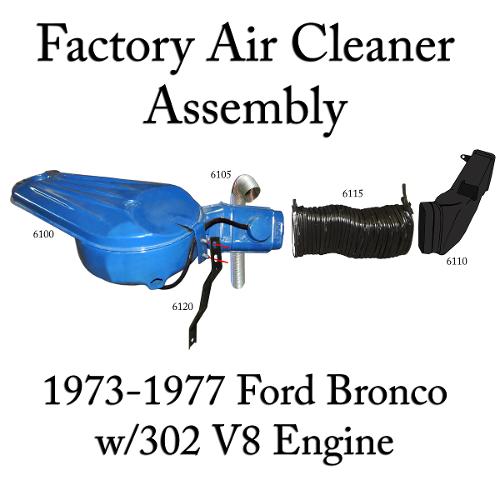
The air intake on the early bronco that goes to the front grill had a plastic tunnel against the passenger inner fender from the grill to the whell well then a flexible tube to the air cleaner.
Here is a photo of the cut out in the grill for the plastic tunnel from my 76 as I was tearing it down. I might have a really nice tunnel if you want to try and use it but i think pulling air from the hood vent might be better...
6A5F9150-5C46-47F6-AA1D-4411777644C7.jpeg
Re: Digger's '69 Build Thread
Posted: Tue Aug 18, 2020 9:09 am
by Jesus_man
landshark wrote: i think pulling air from the hood vent might be better...
Agreed. Especially on.an offroad rig that may see a water crossing.
Re: Digger's '69 Build Thread
Posted: Tue Aug 18, 2020 10:51 am
by Justin
Re: Digger's '69 Build Thread
Posted: Tue Aug 18, 2020 9:09 pm
by Digger
landshark wrote:The air intake on the early bronco that goes to the front grill had a plastic tunnel against the passenger inner fender from the grill to the whell well then a flexible tube to the air cleaner.
Here is a photo of the cut out in the grill for the plastic tunnel from my 76 as I was tearing it down. I might have a really nice tunnel if you want to try and use it but i think pulling air from the hood vent might be better...
6A5F9150-5C46-47F6-AA1D-4411777644C7.jpeg
Thanks for the photo. I was curious how it routed through the core support. Not sure if I need the tunnel, but I will keep it in mind.
Re: Digger's '69 Build Thread
Posted: Tue Aug 18, 2020 9:18 pm
by Digger
Strike2 wrote:Everything is looking great! Brake lines look awesome and clean as to be expected in your build.
will your rig be attending Supercell ??
Afraid not. I'm moving too slow despite working on it every night. I still need to run exhaust, wire, plumb power steering and hydroboost, plumb intake to the turbo, replace the steering column, build a gauge cluster, etc etc.
Re: Digger's '69 Build Thread
Posted: Sun Nov 08, 2020 12:52 pm
by Digger
Re: Digger's '69 Build Thread
Posted: Sun Nov 08, 2020 12:59 pm
by Digger
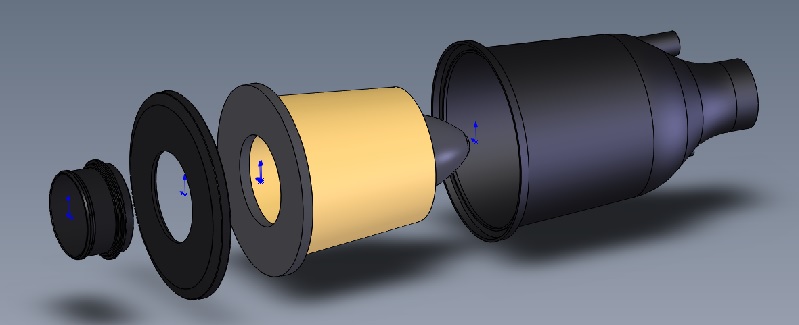
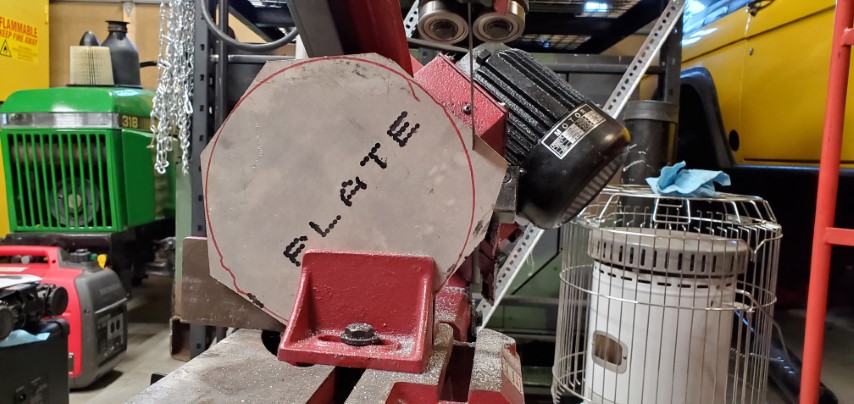
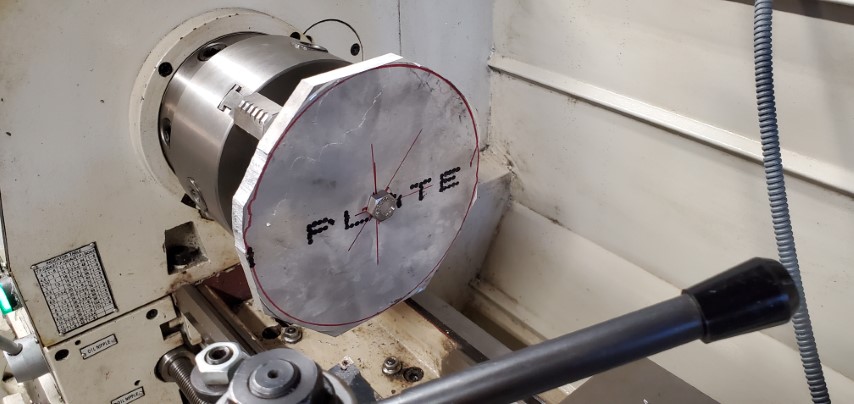
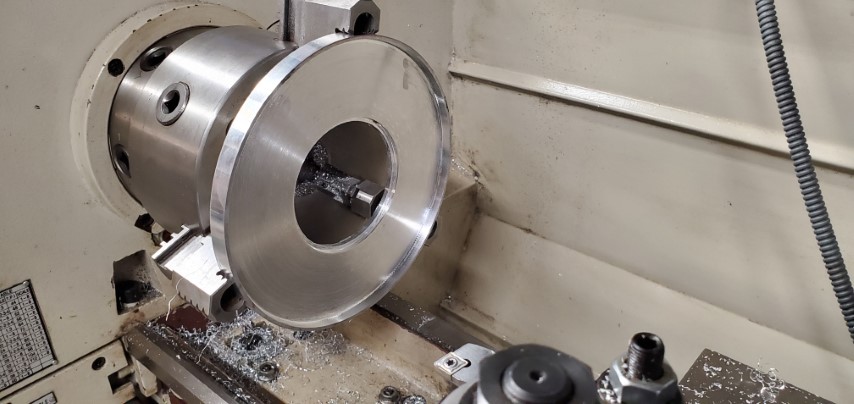
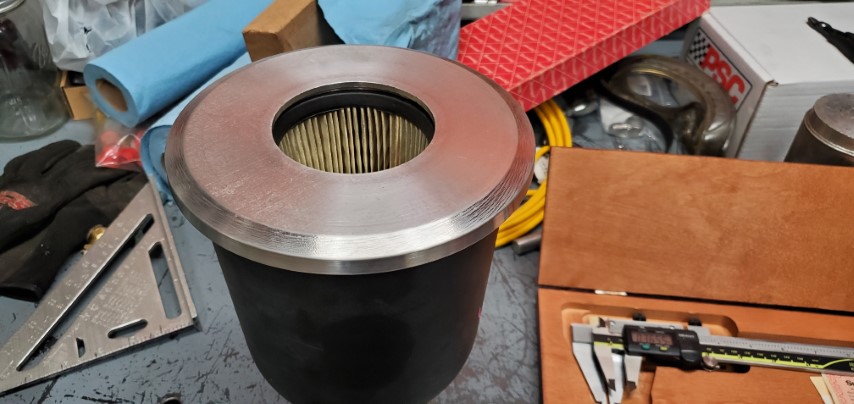
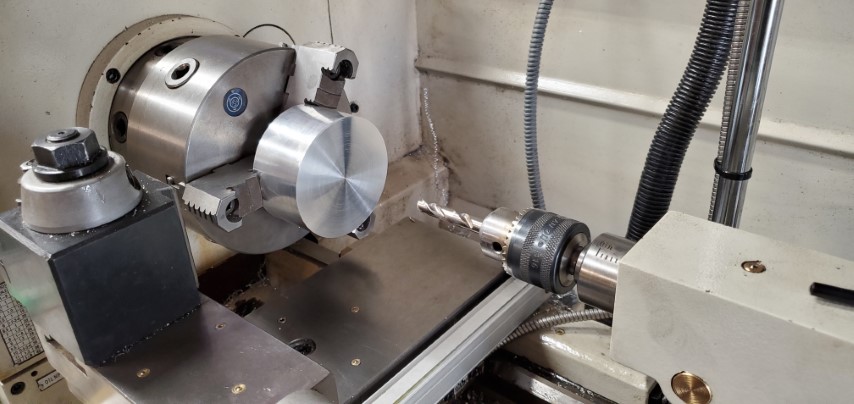
The outer adapter mates to the filter foam and housing to seal it off from dirt ingress. The inner adapter directly connects the filter and intake plumbing
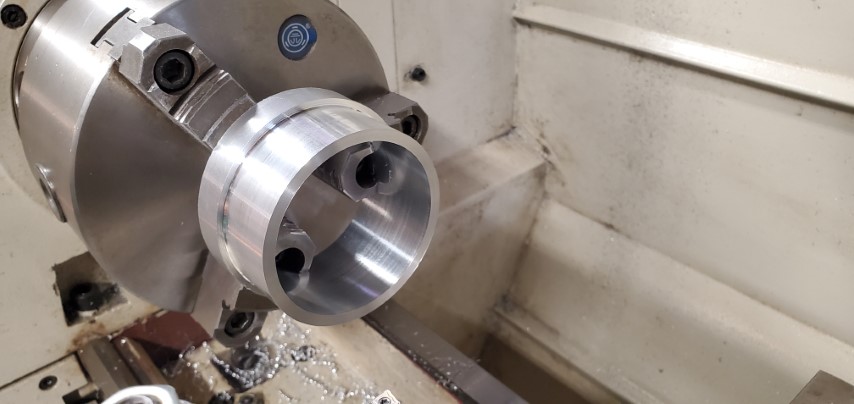
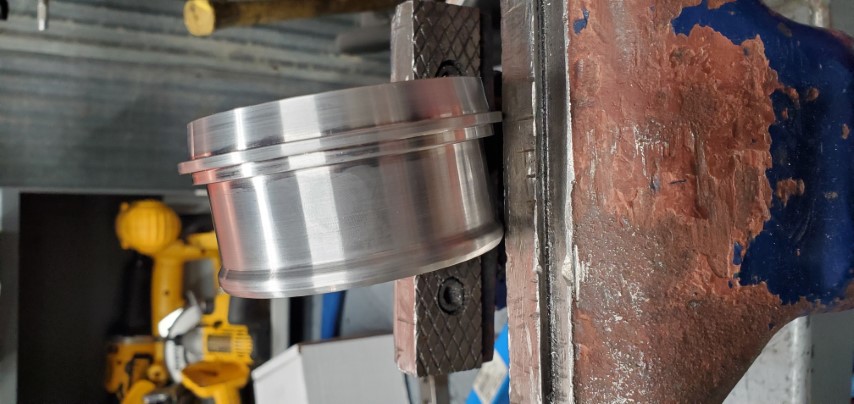
.
.
.
.
.
It makes a snug, air tight fit to the filter without overly compressing it or making it hard to remove.
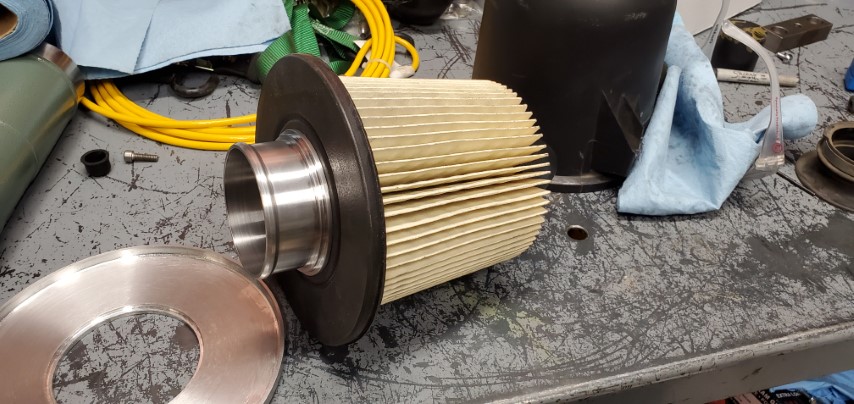
.
.
.
.
.
The inner and outer adapters have a slight interference fit to each other to make them air tight. I heated the outer half slowly until the inner half could be pressed in by hand, then let the whole unit cool. It turned out very nice.
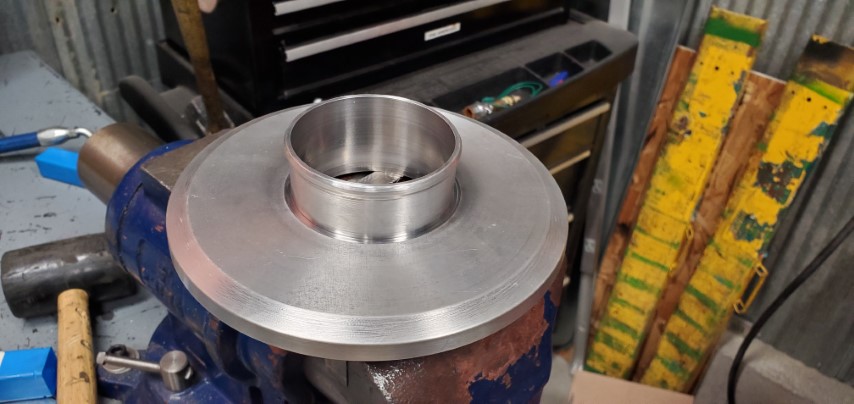
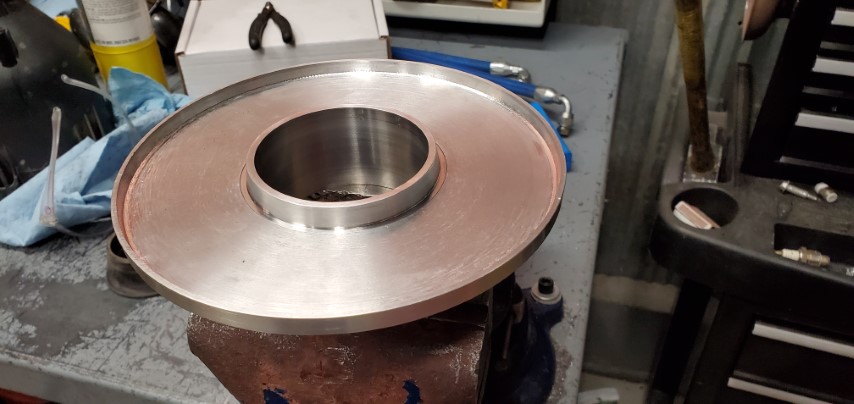
.
.
.
.
.
Final fitup to the filter assembly:
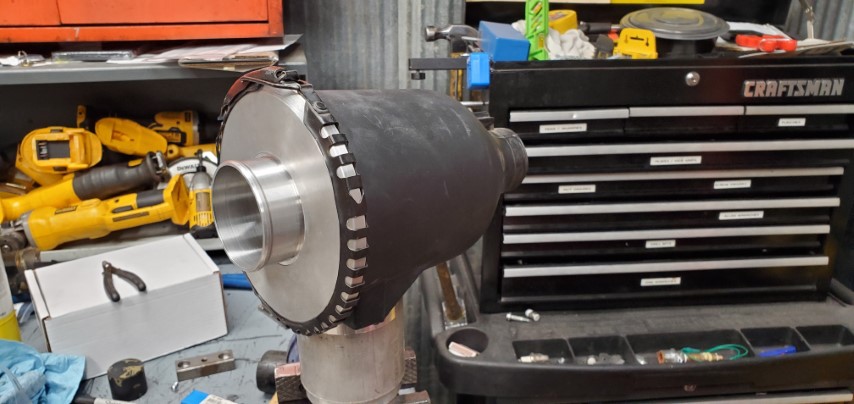
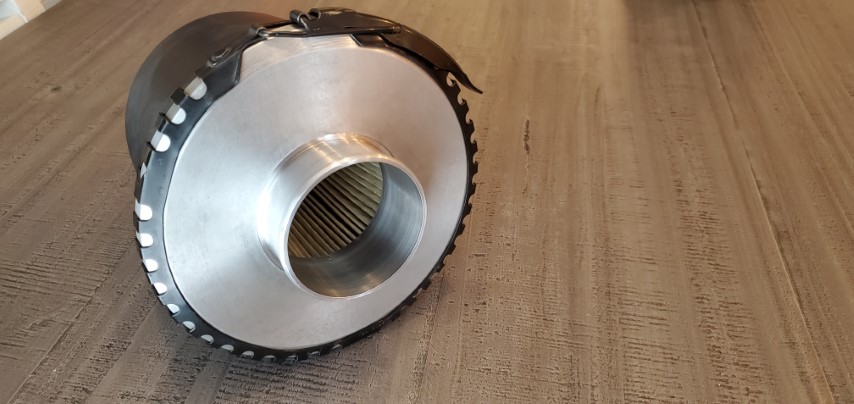
Re: Digger's '69 Build Thread
Posted: Sun Nov 08, 2020 1:10 pm
by Digger
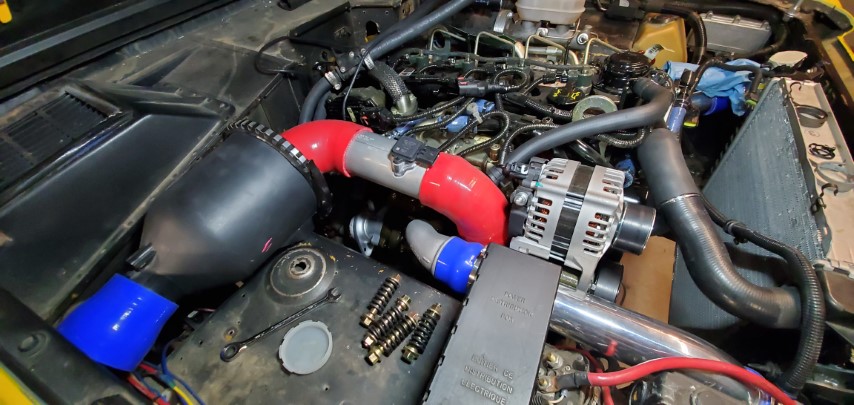
With that finished, I ordered tubes and couplers. Unfortunately like many aftermarket items, the blue 90┬░ couplers were backordered. I settled on red for now.
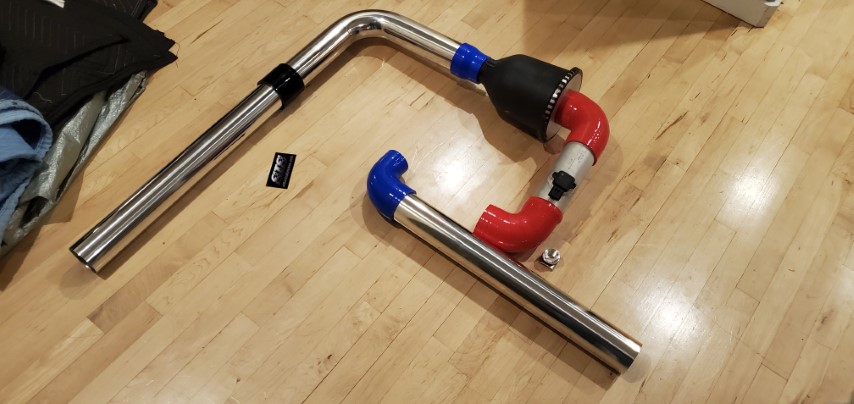
.
.
.
.
.
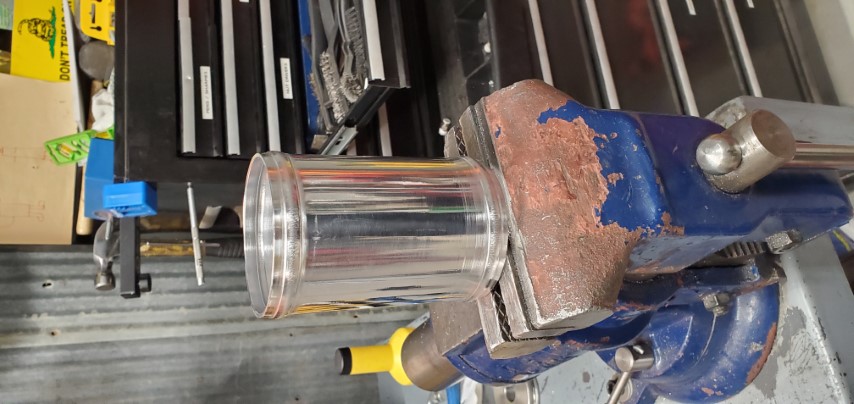
I cut and bead rolled a short stand pipe from the turbo...
.
.
.
.
.
...and mocked everything in. I still need a fitting to connect the crank breather tube. (shown behind the alternator)
.
.
.
.
.
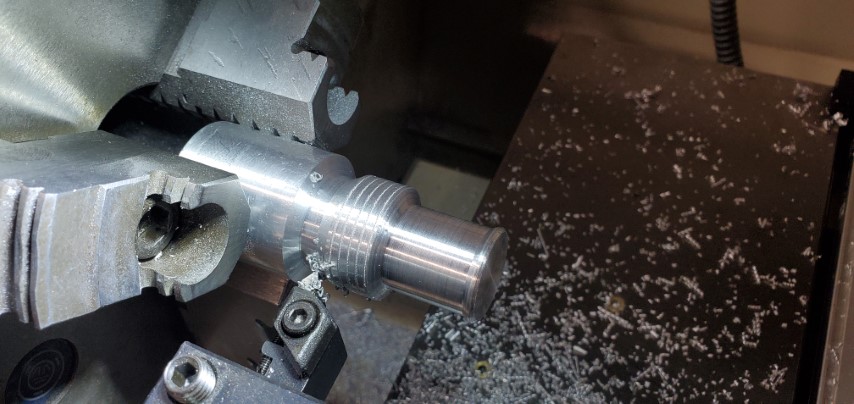
I ordered a fitting for the crank breather, but when it showed up, it was welded together. I didn't care for this because there was a risk of the welded part breaking off and falling directly into the turbo. The fitting needs to sit on a compound curve as well, so I modeled up a new one and got to work.

.
.
.
.
The new fitting is monolithic and threads down from the outside. Even if the nut comes loose, the hose will prevent it from falling into the turbo.
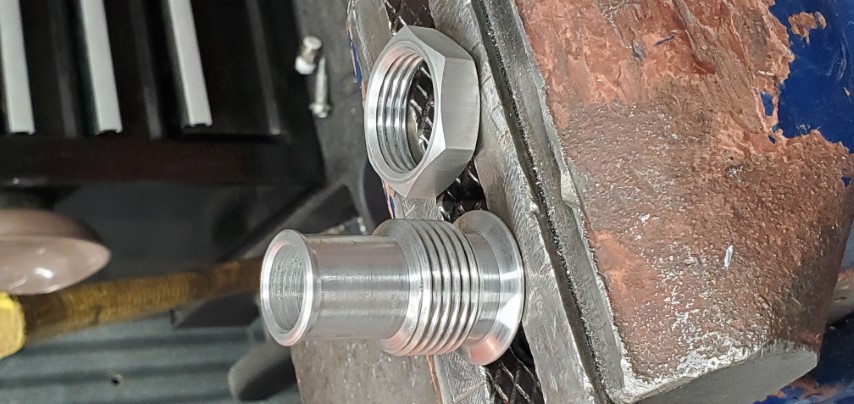
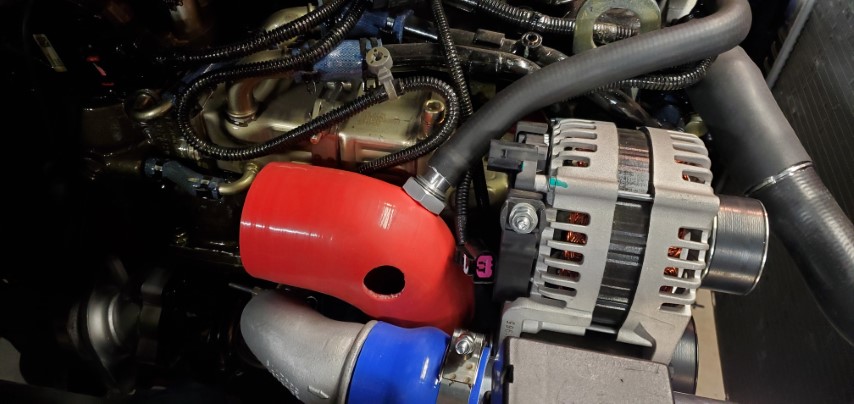
I messed up the first hole I cut in the elbow. I discovered the hole needed to be smaller to hold the fitting tightly.
Re: Digger's '69 Build Thread
Posted: Sun Nov 08, 2020 1:20 pm
by Digger
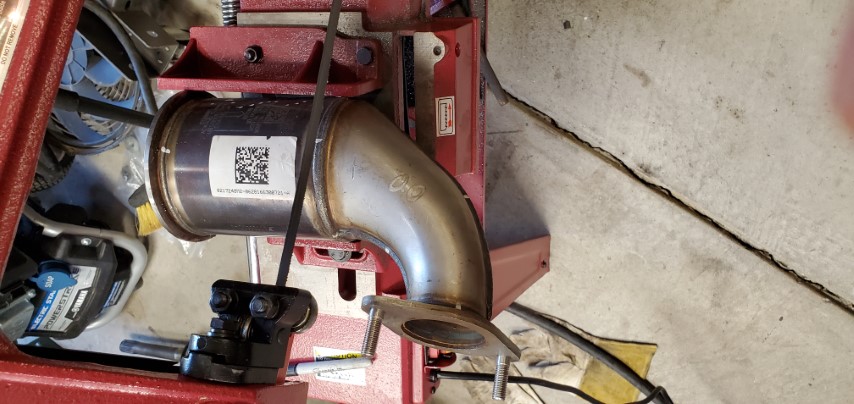
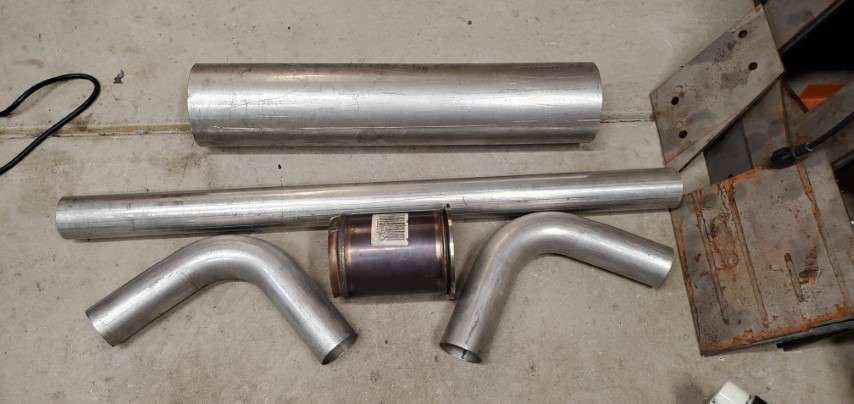
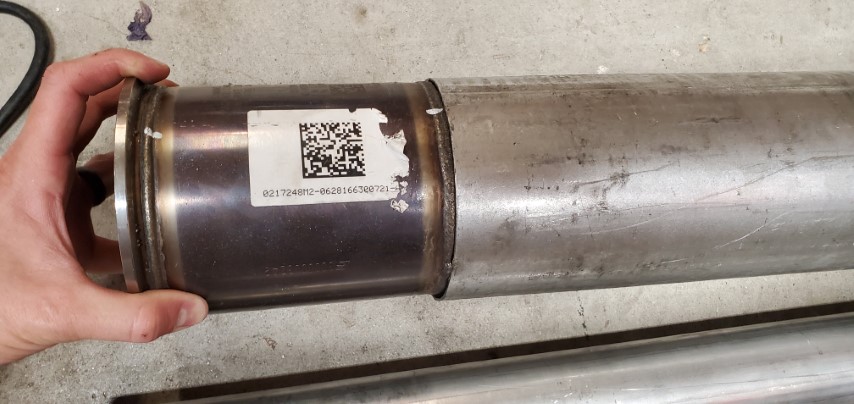
With the intake at a stopping point, I went to work on the exhaust. The Bronco frame was too narrow to leave the DOC in the stock location (diesel cat). Not wanting to ditch it, the only choice was to move it downstream. I cut the end off and ordered some tubing to make a conical adapter.
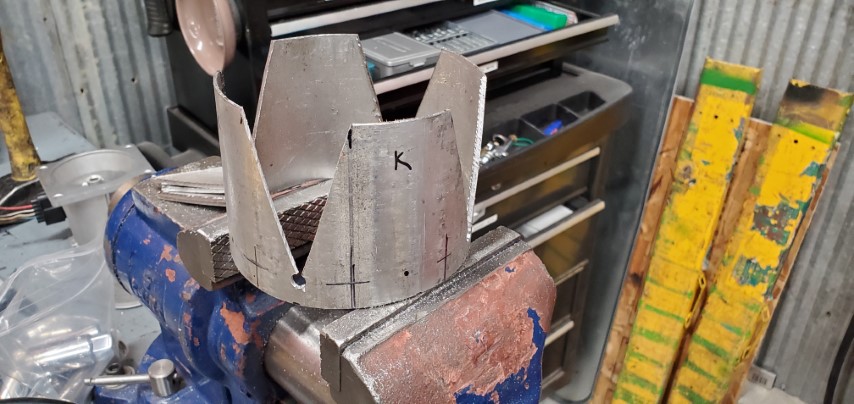
.
.
.
.
.
It took a few days to get everything tucked back into place, but the new exhaust system fits nicely.
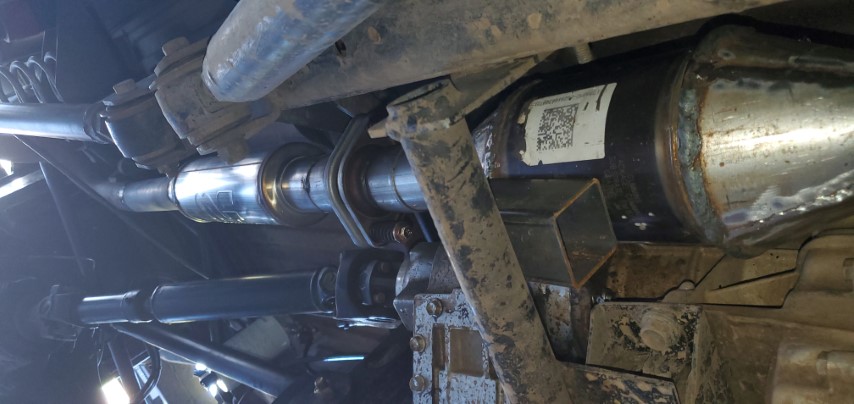
.
.
.
.
.
I added high temp paint to make it look a little nicer. Before reinstallation, I will insulate the section between the turbo and DOC to help keep EGTs up and the floor board cool.
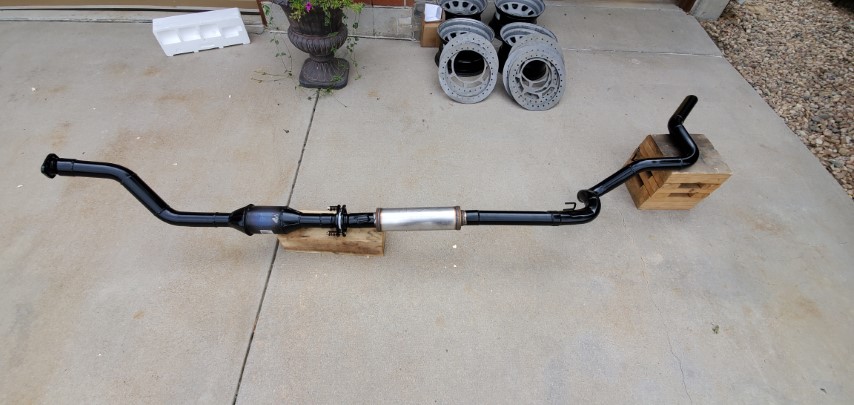

.
.
.
.
.
I am no longer using the DOC's adapter elbow. A new turbo flange needed to be made.

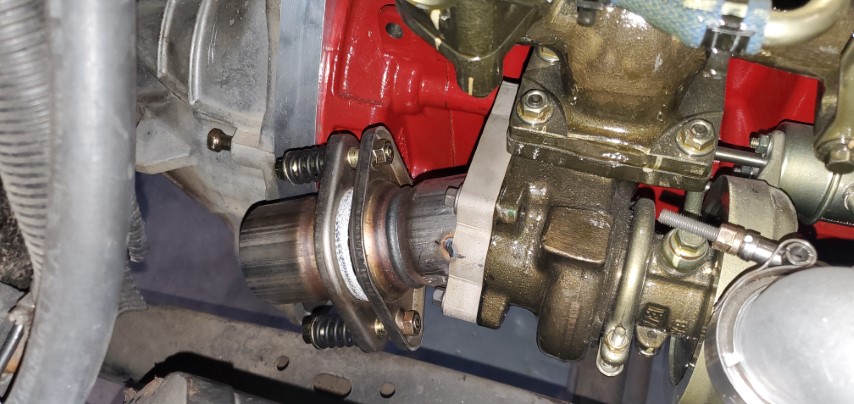
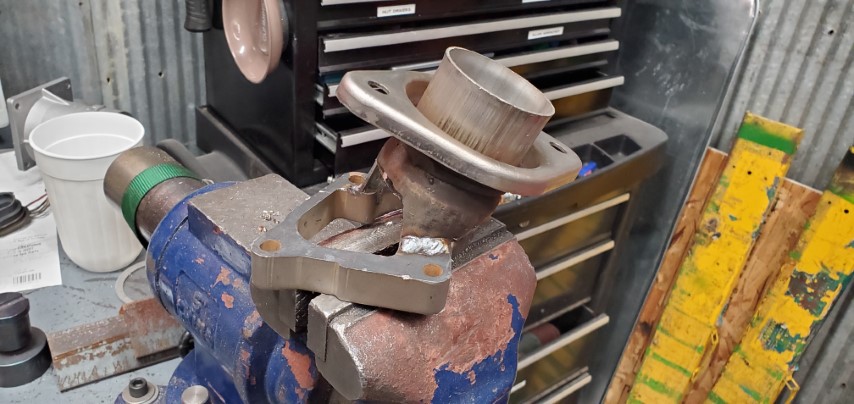
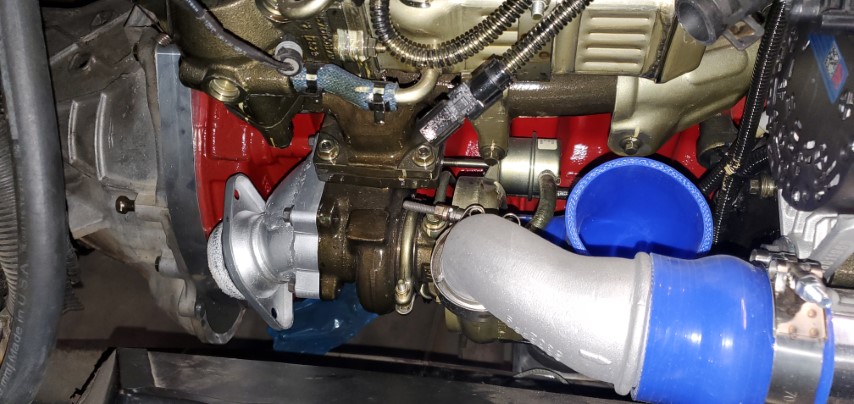
Re: Digger's '69 Build Thread
Posted: Sun Nov 08, 2020 1:30 pm
by Digger
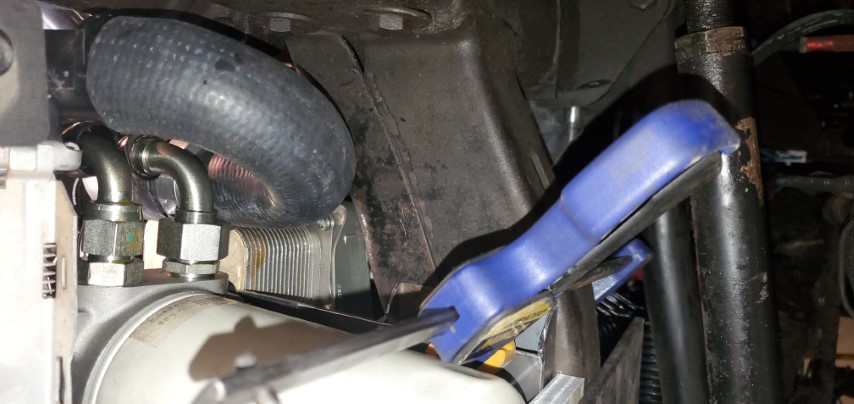
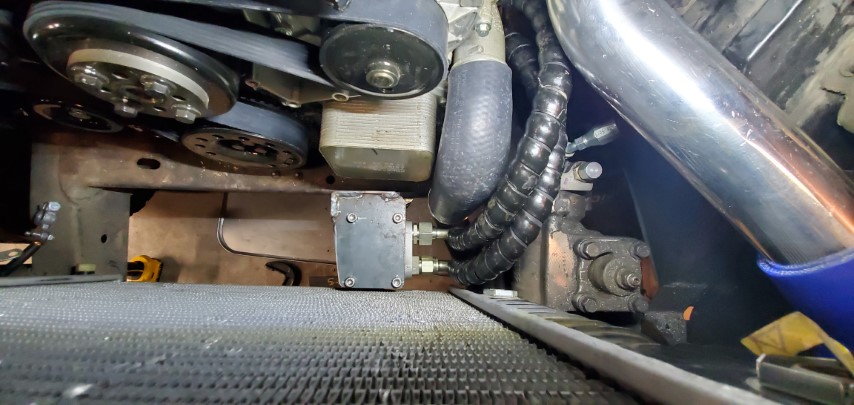
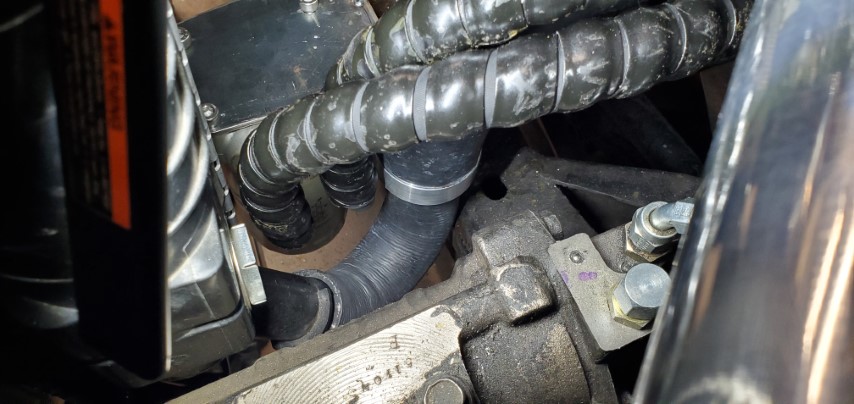
With the turbo, CAC and radiator plumbed, it was time to place the remote oil filter assembly. There was not much wiggle room given the packaging space and length of hose provided. I found a nice spot below the radiator, but still protected by the crossmember. When the bumper is installed, it will be tuck out of sight.
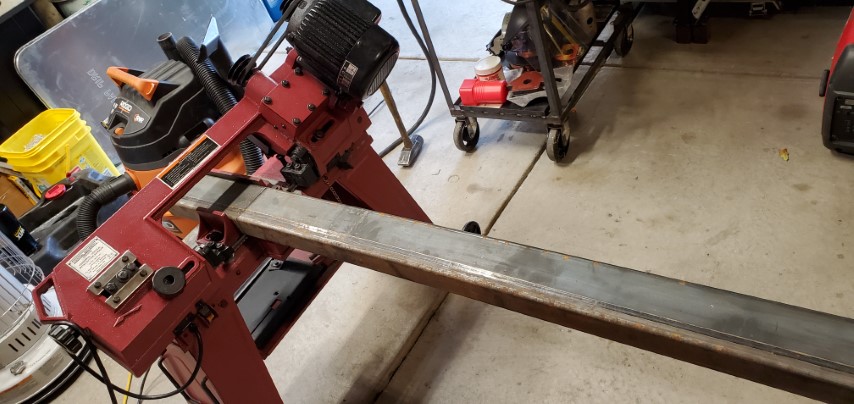
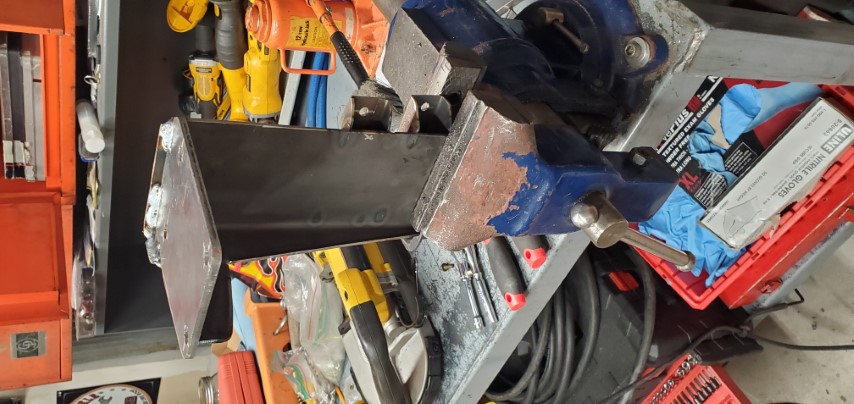
.
.
.
.
.
The fittings and hoses tuck tightly, but nicely into the space left by the lower radiator hose and still remain out of the way of the lower radiator hose adapter.
.
.
.
.
.
The filter will be easily accessible for oil changes. In the unlikely event damage becomes a problem, Cummins sells a shorter filter, but I would prefer to maintain the longer service intervals of the big filter.

Re: Digger's '69 Build Thread
Posted: Sun Nov 08, 2020 1:40 pm
by Digger
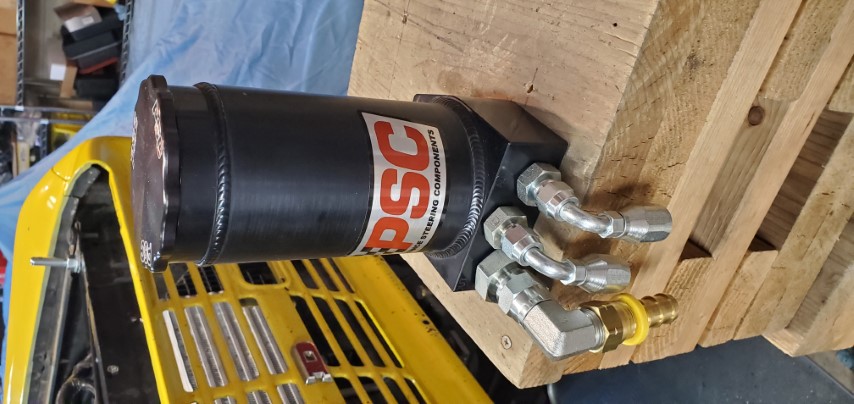
Power steering plumbing is next. This is proving to be a tough nut to crack. The Cummins PS pump is on the passenger side of the engine. Combine that with hydroboost and a lot of plumbing needs to be laid. I looked at a few options and ordered a PSC reservoir due to its large capacity and dual return inlets.
.
.
.
.
With other ancillary equipment in place, there is very little room left for the PS reservoir. I played around with locations, but the vertical spacing between the PS pump and the hood was limited. I investigated a few locations on the driver's side, but they were either space limited too or were directly in the air flow of the radiator and CAC. The last placed I tried was just too far from the pump. It would have starved out with only 11┬░ of side angle. Bummer.

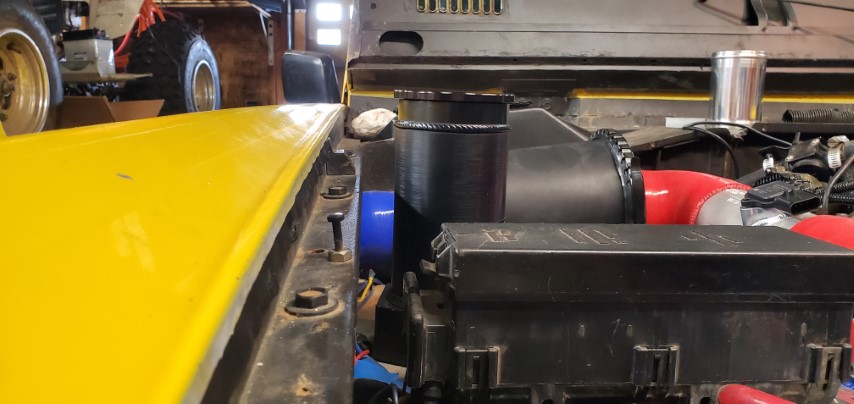
.
.
.
.
.
I conceded that it was time to head back to the salvage yard and find a new reservoir. After a few hours poking around, I discovered an Explorer reservoir and a Econoline reservoir I had not seen before. The Econoline unit looks promising, but need to wait for my coolant deaeration tank to show up tomorrow before deciding.
Re: Digger's '69 Build Thread
Posted: Sun Nov 08, 2020 6:50 pm
by Rox Crusher
The next time IΓÇÖm stumped or doubting whether something can be accomplished, IΓÇÖm coming back to this thread to obtain inspiration.
Re: Digger's '69 Build Thread
Posted: Mon Nov 09, 2020 8:08 am
by Jesus_man
So glad you are back at it again!!
Re: Digger's '69 Build Thread
Posted: Wed Nov 11, 2020 1:50 pm
by Kinder
Beautiful work as always and your problem solving keeps me going. It looks like youΓÇÖre closing in on turning the key, which is super exciting for all us gawkers!
Re: Digger's '69 Build Thread
Posted: Wed Nov 11, 2020 3:58 pm
by mickphatmac
Simply Amazing Jesse... thank you for posting a picture of the hole that was too big, I guess you are human!!!
My Goofs are like 50/50 instead of you like 1/1000 :)
Keep up the good work man!!
Re: Digger's '69 Build Thread
Posted: Fri Dec 04, 2020 9:43 am
by Booger
Dang this thing is going to be impressive to see when you get it done.
Re: Digger's '69 Build Thread
Posted: Thu Dec 10, 2020 9:42 pm
by Digger
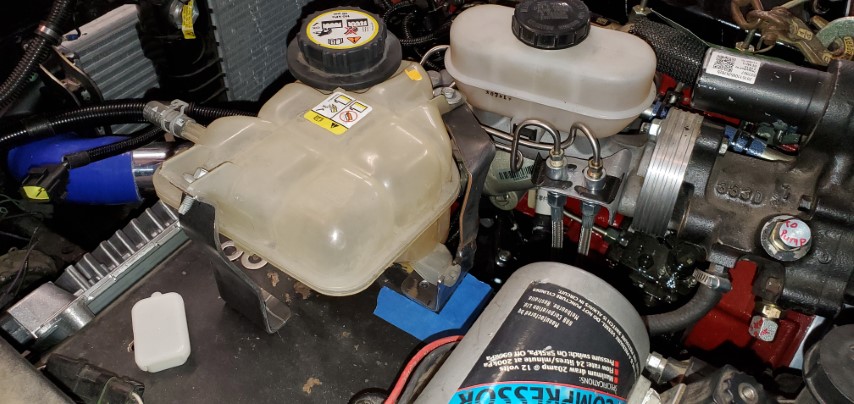
I feel like I spent most of November and part of December in the junkyard weighing options for fluid reservoirs. My PSC reservoir was not going to work. I needed something much lower profile. After searching again, I came up with a few candidates from an Explorer, an Econoline and a Superduty.
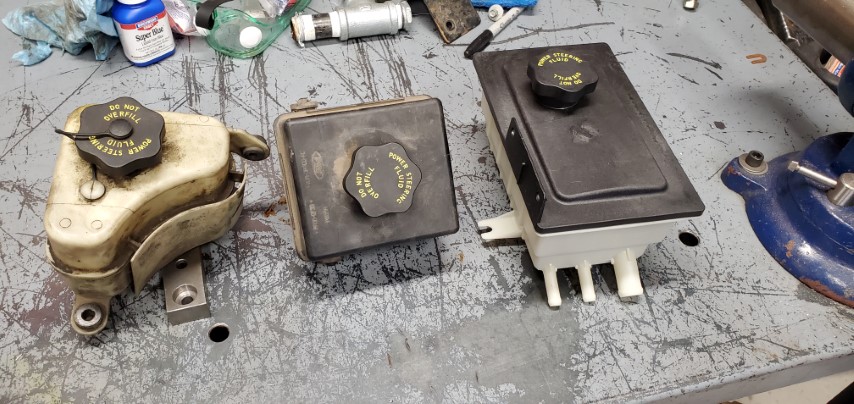
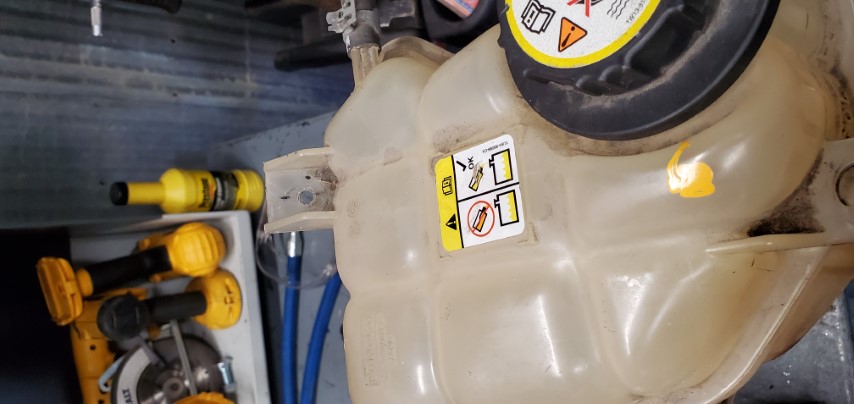
In the end, the Superduty reservoir won easily. It fit nice in the space available and had dual returns for hydroboost. I had also purchased a nice looking reservoir for the coolant expansion tank, but after mocking it in, I realized I had made a mistake since there was no place to vent system pressure above the coolant line. So back to the junkyard.
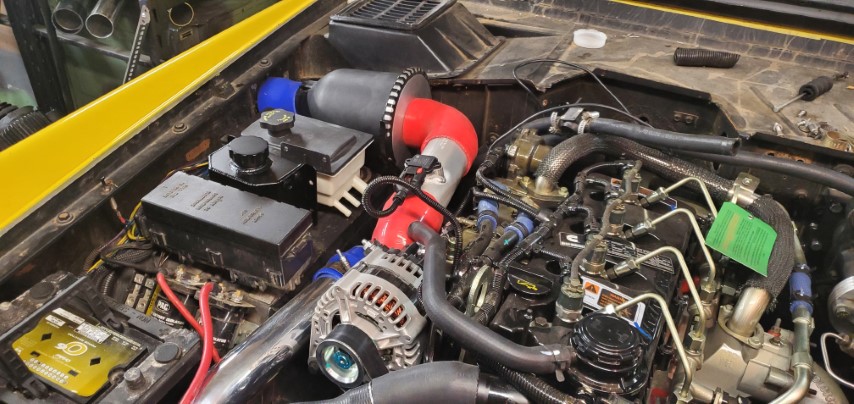
This time I found an expansion tank for a Ford Fusion that would fit. Even with a 2" body lift, the Cummins sits almost right against the hood. The coolant lines for the EGR cooler are near the top of the engine, so there is very little space above the coolant level for an expansion tank. I had to place the tank back further in the engine compartment to move it high enough.
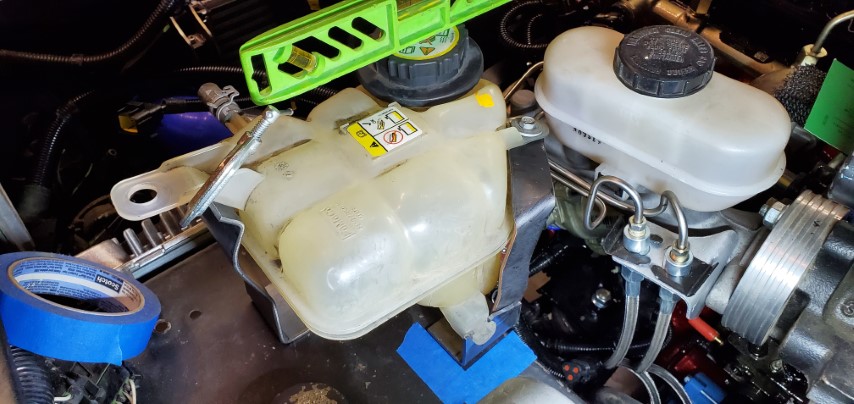
I made some brackets and a small modification to the tank to reduce how far out the mounting ear stuck.
Re: Digger's '69 Build Thread
Posted: Thu Dec 10, 2020 9:45 pm
by Digger
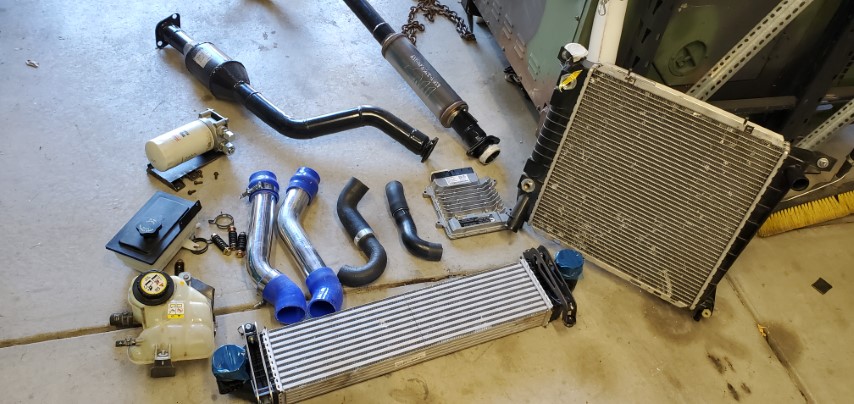
With nice weather approaching, I pulled decided to pull the trigger and remove the engine to finish welding the frame and paint the engine bay.
Out with the bits...
And the engine...
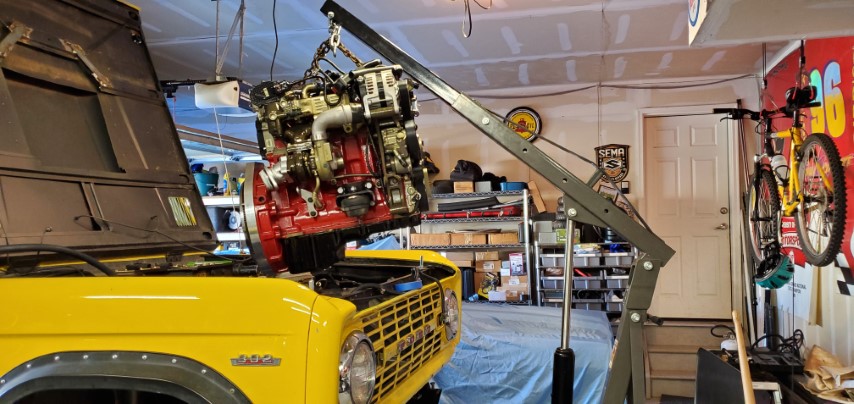
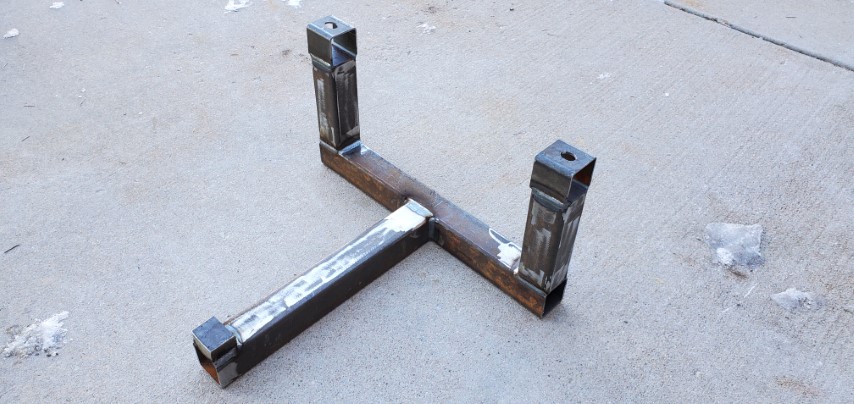
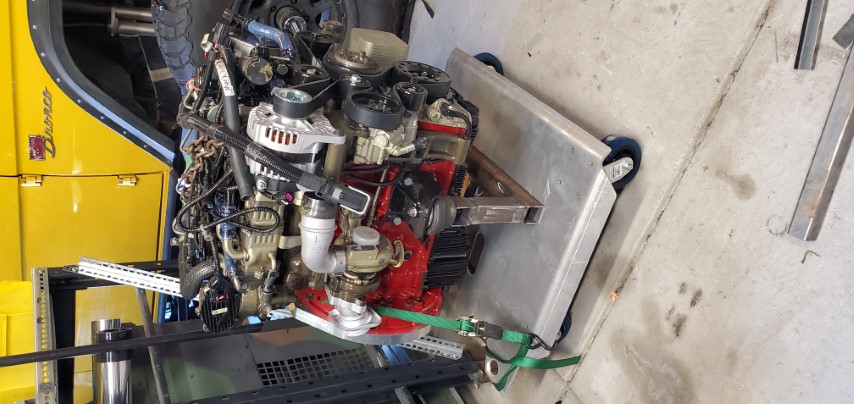
The engine crate took up too much room, so I welded up an engine stand for the Cummins:
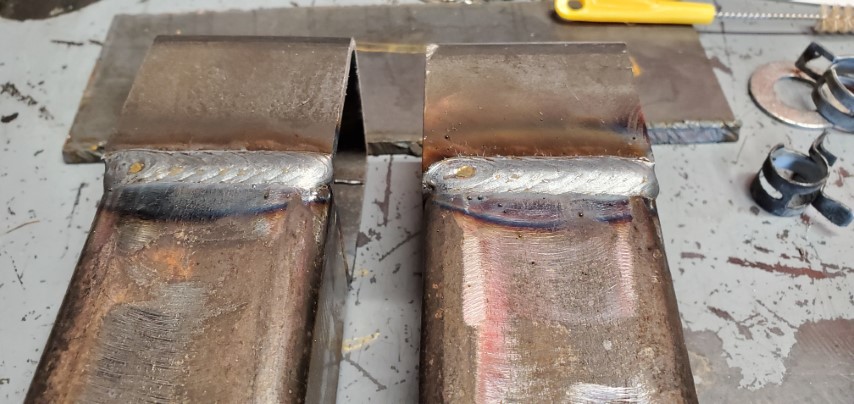
Definitely was having a "good weld day."
Re: Digger's '69 Build Thread
Posted: Thu Dec 10, 2020 9:56 pm
by Digger
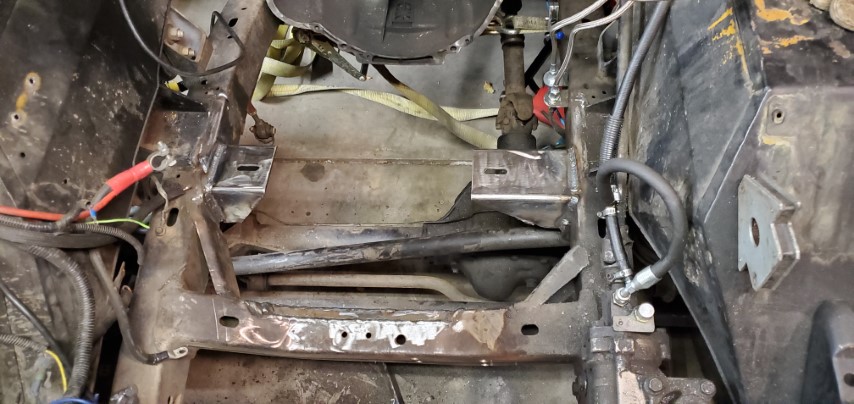
After photos and marking up the frame, I trimmed the crossmember where the oil pan overhangs it...
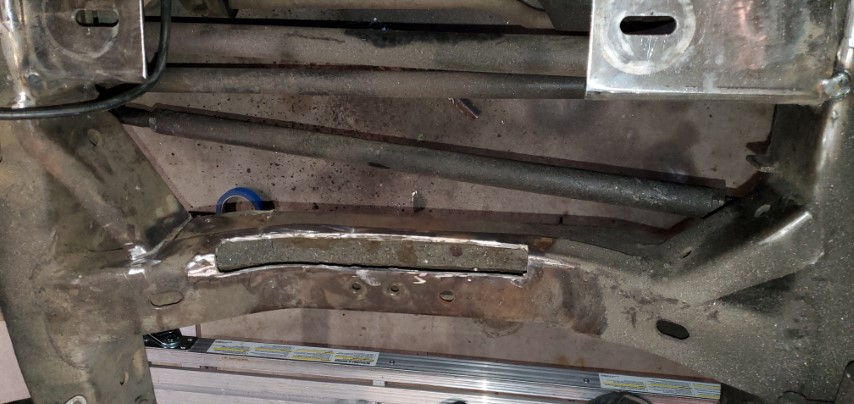
...and bent a filler plate:
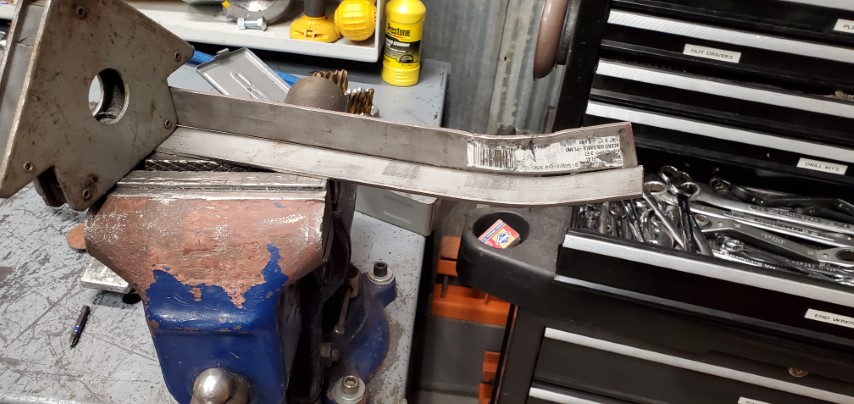
I could have spend more time on this making it look nice, but no one will see it with the engine installed.

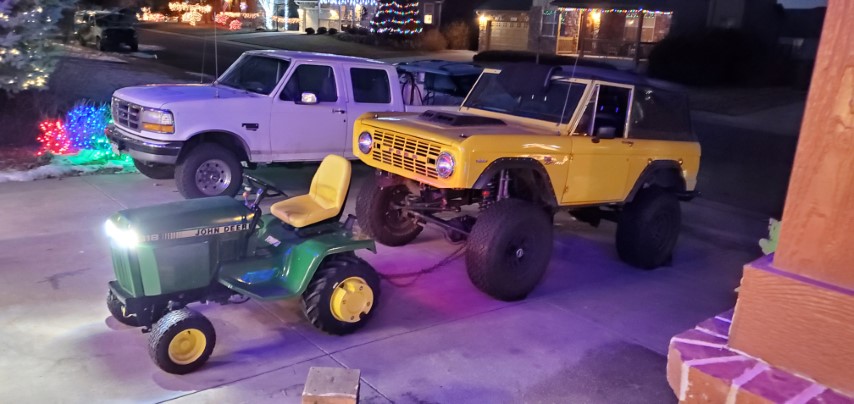
After welding, the truck was ready for a power wash
The neighbors probably wonder what I'm up to at times. Since the Bronco has no engine, I had to redneck improvise a way to get it back in the garage. The nerd in me had to calculate whether the tractor had enough weights to pull a dead Bronco up the slope of the drive.
Things are looking nicer now. I'm getting excited for finishing the project.
Before:
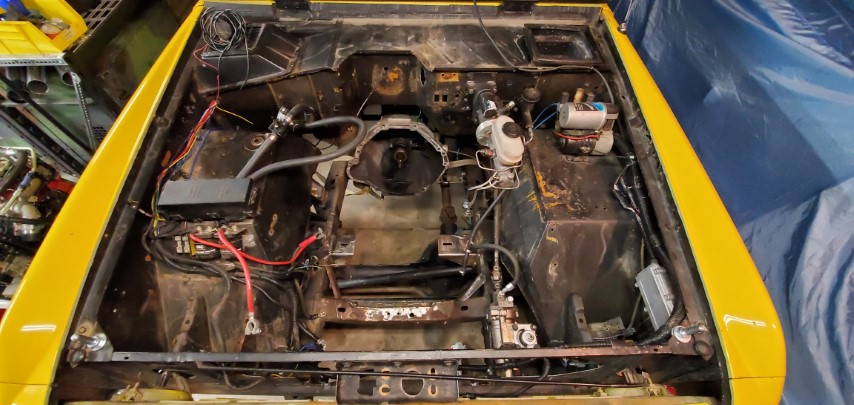
After:
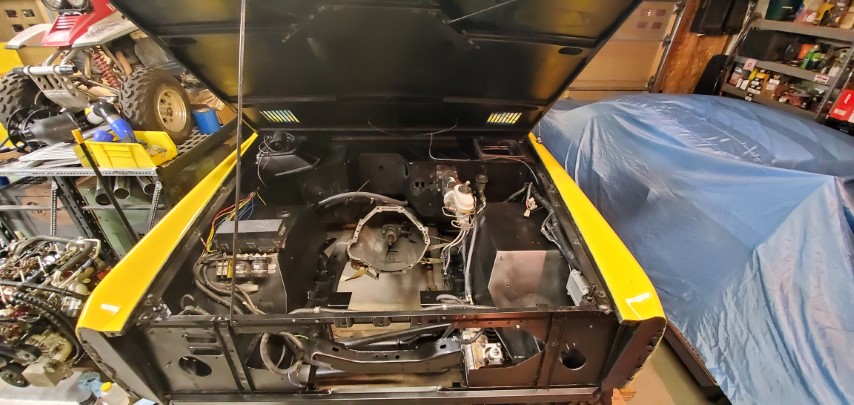
While the engine is out, I plan to install a new Ididit steering column, add a pyro port to the exhaust manifold, install sensors and delete the vacuum pump off the engine.